

What the Administrator role is for#
An Administrator helps the Super Admin run the school’s Juwazi workspace. Their main job is quality control: checking exams that teachers submit, then approving them so they can be given to students, or rejecting them so they can be fixed.
A Super Admin invites Administrators from Staff → Invite staff (see Super Admin Guide 10). The Administrator gets an email with a temporary password and signs in at app.juwazi.com/login with their email and that password.
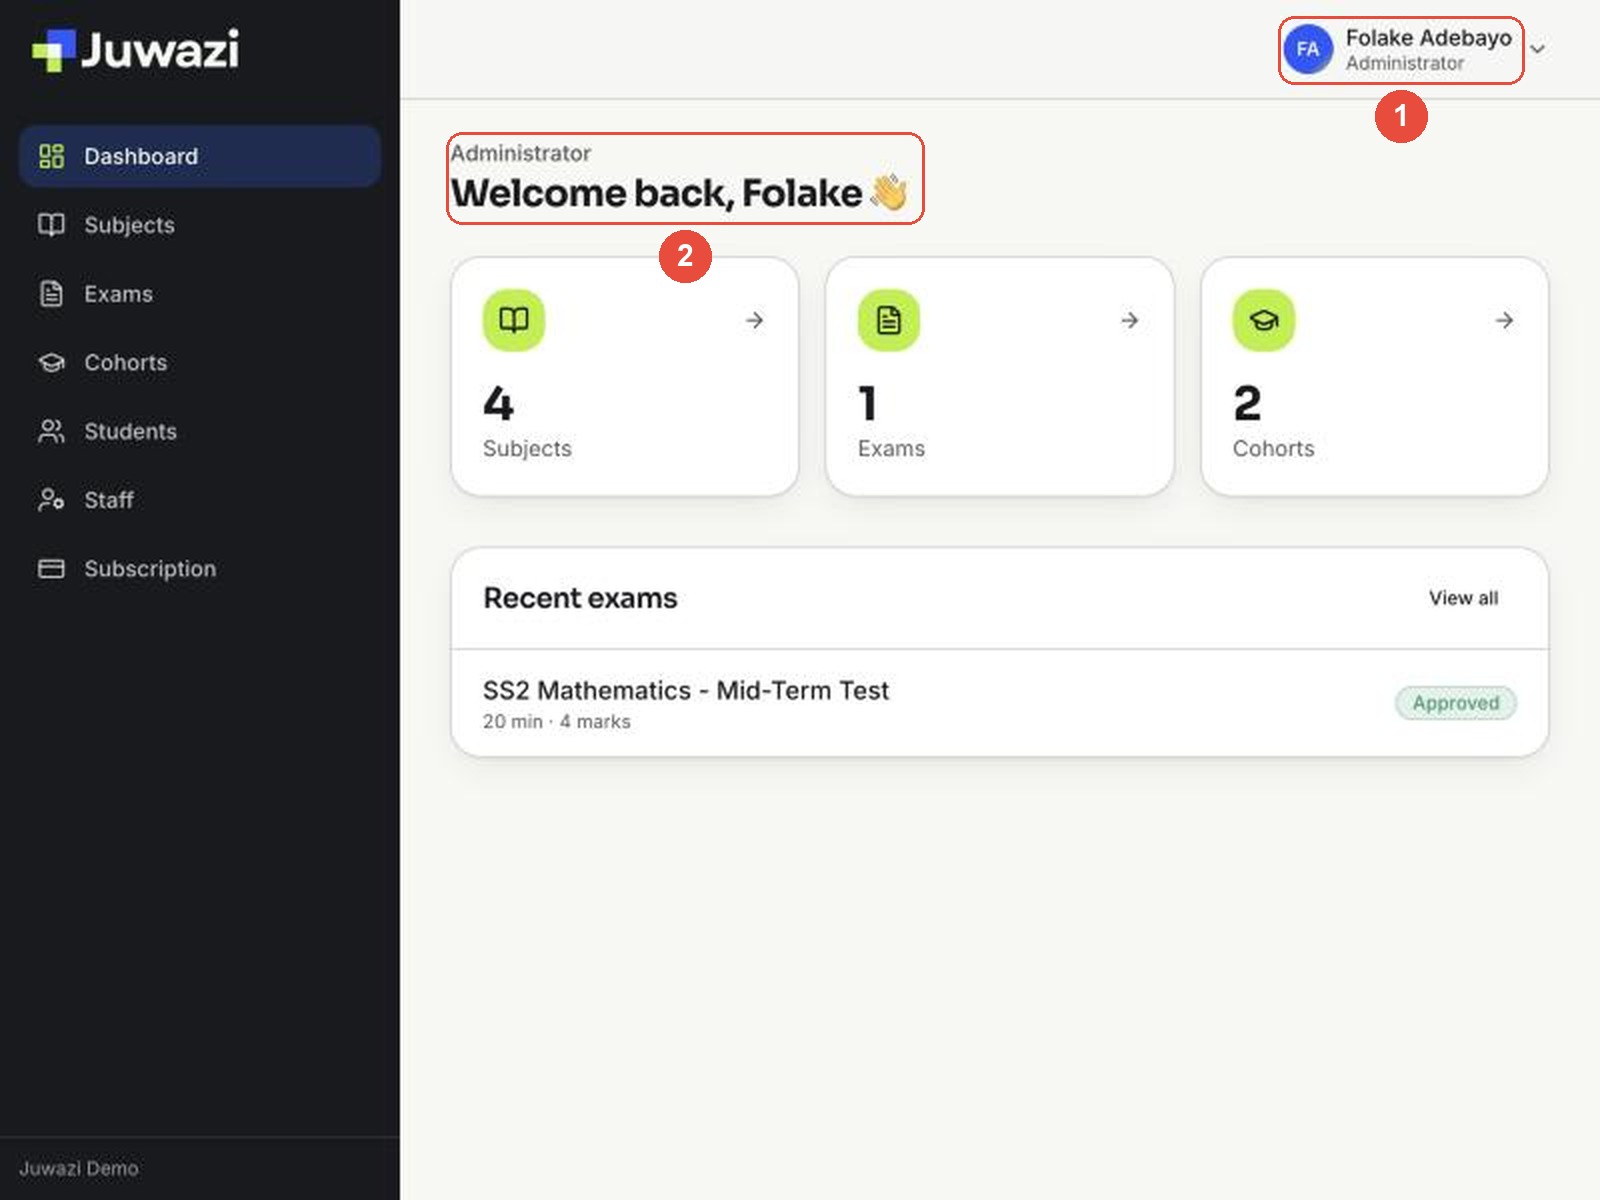
After signing in, the Administrator sees the same dashboard as the Super Admin. Their name and the label Administrator (1) appear at the top right, and the greeting shows Administrator above “Welcome back” (2).
How the Administrator differs from the Super Admin#
On screen, very little. When we signed in as an Administrator, every page had the same buttons as the Super Admin:
| Area | Super Admin | Administrator |
|---|---|---|
| Sidebar | Dashboard, Subjects, Exams, Cohorts, Students, Staff, Subscription | Same |
| Subjects and item bank | Create, edit, archive, bulk upload | Same |
| Exams | Create, edit, delete, submit, approve, reject, Override status | Same |
| Cohorts and students | Create cohorts, enrol, bulk upload, export | Same |
| Staff | Invite any role, manage assignments, remove | Same, including all four roles |
| Who owns the workspace | The person who created the organisation | An invited team member |
So everything in Super Admin Guides 2–10 applies to Administrators too. The rest of this guide covers the part that’s special to the role: reviewing and approving exams.
Agree the rules with your Super Admin. Juwazi lets Administrators do almost anything, including removing other staff. Decide as a school what Administrators should and shouldn’t do, for example “Administrators approve exams, but only the Super Admin removes staff”.
How exams reach you#
Exams follow a simple path:
Draft (being built) → Pending (submitted, waiting for review) → Approved (ready to assign to a cohort)
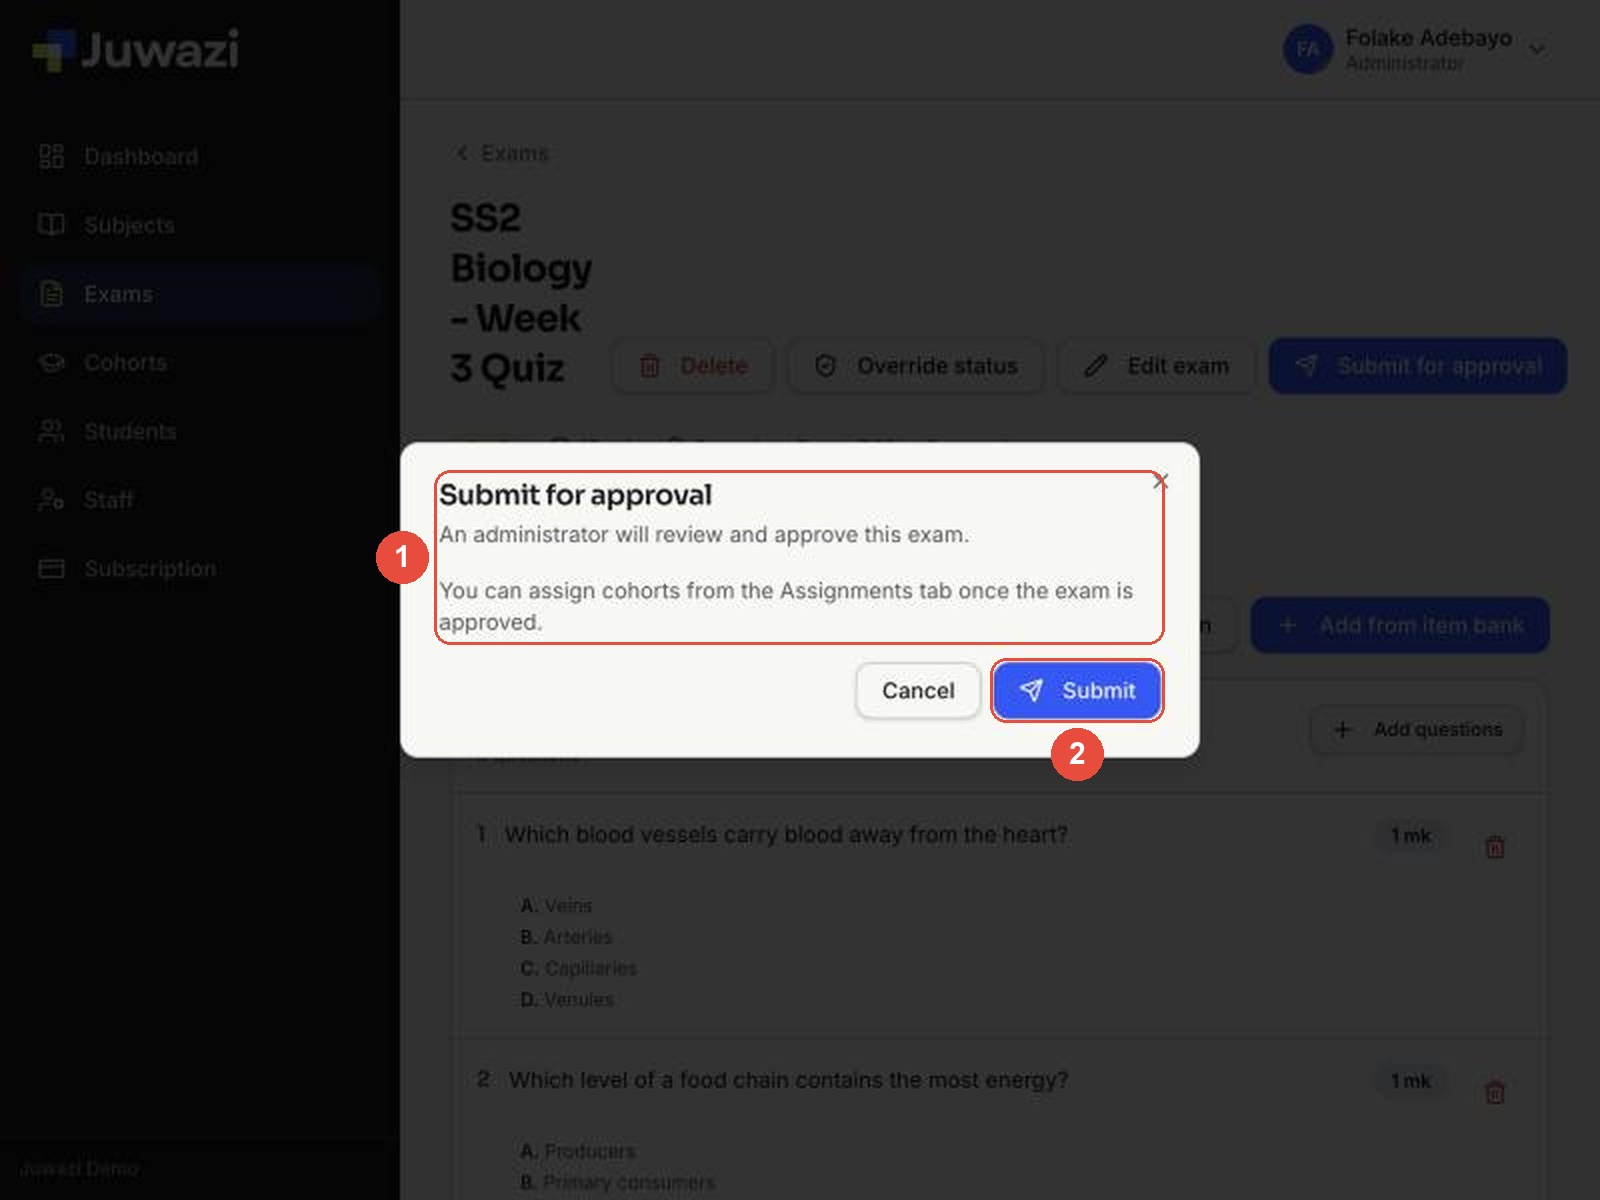
When the person building an exam has finished adding questions, they click Submit for approval. A confirmation window explains what happens next (1): “An administrator will review and approve this exam”, and the exam can be assigned to cohorts once it’s approved. They click Submit (2).
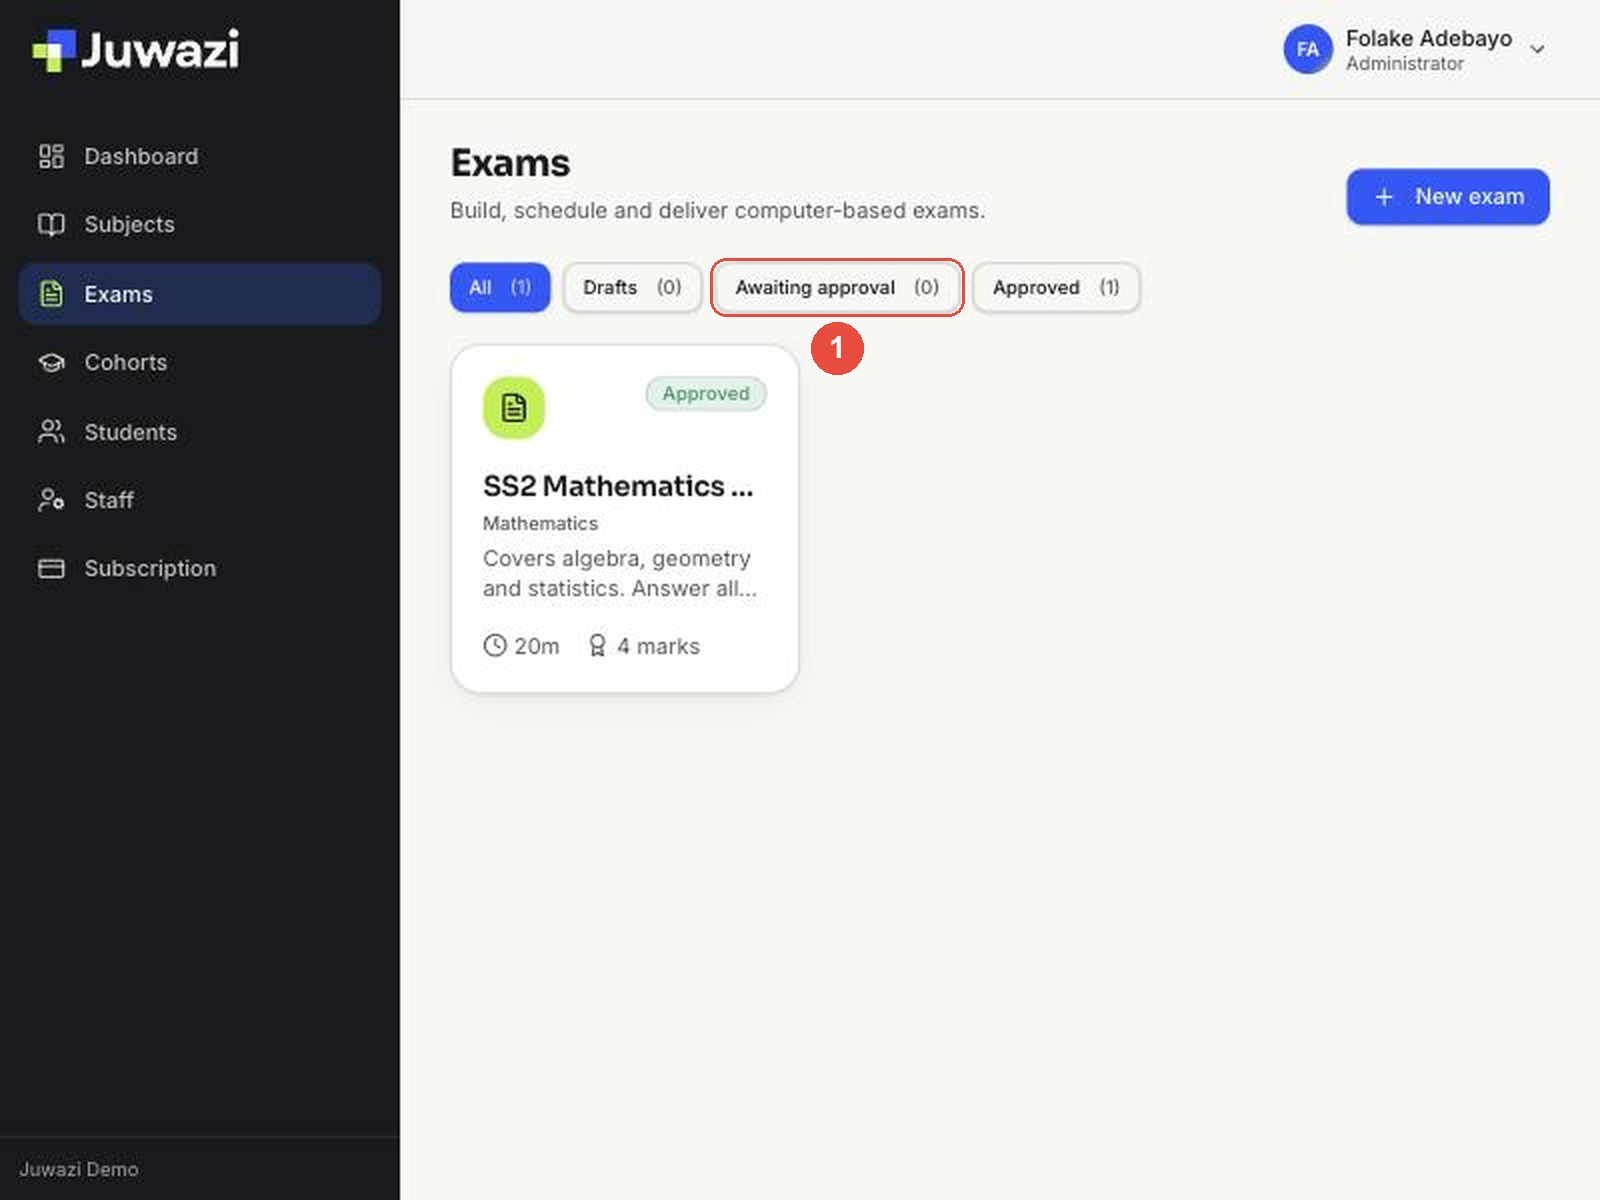
To find exams waiting for you, go to Exams and click the Awaiting approval filter (1). The number in brackets shows how many are waiting.
Juwazi doesn’t send a notification when an exam is submitted, as far as we’ve seen. Check Awaiting approval regularly, or ask teachers to tell you when they submit.
Review and approve an exam#
Our example is SS2 Biology – Week 3 Quiz: 15 minutes, 3 questions, pass mark 50%.
1. Open the exam#
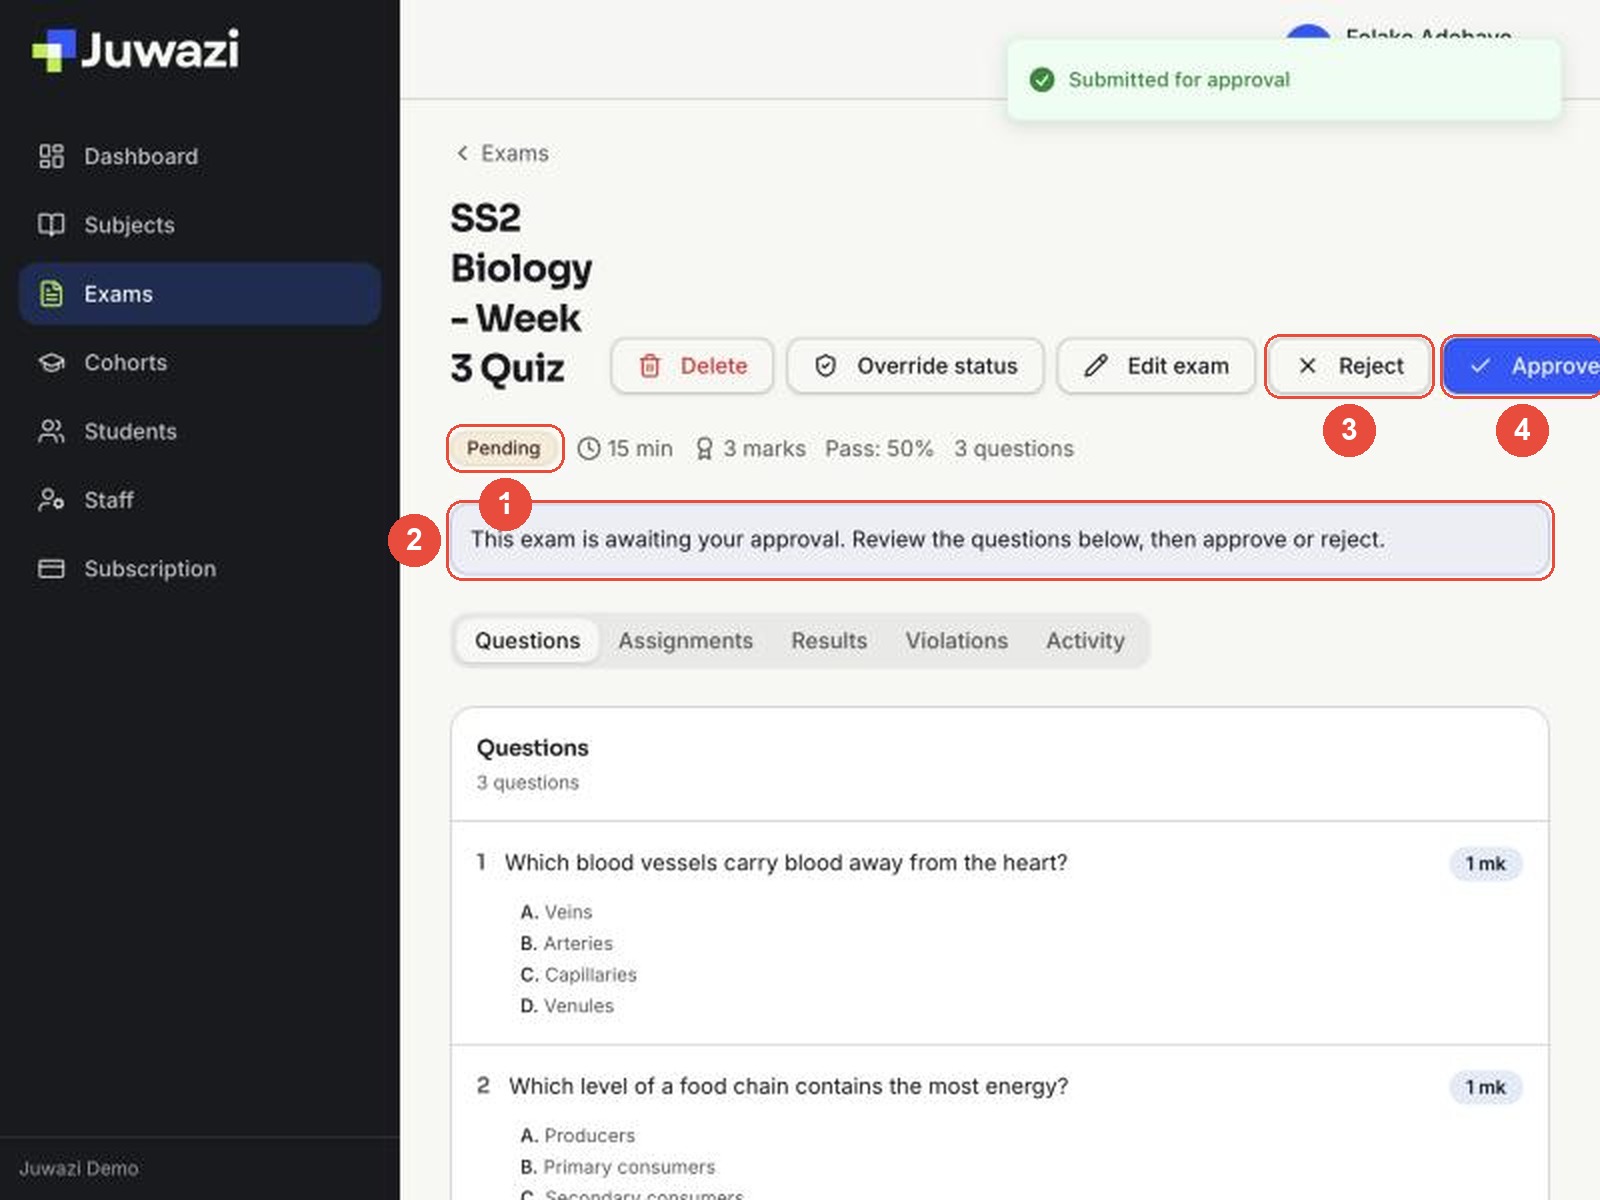
Click the exam card. A pending exam shows:
- The Pending status.
- A banner: “This exam is awaiting your approval. Review the questions below, then approve or reject.”
- Reject.
- Approve. On smaller screens it can sit partly off the right edge, so scroll right or widen the window if you can’t see it.
2. Check the exam before approving#
Read through the Questions tab. For each question (1), check:
- The question is clear and has no typos.
- The options make sense and only one is correct.
- The marks (2) are right for the difficulty.
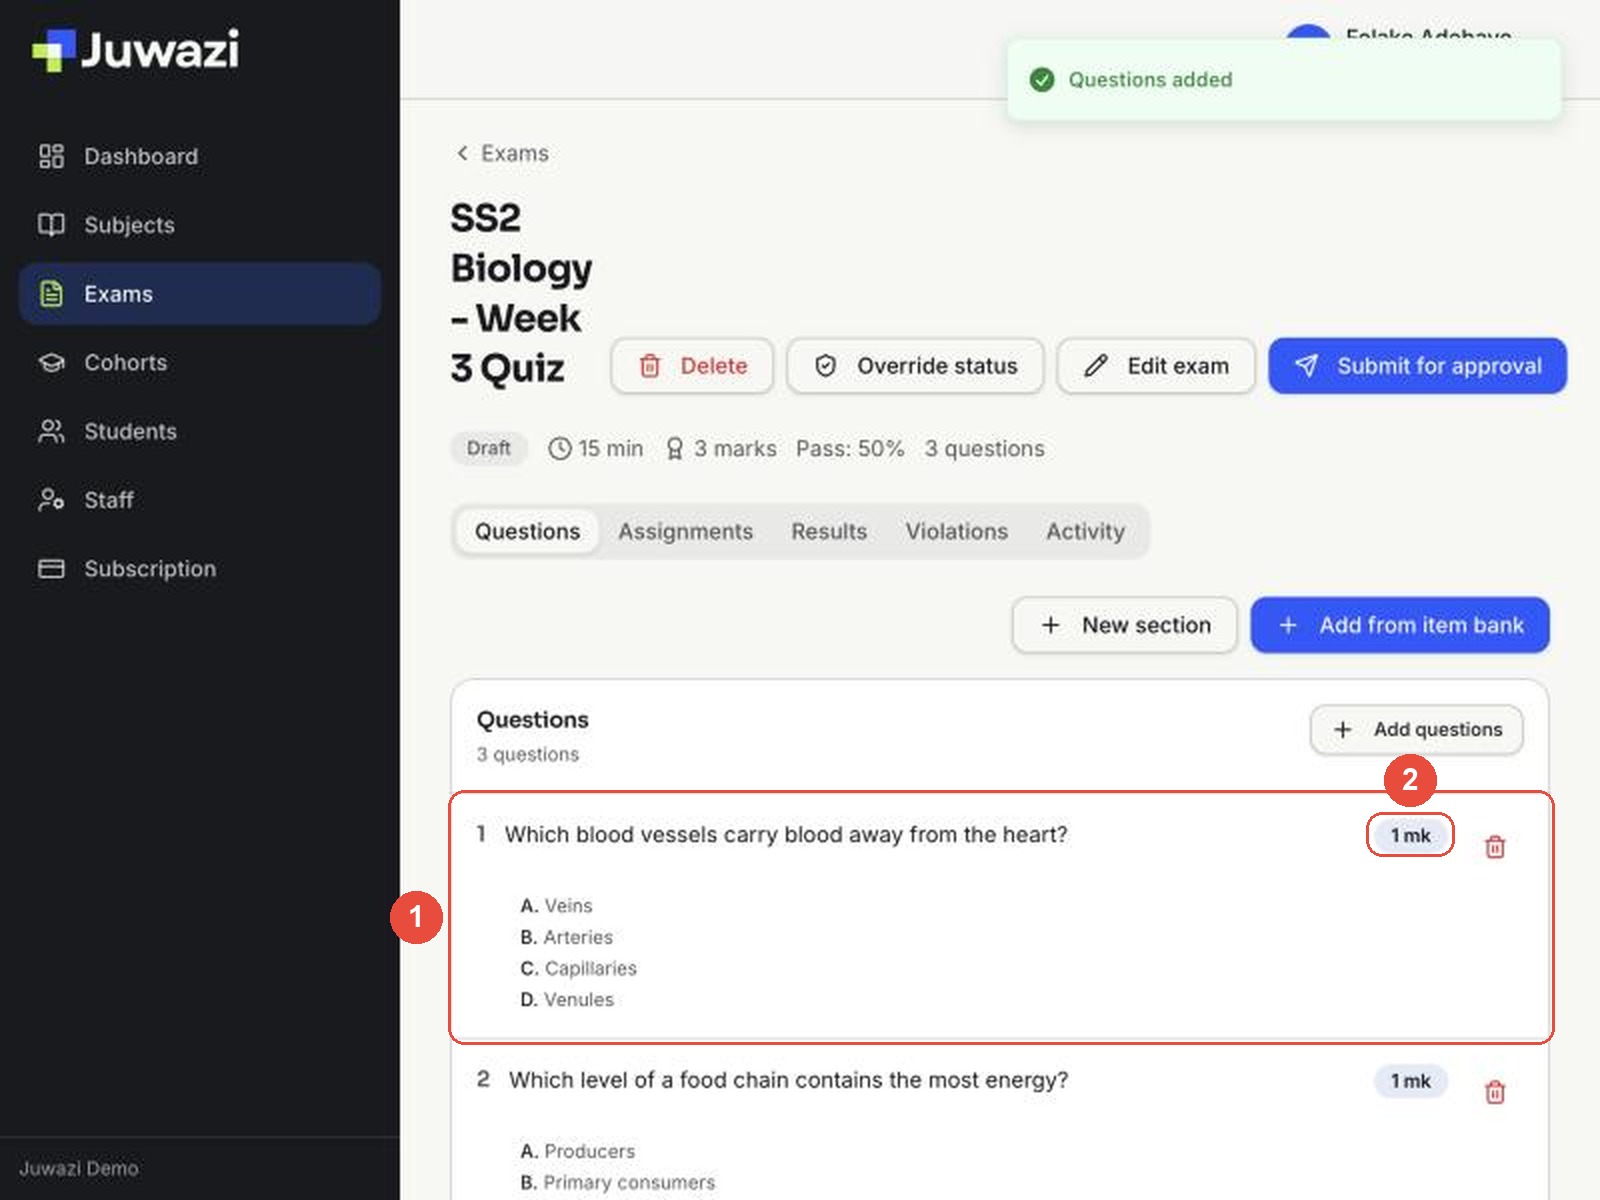
Also check the summary line under the title: duration, total marks, pass mark and number of questions. If anything in the settings is wrong, click Edit exam to see shuffle, results and review options and the opening and closing times.
A quick checklist:
| Check | Where |
|---|---|
| Right subject and class level | Exam title and subject |
| Enough time for the number of questions | Duration in the summary line |
| Total marks and pass mark as agreed | Summary line |
| Questions correct, no duplicates | Questions tab |
| Opening and closing times, shuffle and review settings | Edit exam |
3. Approve, or reject#
- If everything is right, click Approve. The status changes to Approved (2) and an Exam approved message appears (1).
- If something needs fixing, click Reject and tell the author what to change. We haven’t tested the Reject screen yet; it’s covered in a later update.
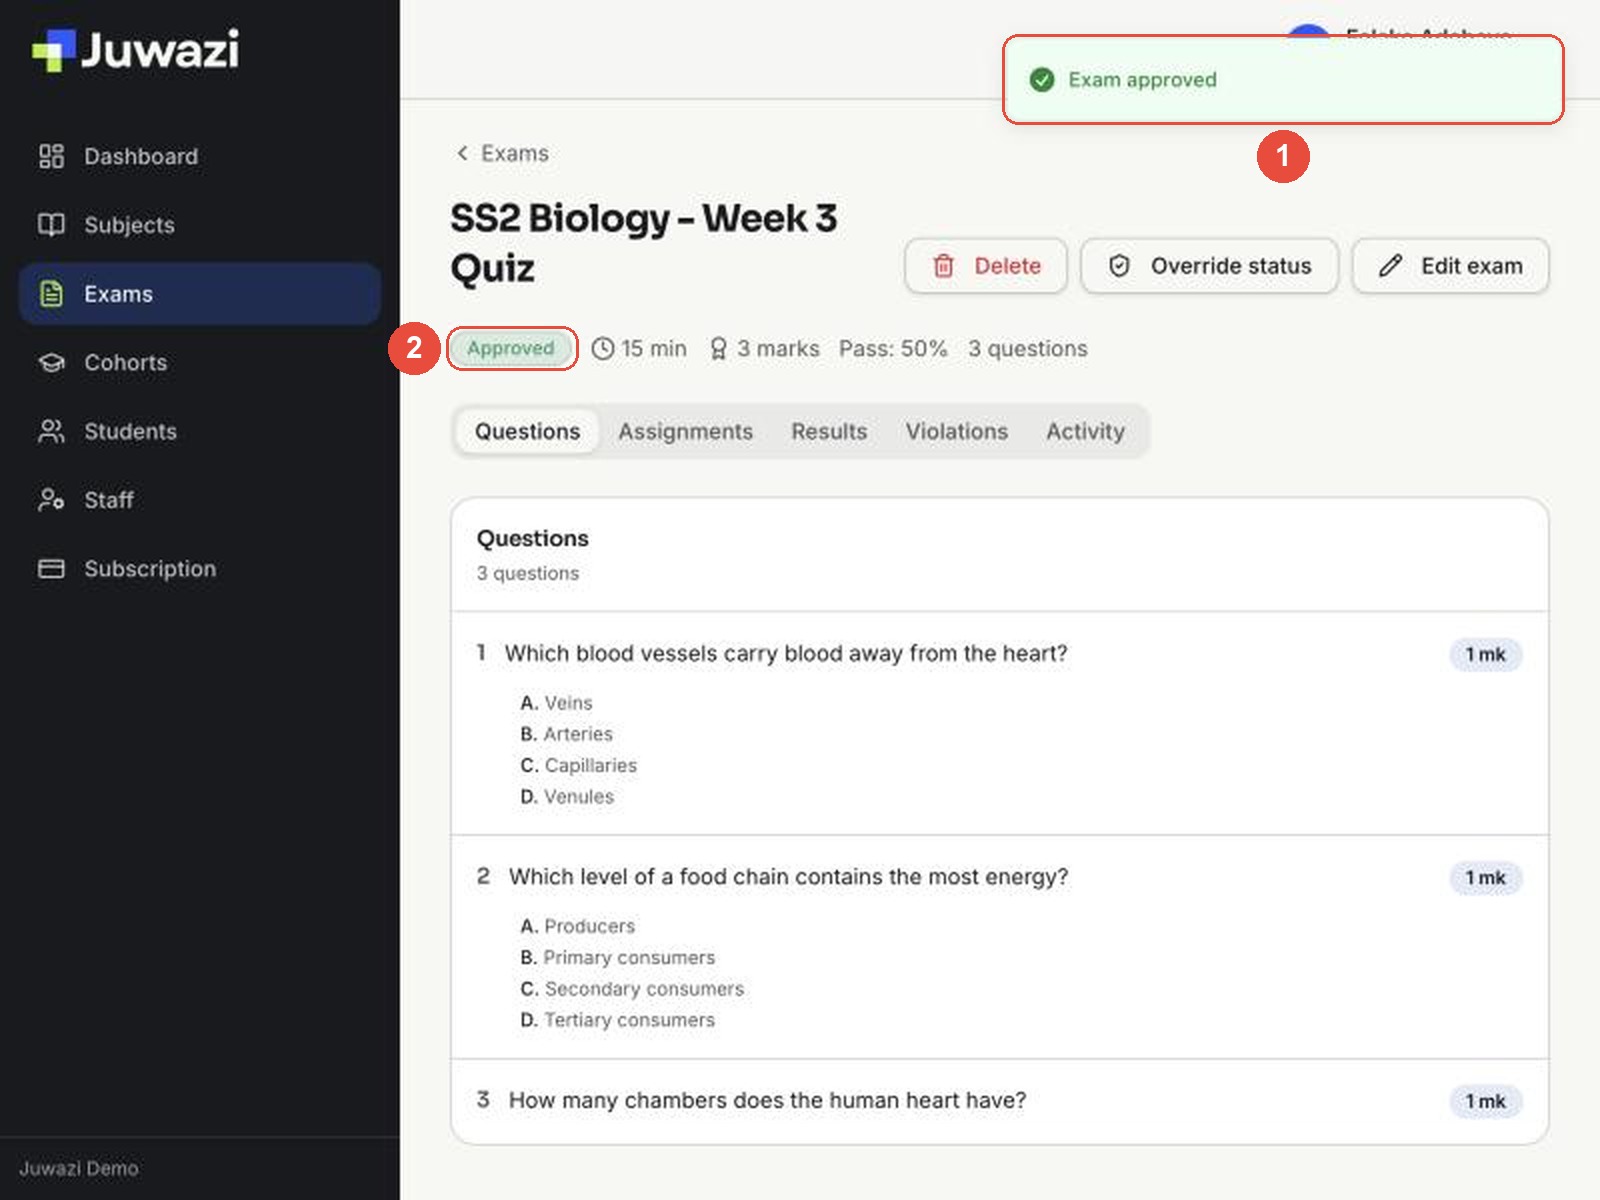
Approve has no “Are you sure?” step. It takes effect as soon as you click, so finish reviewing first.
After approval#
Check the activity log#
Open the Activity tab to see the exam’s history (1): created, submitted for approval and approved, each with a date and time.
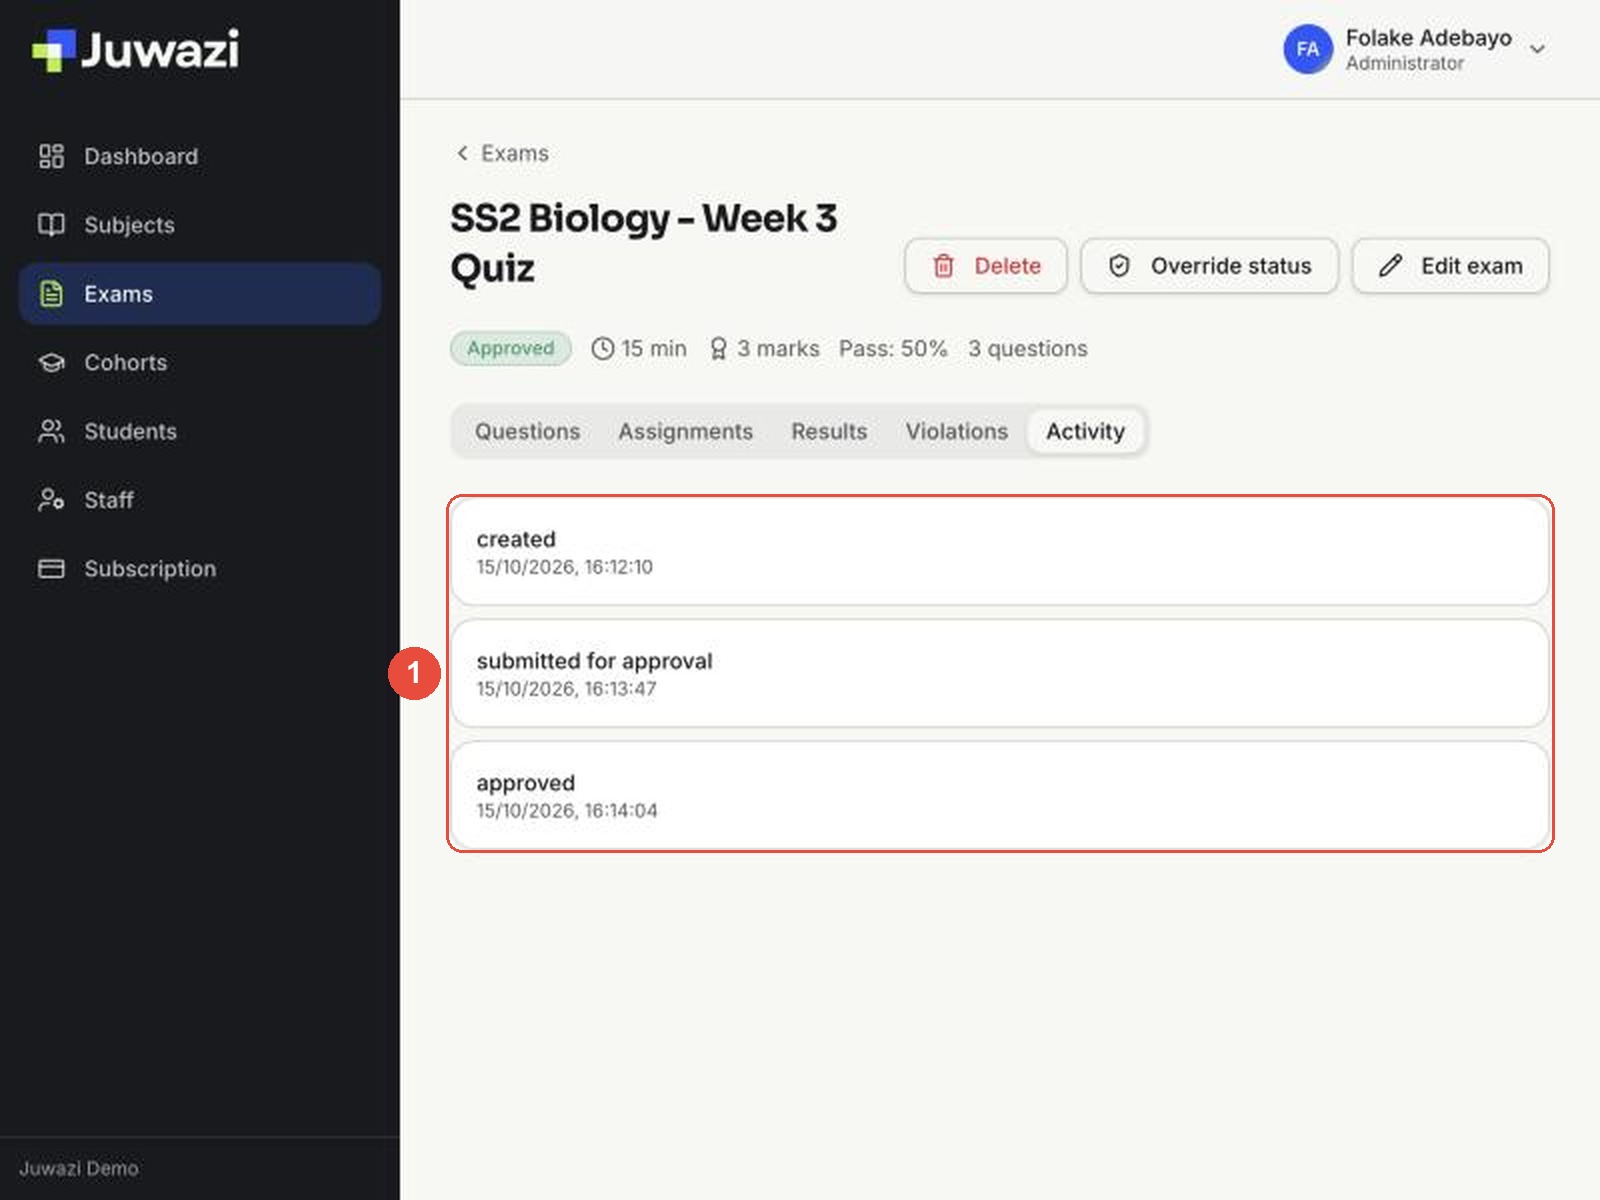
The log shows what happened and when, but not who did it. If your school needs a record of who approved each exam, keep a simple list alongside Juwazi.
Assign the exam to a cohort#
An approved exam isn’t visible to students until it’s assigned. Open the Assignments tab and click Assign cohort. Every student in that cohort gets the exam. This works exactly as in the Super Admin guide on assigning exams.
Depending on how your school works, either the Administrator assigns the exam after approving it, or the teacher does it. Agree who is responsible, so exams don’t sit approved but unassigned.
Good practice and known limitations#
Good practice
- Don’t approve your own exams. Juwazi lets an Administrator create, submit and approve an exam alone; we did it in about two minutes with the Biology quiz. Ask another Administrator or the Super Admin to review anything you wrote.
- Review before you click. Approve takes effect immediately, with no confirmation.
- Check Awaiting approval daily during exam periods, since Juwazi may not notify you.
- Use Override status only to fix mistakes, for example to send an approved exam back to draft. Always fill in the reason.
- Leave staff removal to the Super Admin. The Remove button appears on every staff row, including the Super Admin’s own.
Known limitations (as of 15 October 2026)
| Limitation | What to do |
|---|---|
| An Administrator can approve their own exam | Agree a “two people” rule |
| Activity log doesn’t show who did each action | Keep your own approval record if needed |
| Approve can be cut off on narrow screens | Widen the window or scroll right |
| No confirmation on Approve | Finish reviewing first |
Next: the Teacher guide, which covers building and submitting an exam from the teacher’s side.