

What a cohort is#
A cohort is a group of students who sit the same exams, such as a class, a year group, a training batch or a set of job applicants. Cohorts matter for two reasons:
- Every student must belong to a cohort. You choose the cohort when you enrol a student (Guide 8).
- Exams are assigned to cohorts, not individual students. When you assign an exam to a cohort, every student in it gets the exam (Guide 15).
Plan your cohorts before enrolling students. Make one cohort for each group that will sit the same exams at the same time. For example:
| Organization | Example cohorts |
|---|---|
| Secondary school | SS2 Science – Class A, SS2 Science – Class B, SS3 Arts |
| University | 100L Computer Science 2026/2027, 200L Biochemistry |
| Training provider | Data Analytics Bootcamp – October 2026 |
| Recruiter | Graduate Trainee Assessment – Batch 3 |
Create a cohort#
In this example we create SS2 Science – Class B.
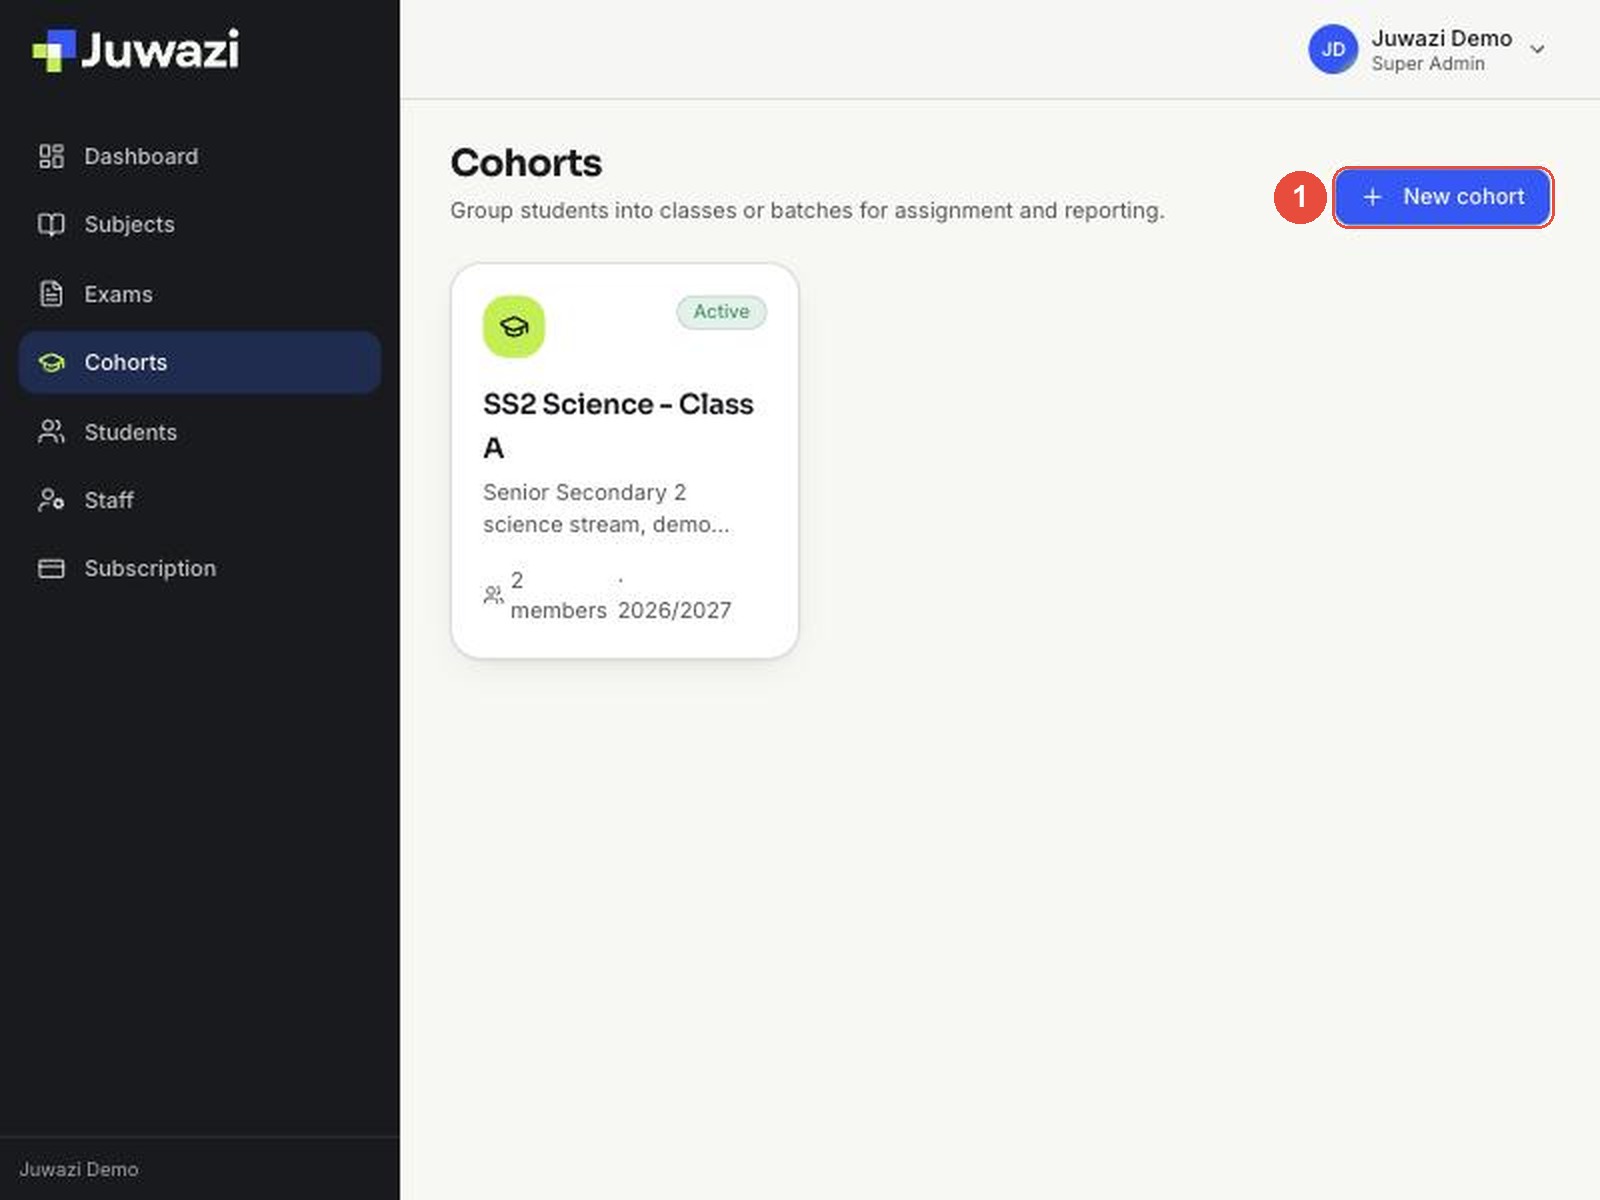
Step 1. Click Cohorts in the left-hand menu, then click New cohort.
Step 2. Fill in the Create cohort form.
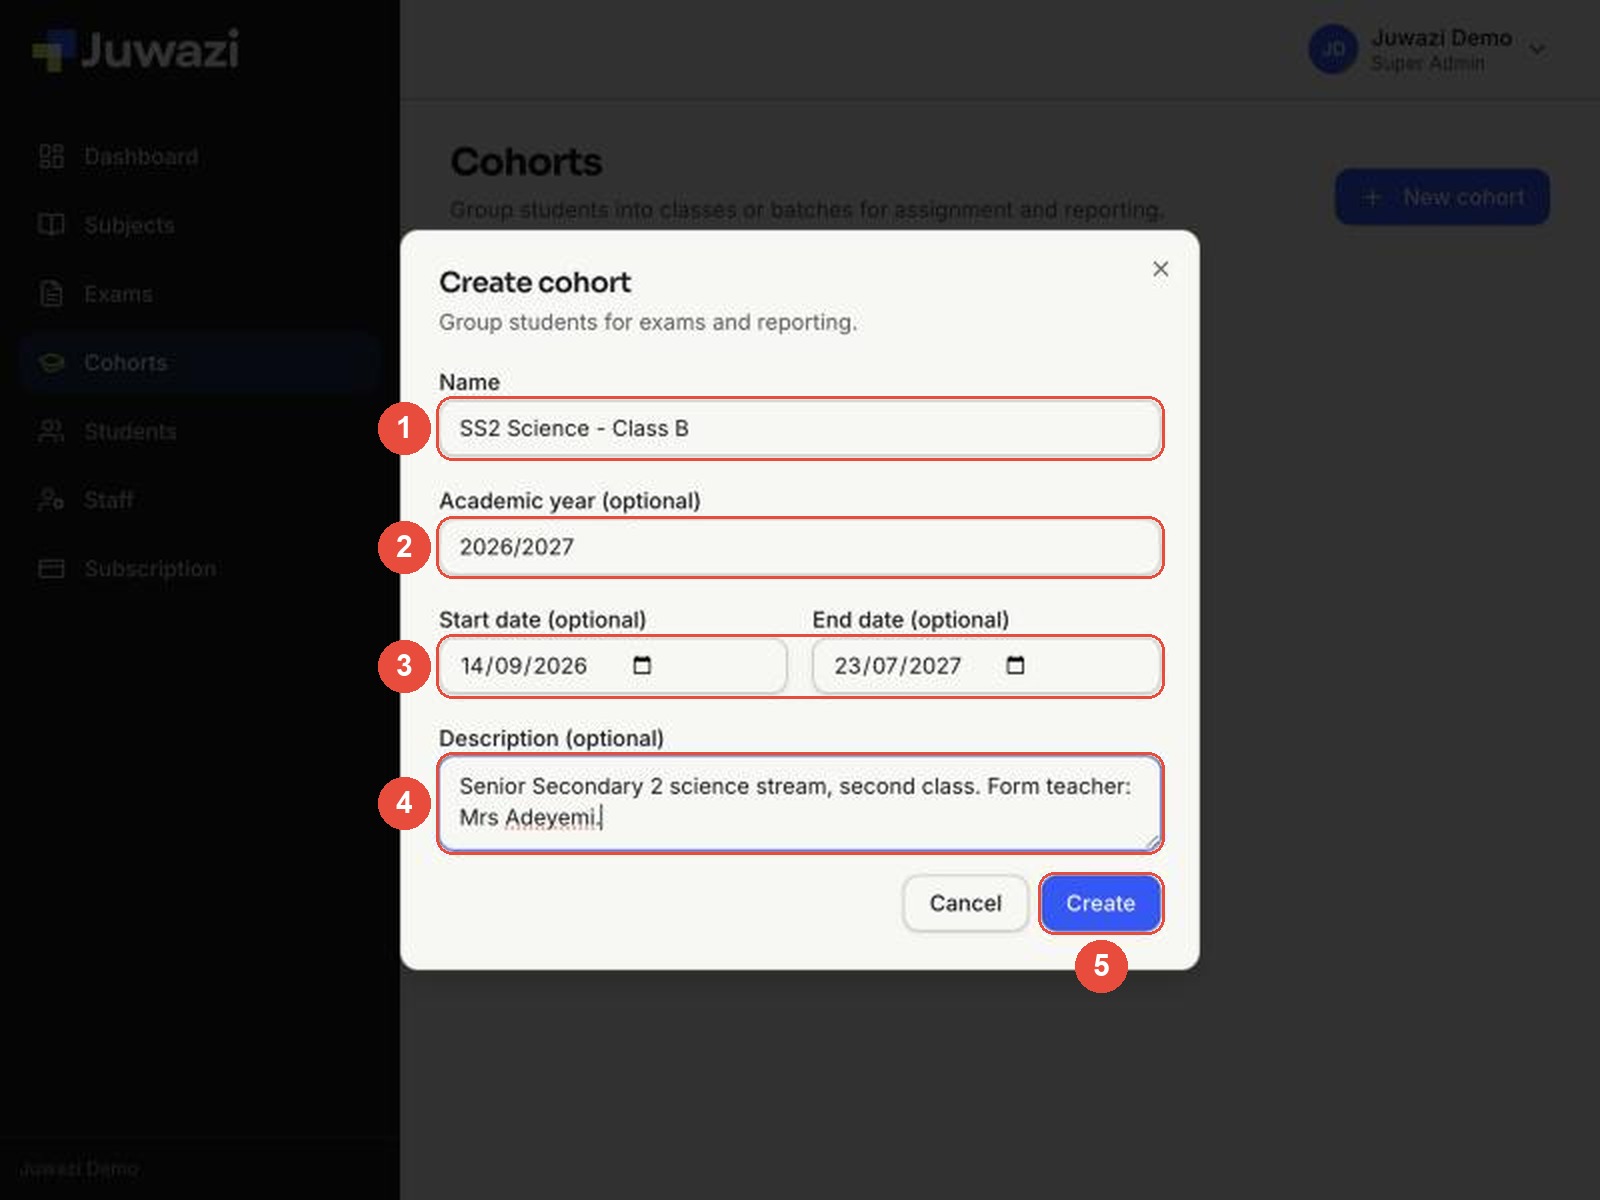
- Name (required): what staff will see, e.g. SS2 Science – Class B.
- Academic year (optional): e.g. 2026/2027. It’s shown on the cohort card, which helps once you have cohorts from several years.
- Start date and End date (optional): when the class or programme runs. These can only be set here, not edited later.
- Description (optional): anything useful, such as the stream or the form teacher’s name.
- Click Create.
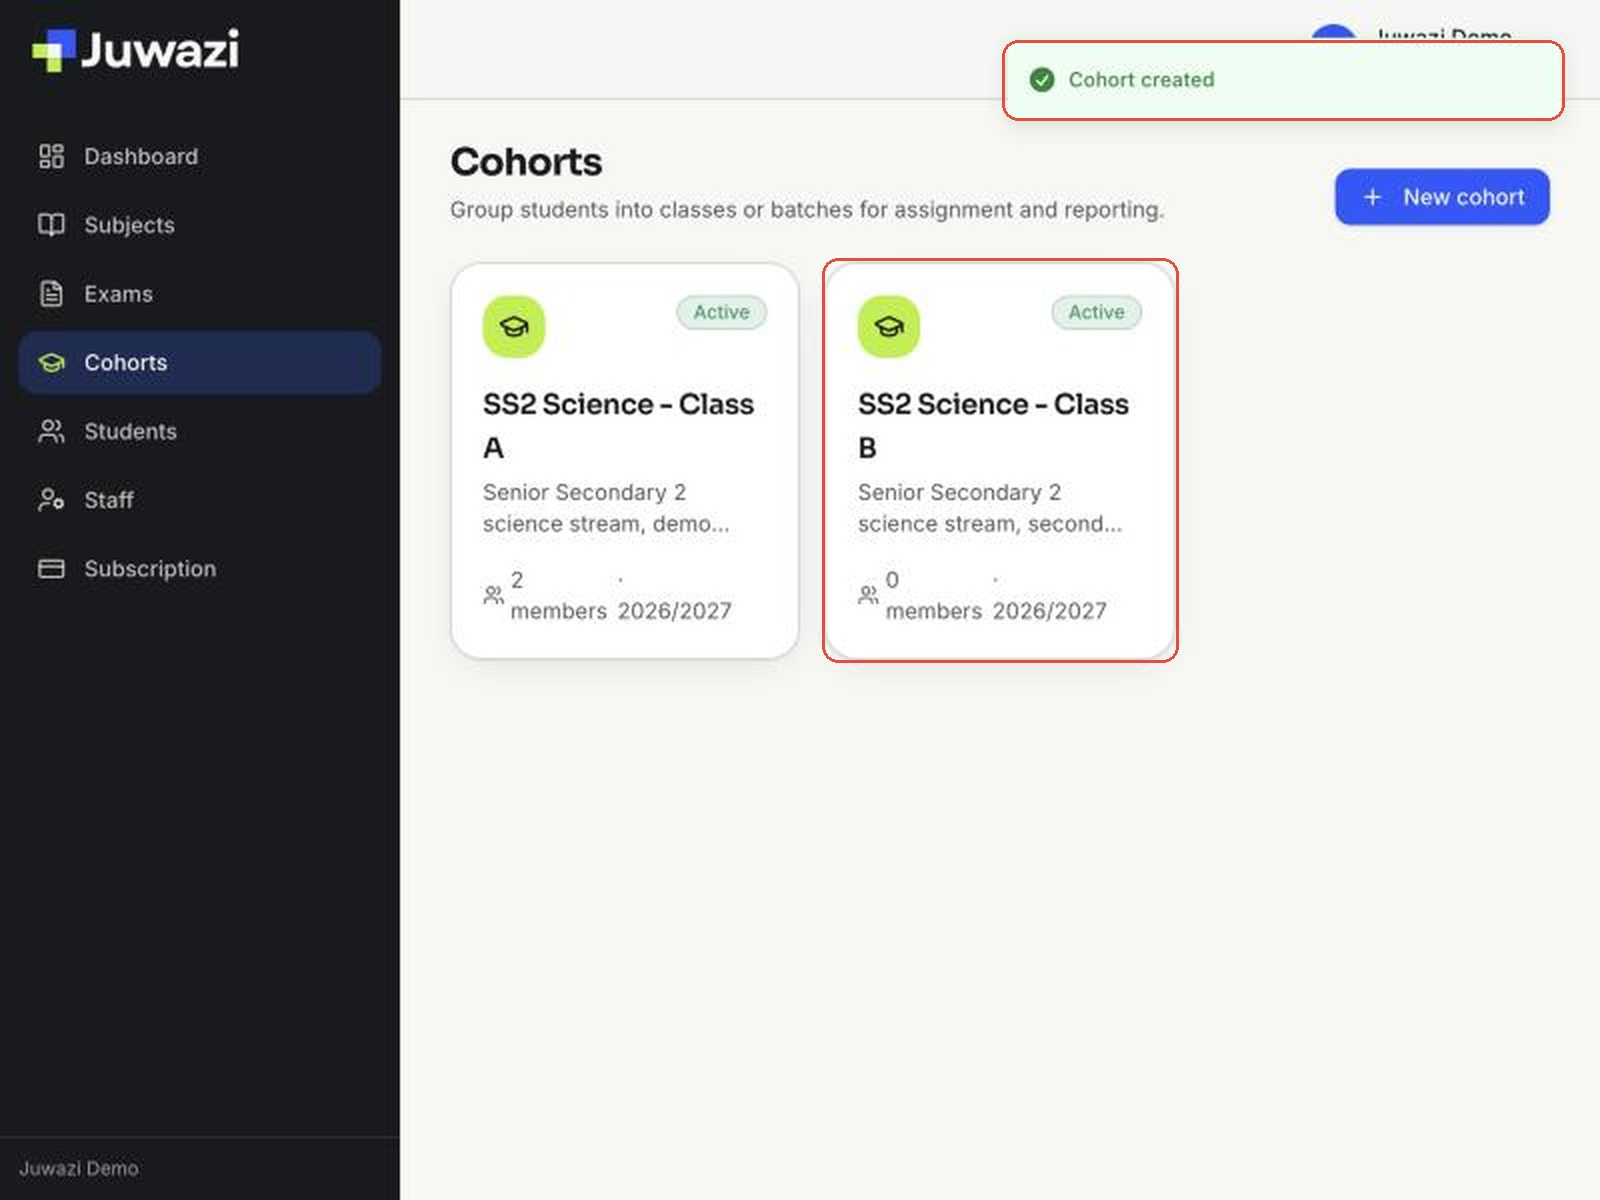
Step 3. Juwazi shows Cohort created and the new cohort appears as a card, marked Active, with 0 members.
The cohort page#
Click a cohort’s card to open it. The page has three tabs.
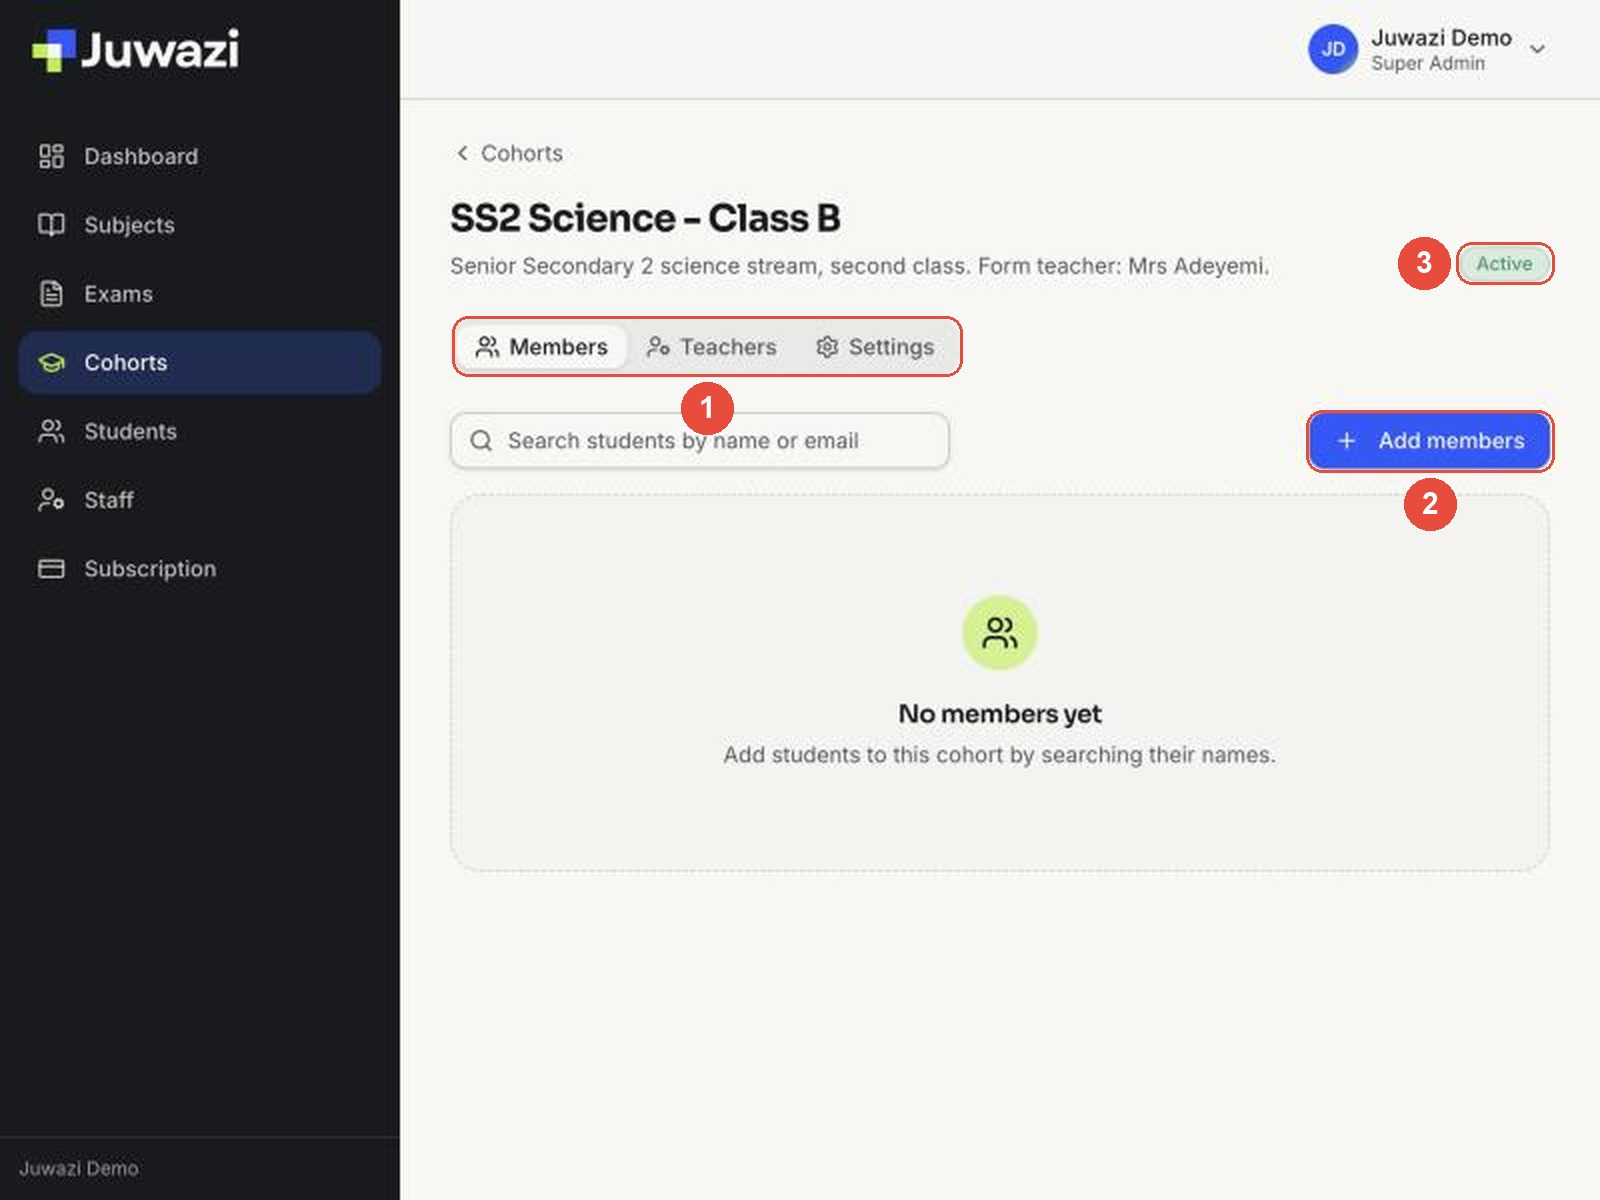
- Tabs: – Members: the students in the cohort. – Teachers: staff responsible for the cohort. – Settings: edit the details, or graduate or archive the cohort.
- Add members: add existing students to the cohort.
- Status: Active while the cohort is in use.
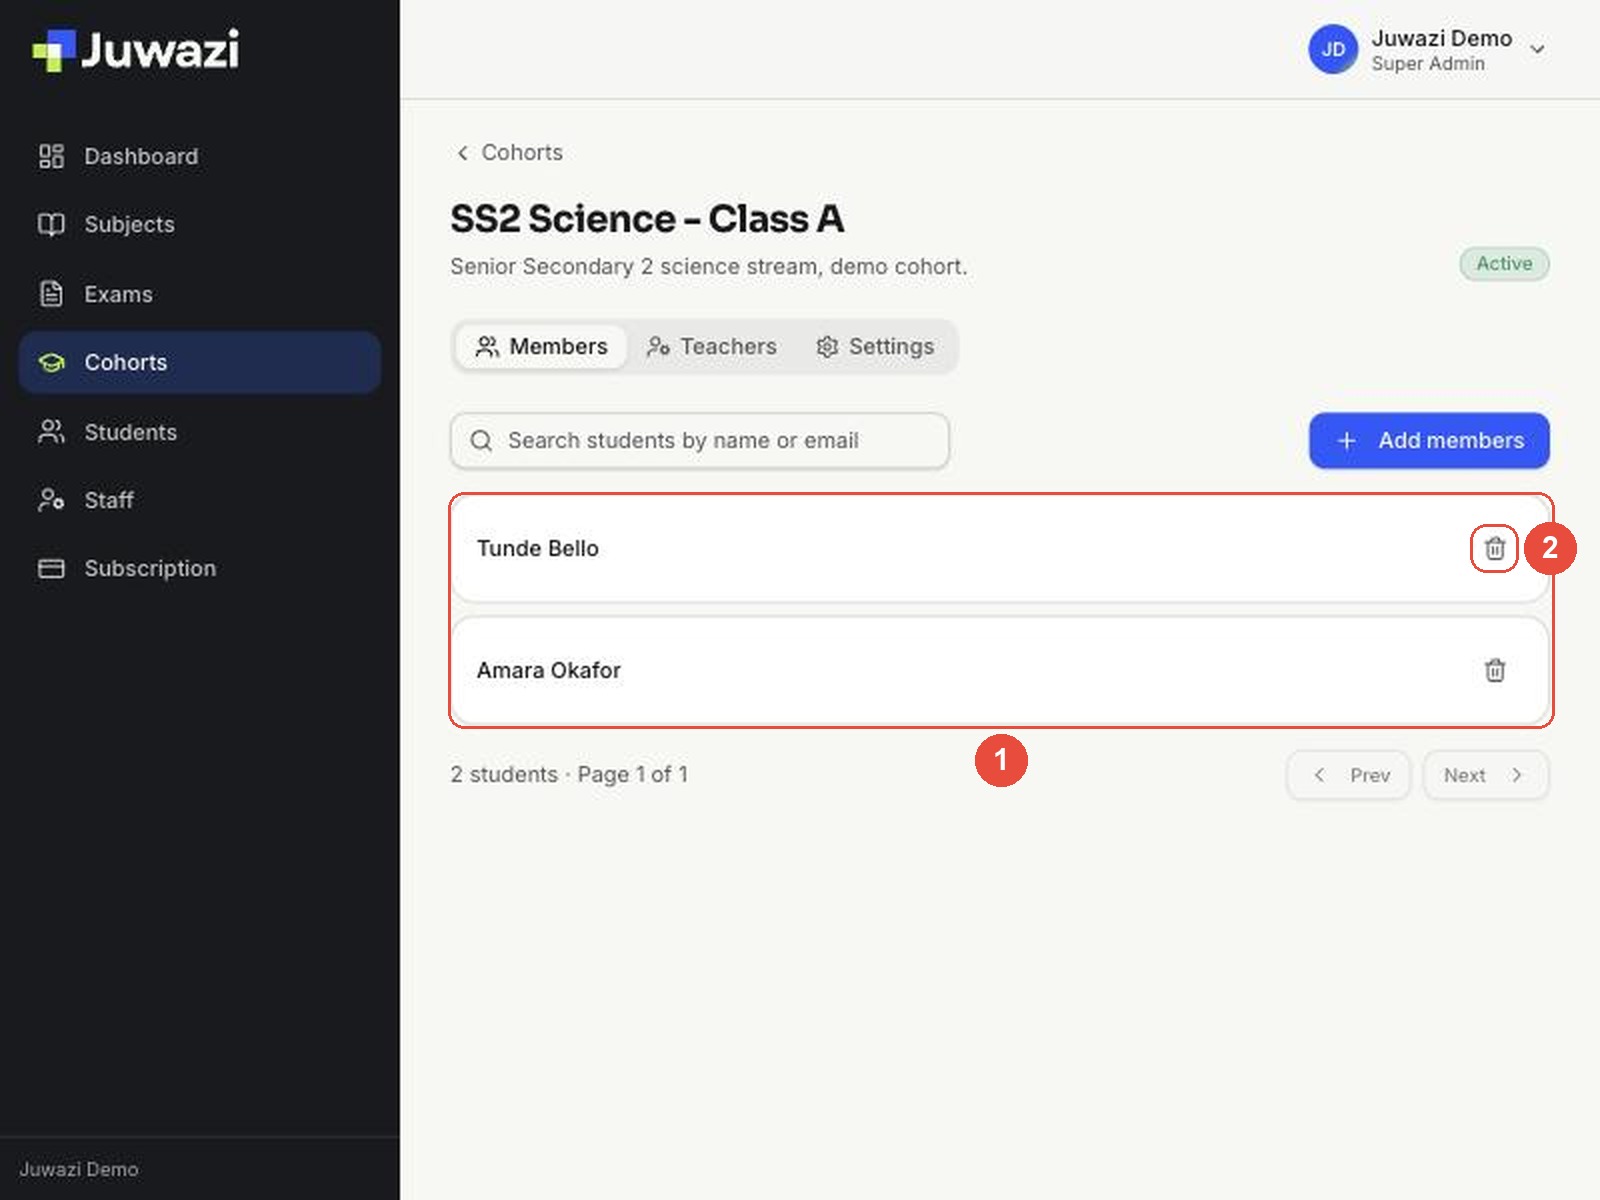
Once a cohort has students, the Members tab lists them with a search box and a remove (bin) button for each.
Add students to a cohort#
There are two ways to put students in a cohort:
- When you enrol them. Choosing the cohort is part of enrolment (Guide 8). This is the usual way.
- From the cohort page with Add members, for students who are already enrolled.
To add existing students:
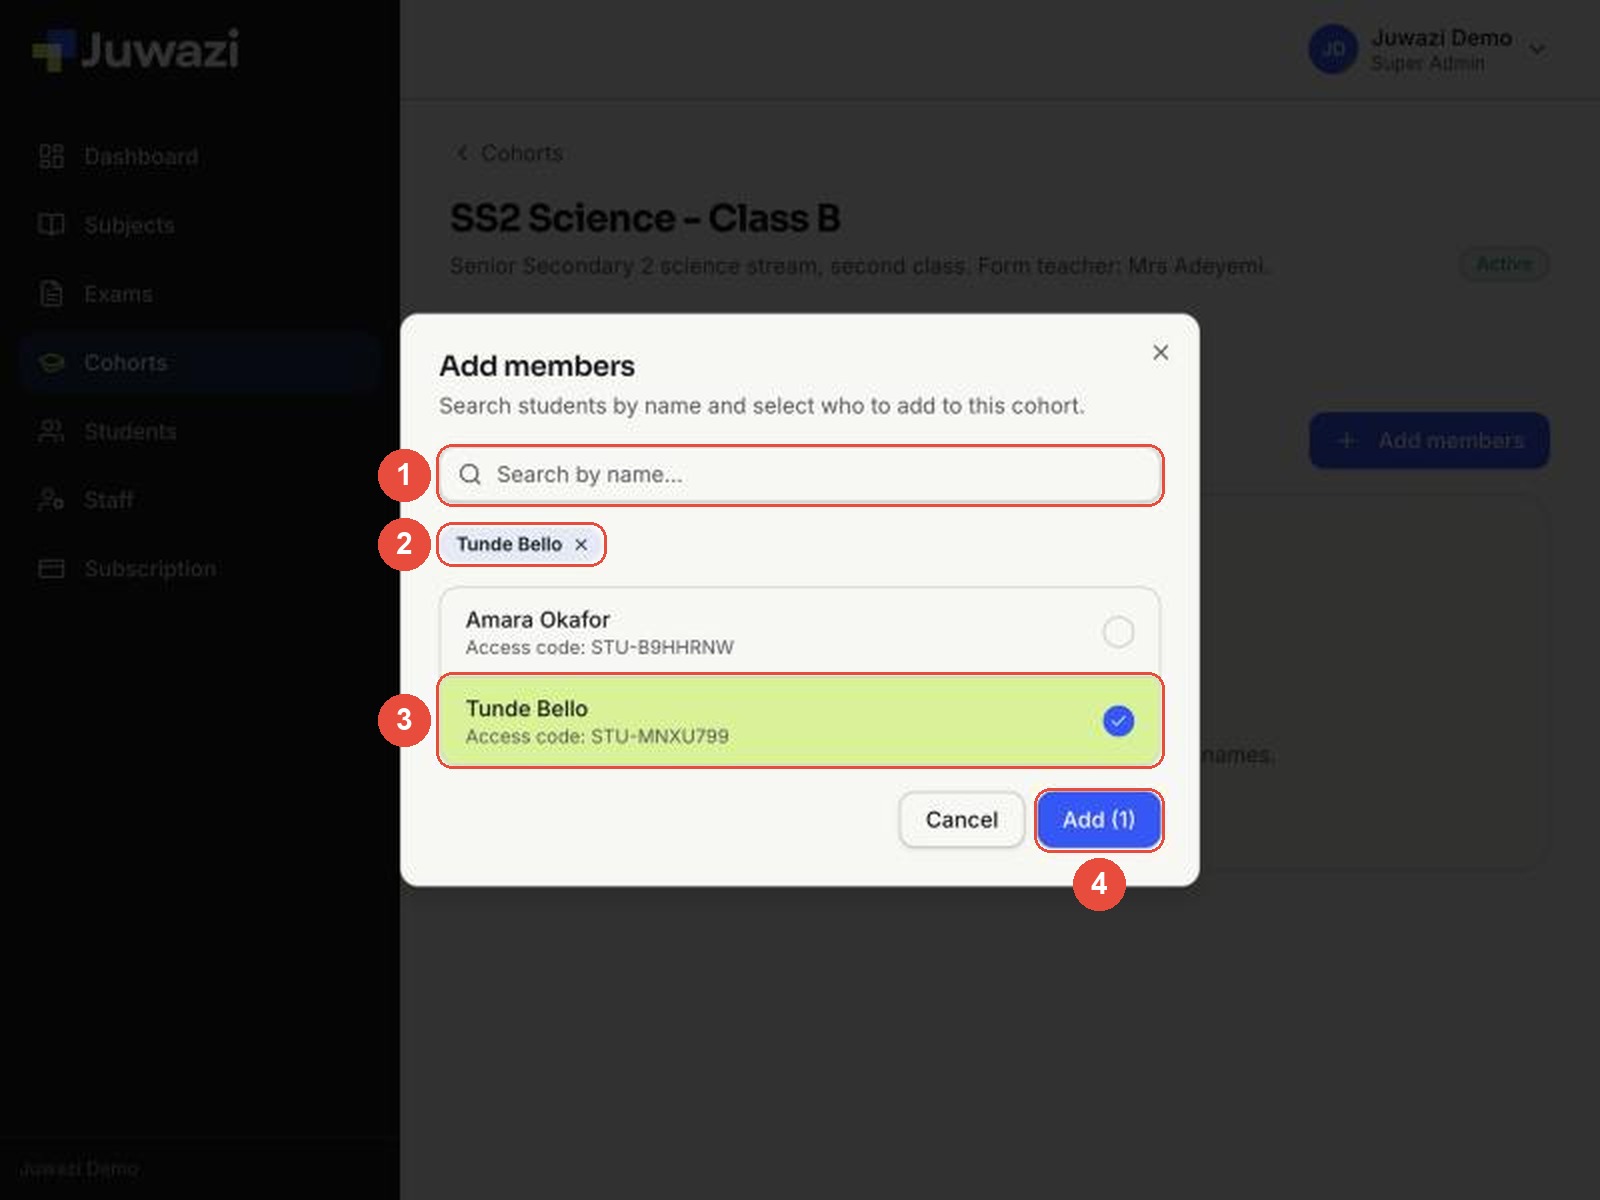
- Open the cohort and click Add members.
- Search by name, or scroll the list. Each student shows their access code, which helps tell apart students with similar names.
- Click each student you want to add. Selected students turn green and appear as chips above the list.
- Click Add (n), where n is the number selected.
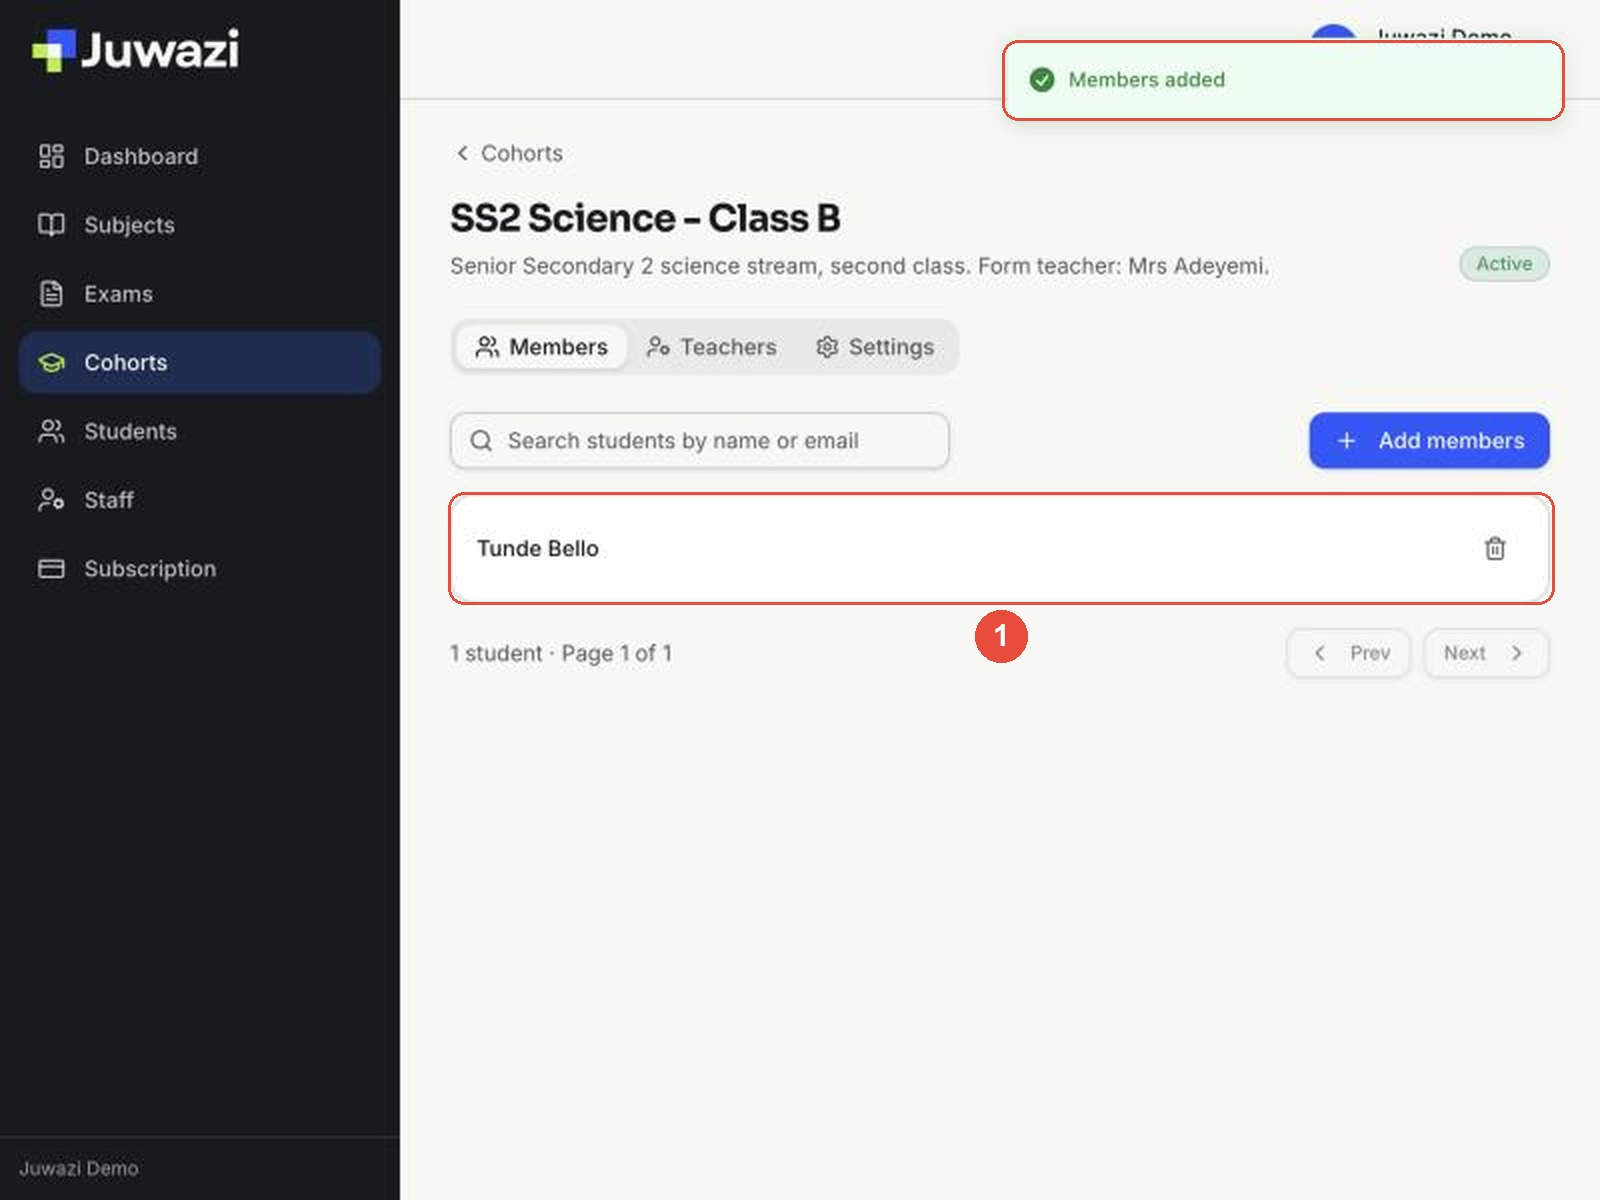
Juwazi shows Members added and the student appears on the Members tab.
Good to know: a student can belong to more than one cohort. Adding Tunde to Class B didn’t remove him from Class A. The Students page also has a Change cohort action for each student, covered in Guide 21.
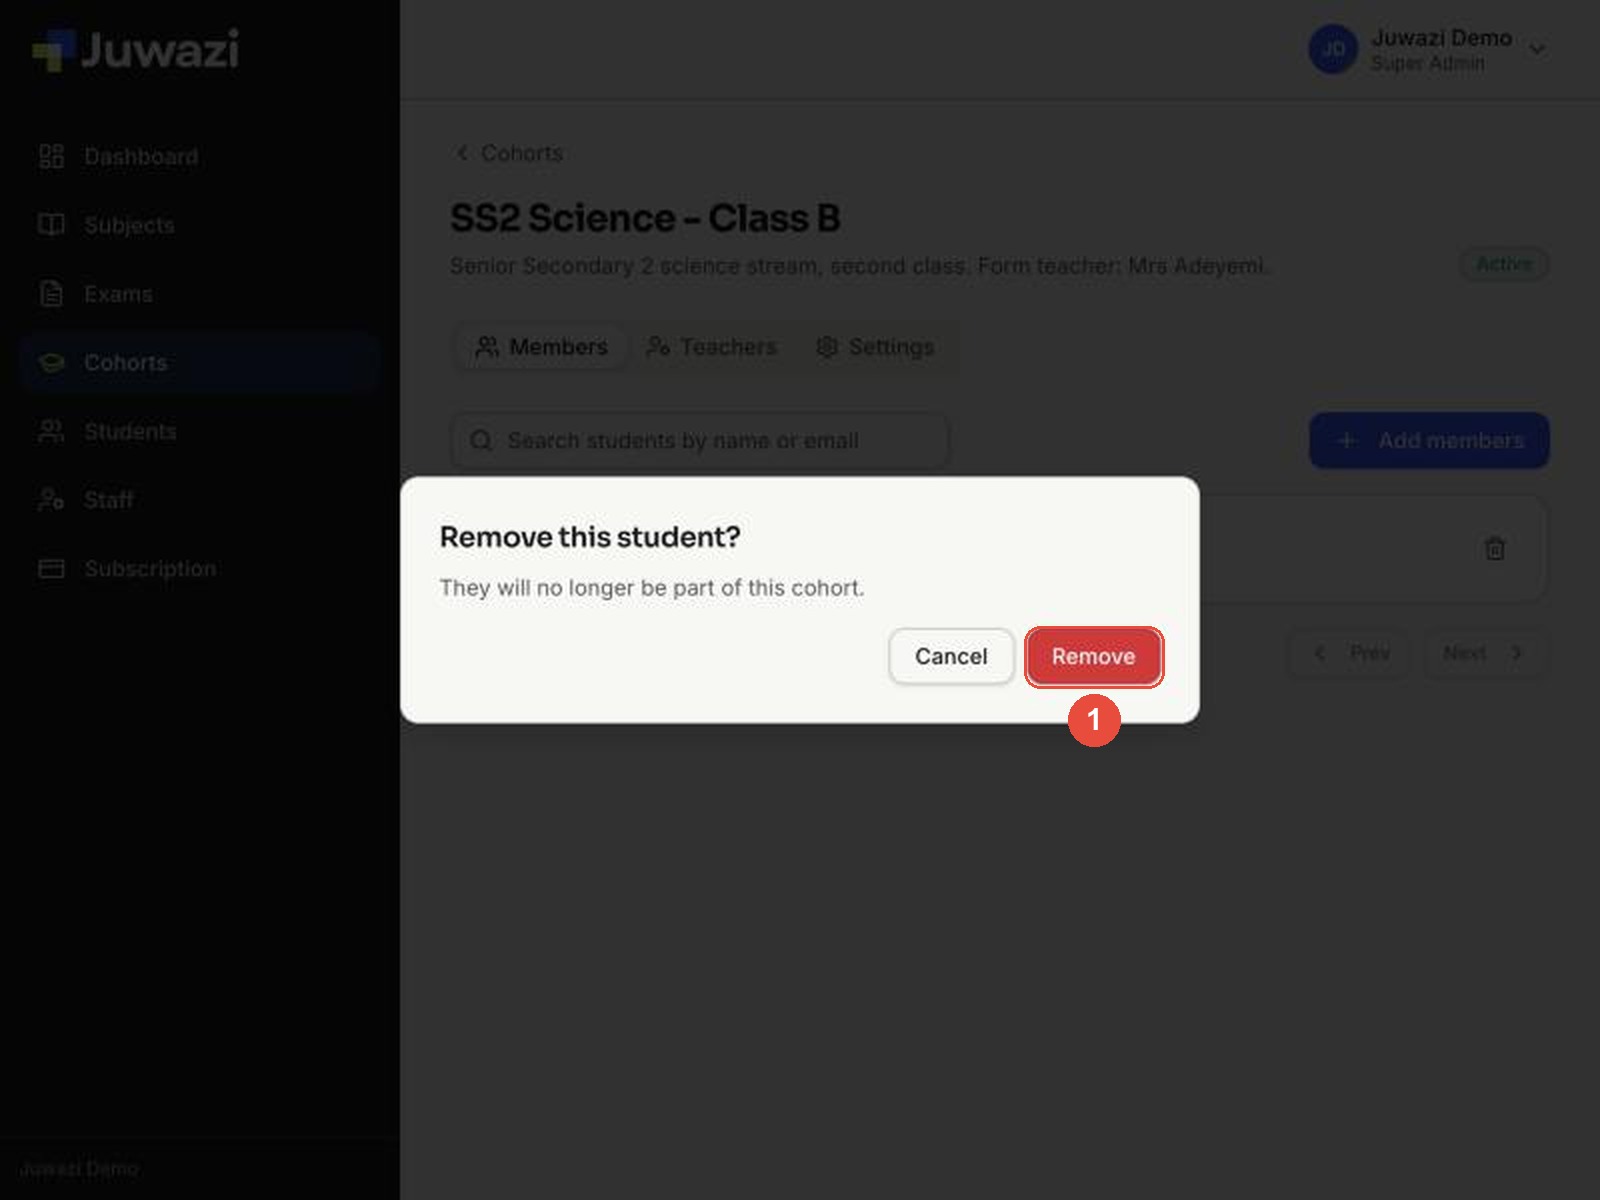
To remove a student from a cohort, click the bin icon next to their name, then Remove. This only takes them out of this cohort; it doesn’t delete the student.
Assign a teacher to a cohort#
Assigning a teacher links them to the cohort they look after. You can assign any member of your staff: teachers, supervisors, administrators or staff.
- Open the cohort and click the Teachers tab.
- Click Assign teacher.
- Search for the staff member by name, click their row to select them, then click Assign.
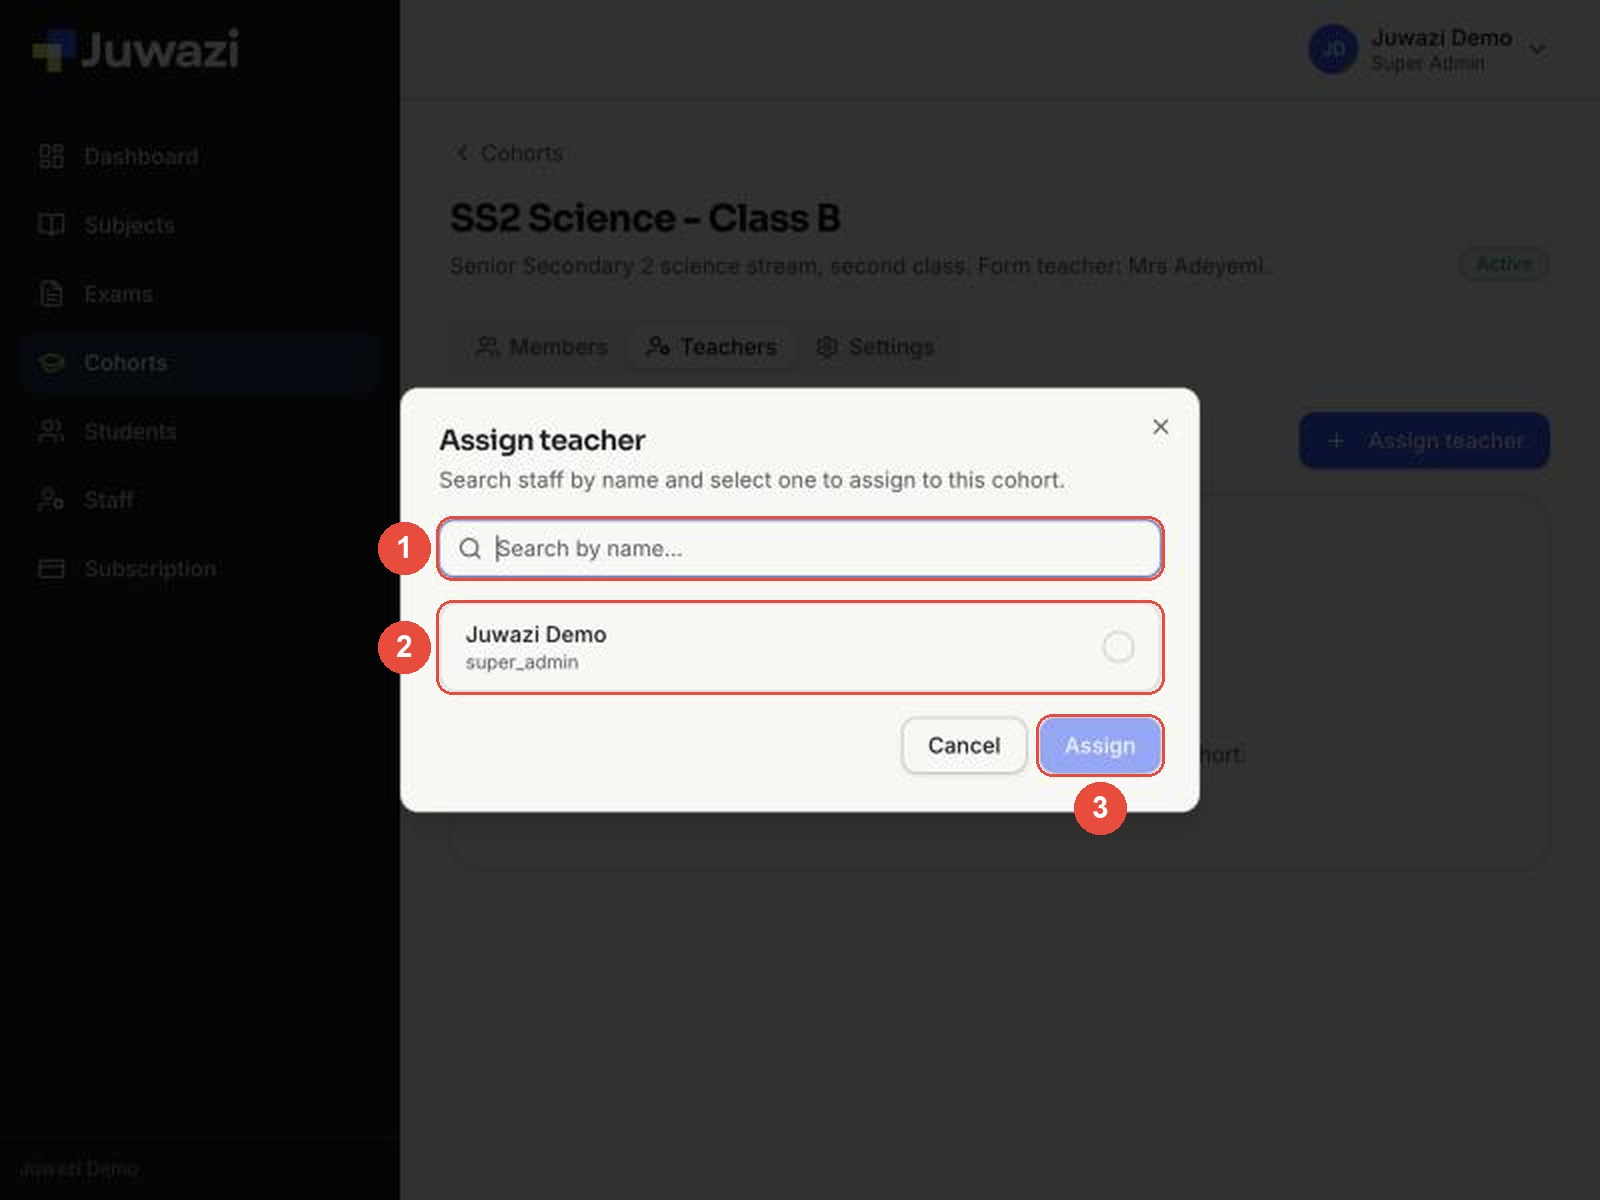
You pick one person at a time; repeat to assign more. Staff must be invited first (Guide 10). You can also manage a staff member’s cohorts from the Staff page.
Draft note: the demo workspace only has the Super Admin on its staff list so far. We’ll update this section once teacher accounts exist, including what an assigned teacher can see.
Edit a cohort, graduate or archive it#
Open the cohort and click Settings.
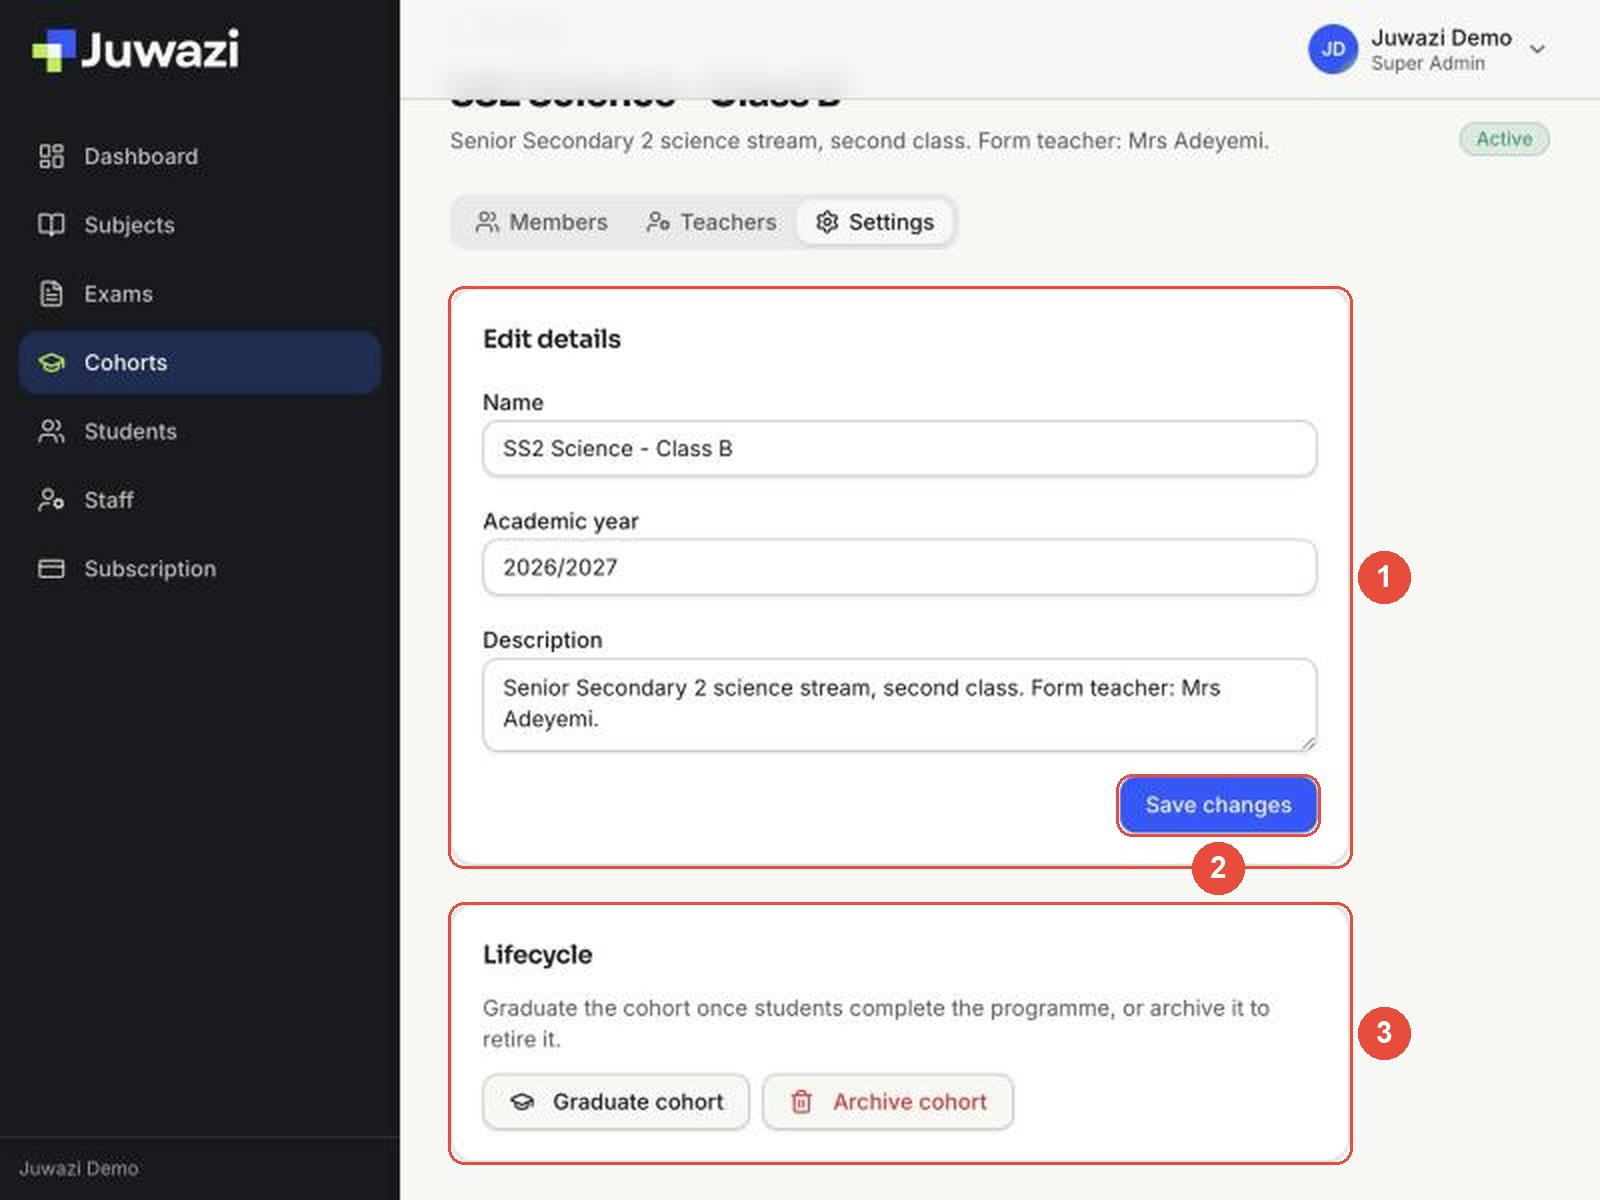
- Edit details: change the name, academic year or description.
- Click Save changes.
- Lifecycle: at the end of the programme, Graduate cohort is for when students complete the programme; Archive cohort retires a cohort you no longer use. Both are covered in Guide 22.
Note: start and end dates can’t be changed here, and they aren’t shown anywhere after the cohort is created.
Tips and what’s next#
- Use a naming pattern and stick to it, such as Level – Stream – Class (SS2 Science – Class B). Lists stay easy to scan as you add more cohorts.
- Always fill in the academic year. Next year you’ll have a new SS2 Science – Class B, and the year is what tells them apart.
- Create cohorts first, then students. Enrolling a student requires choosing a cohort.
Next: Guide 8, Enrolling students and sharing access codes.