

How student accounts work#
Students don’t need an email address or a password. When you enrol a student, Juwazi creates a personal access code for them, such as STU-B9HHRNW. You give the code to the student, and they use it to sign in.
A student’s account goes through two stages:
| Status | Meaning |
|---|---|
| Pending | You’ve enrolled the student, but they haven’t signed in yet. |
| Active (to be confirmed) | The student has verified their account by entering the access code and choosing a security question. |
The security question is a second check. From then on, the student needs both the access code and the answer to sign in, so a lost code on its own isn’t enough to get into their account.
Enrol a student#
You’ll need at least one cohort first (Guide 7). In this example we enrol Emeka Obi into SS2 Science – Class B.
Step 1. Click Students in the left-hand menu, then Enroll student.
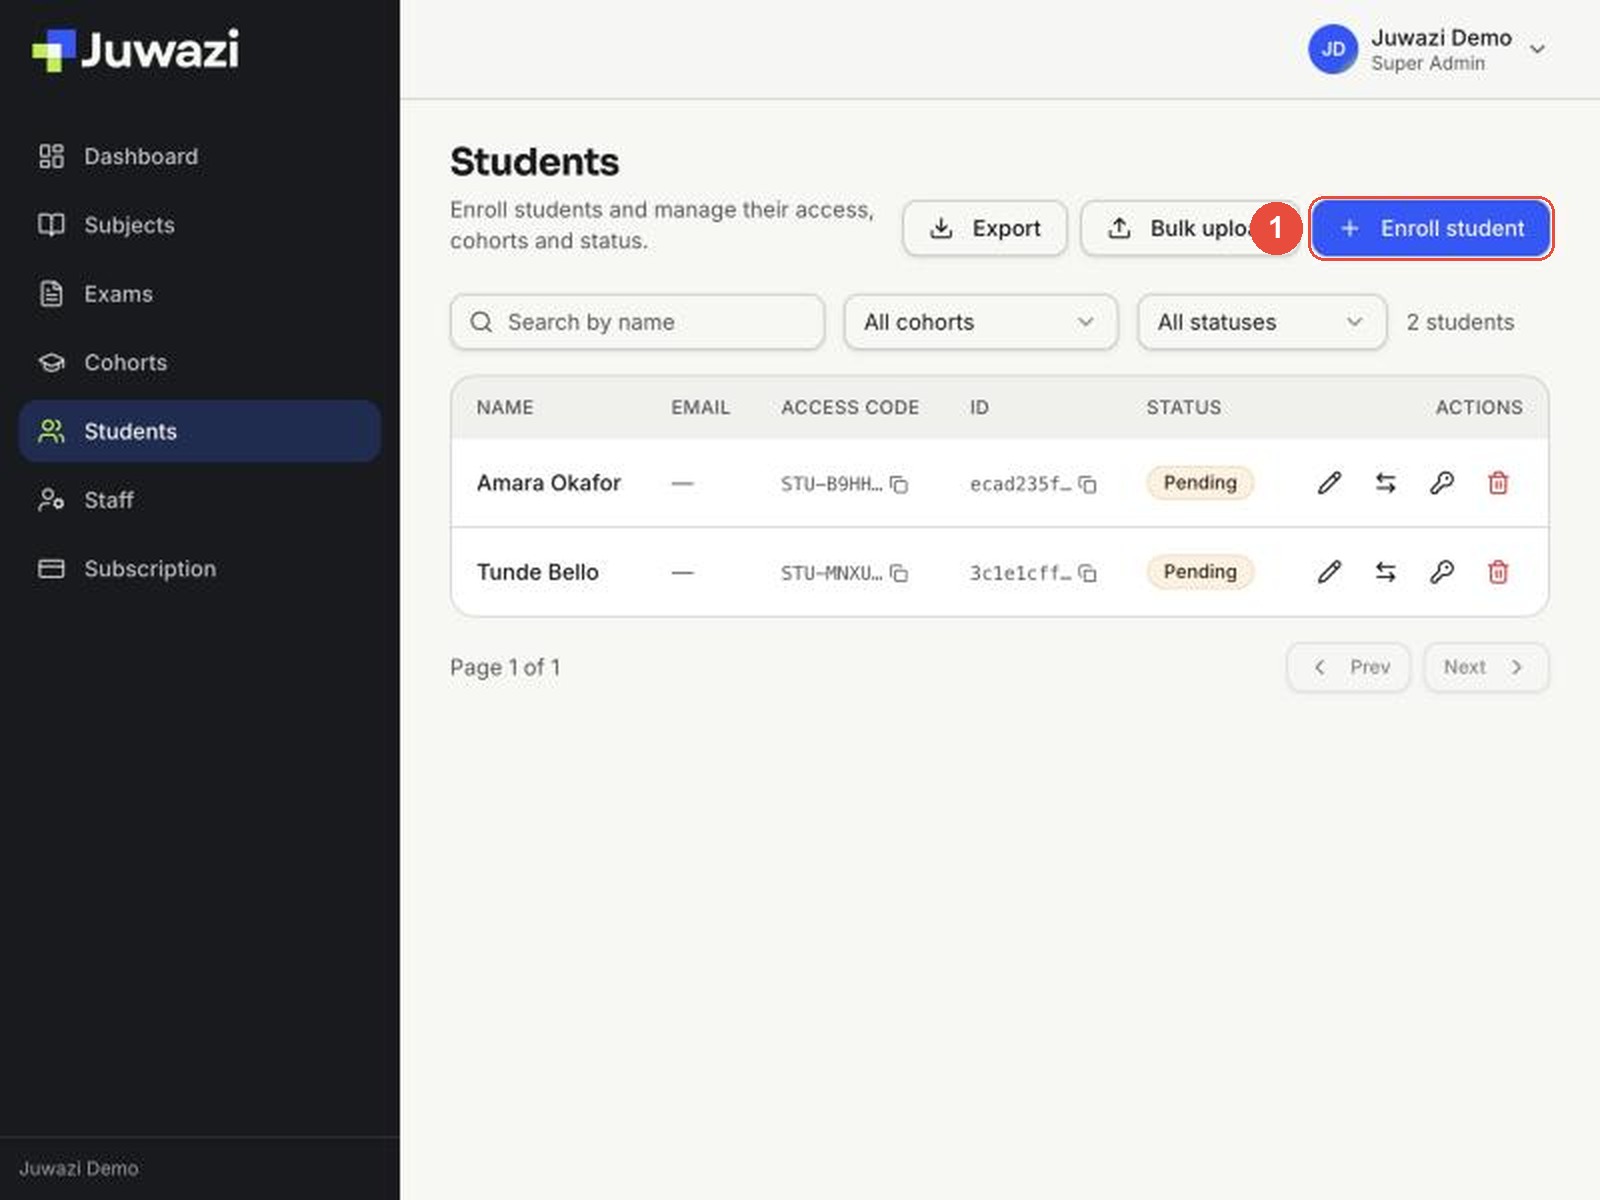
Step 2. Fill in the Enroll student form.
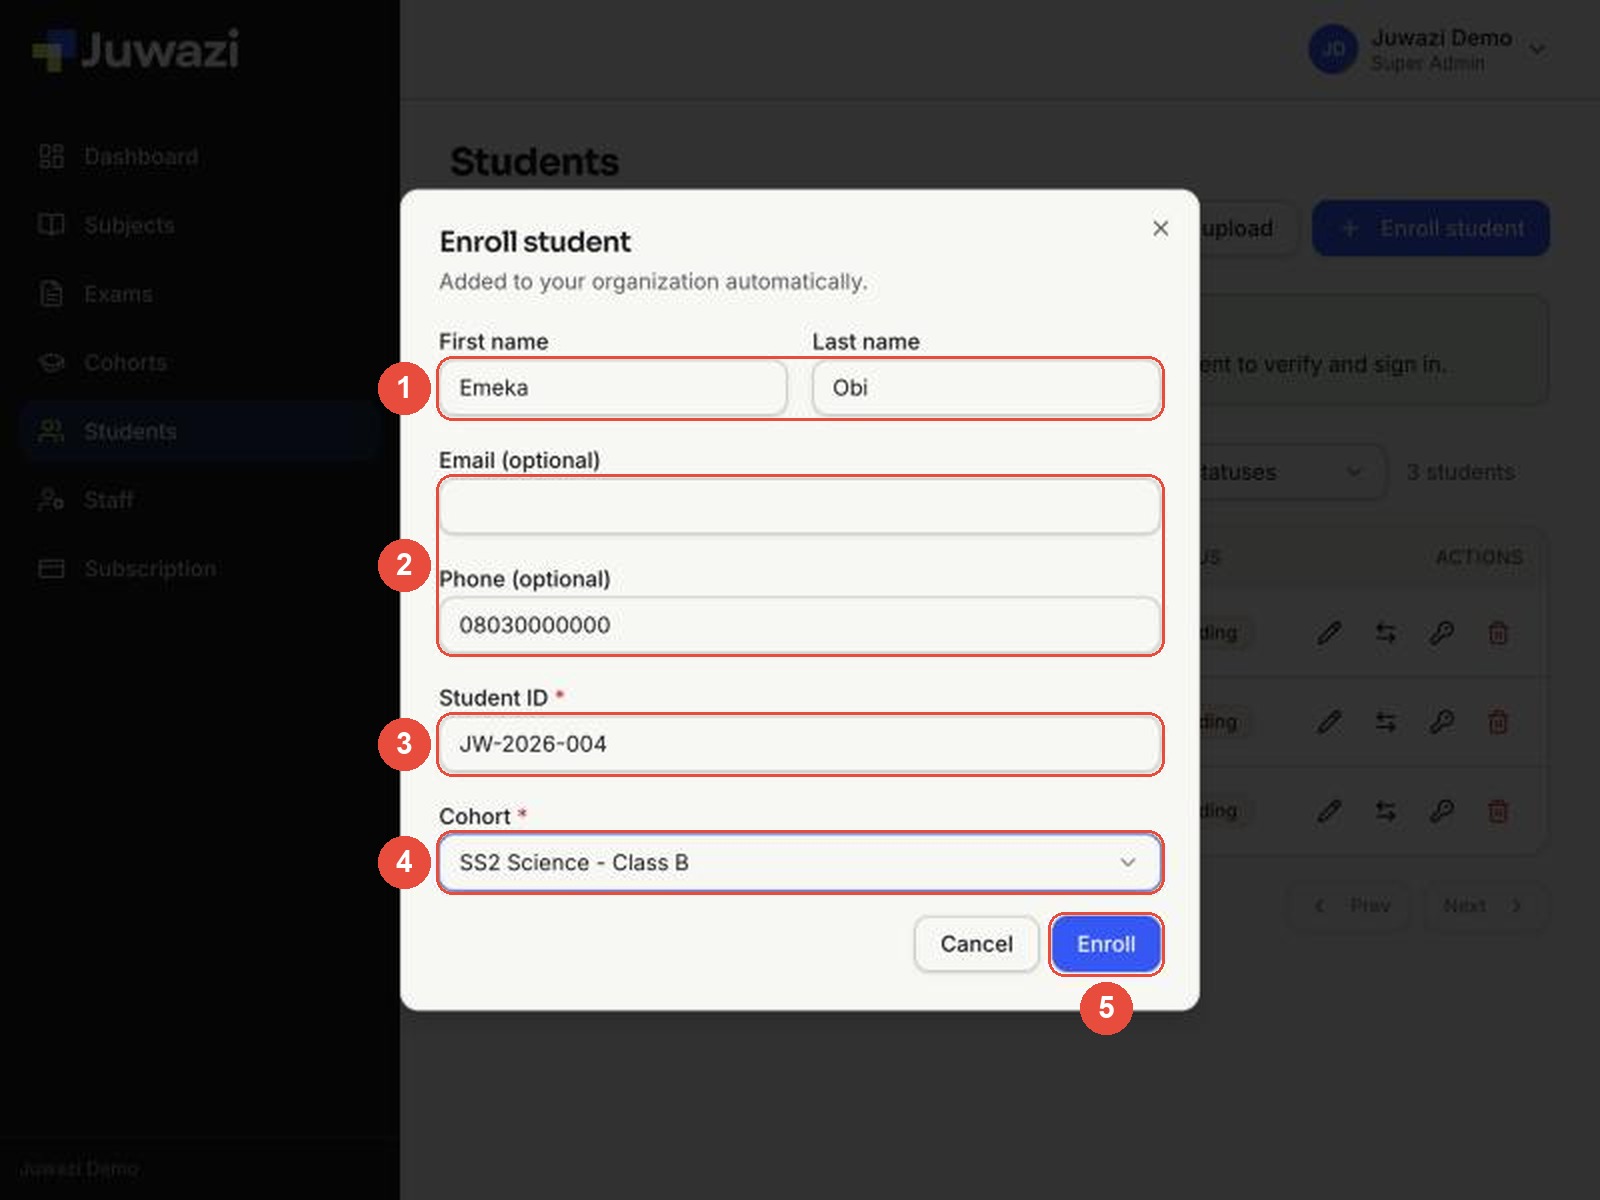
- First name and Last name: as they should appear on results.
- Email and Phone (optional): leave them blank if the student doesn’t have them.
- Student ID (required): your own reference for the student, such as their admission or matriculation number. It must be unique; no two students can share one.
- Cohort (required): the class or batch the student belongs to.
- Click Enroll. It can take a few seconds.
Step 3. A green banner confirms the enrolment and shows the student’s access code. The student appears in the list with the status Pending.
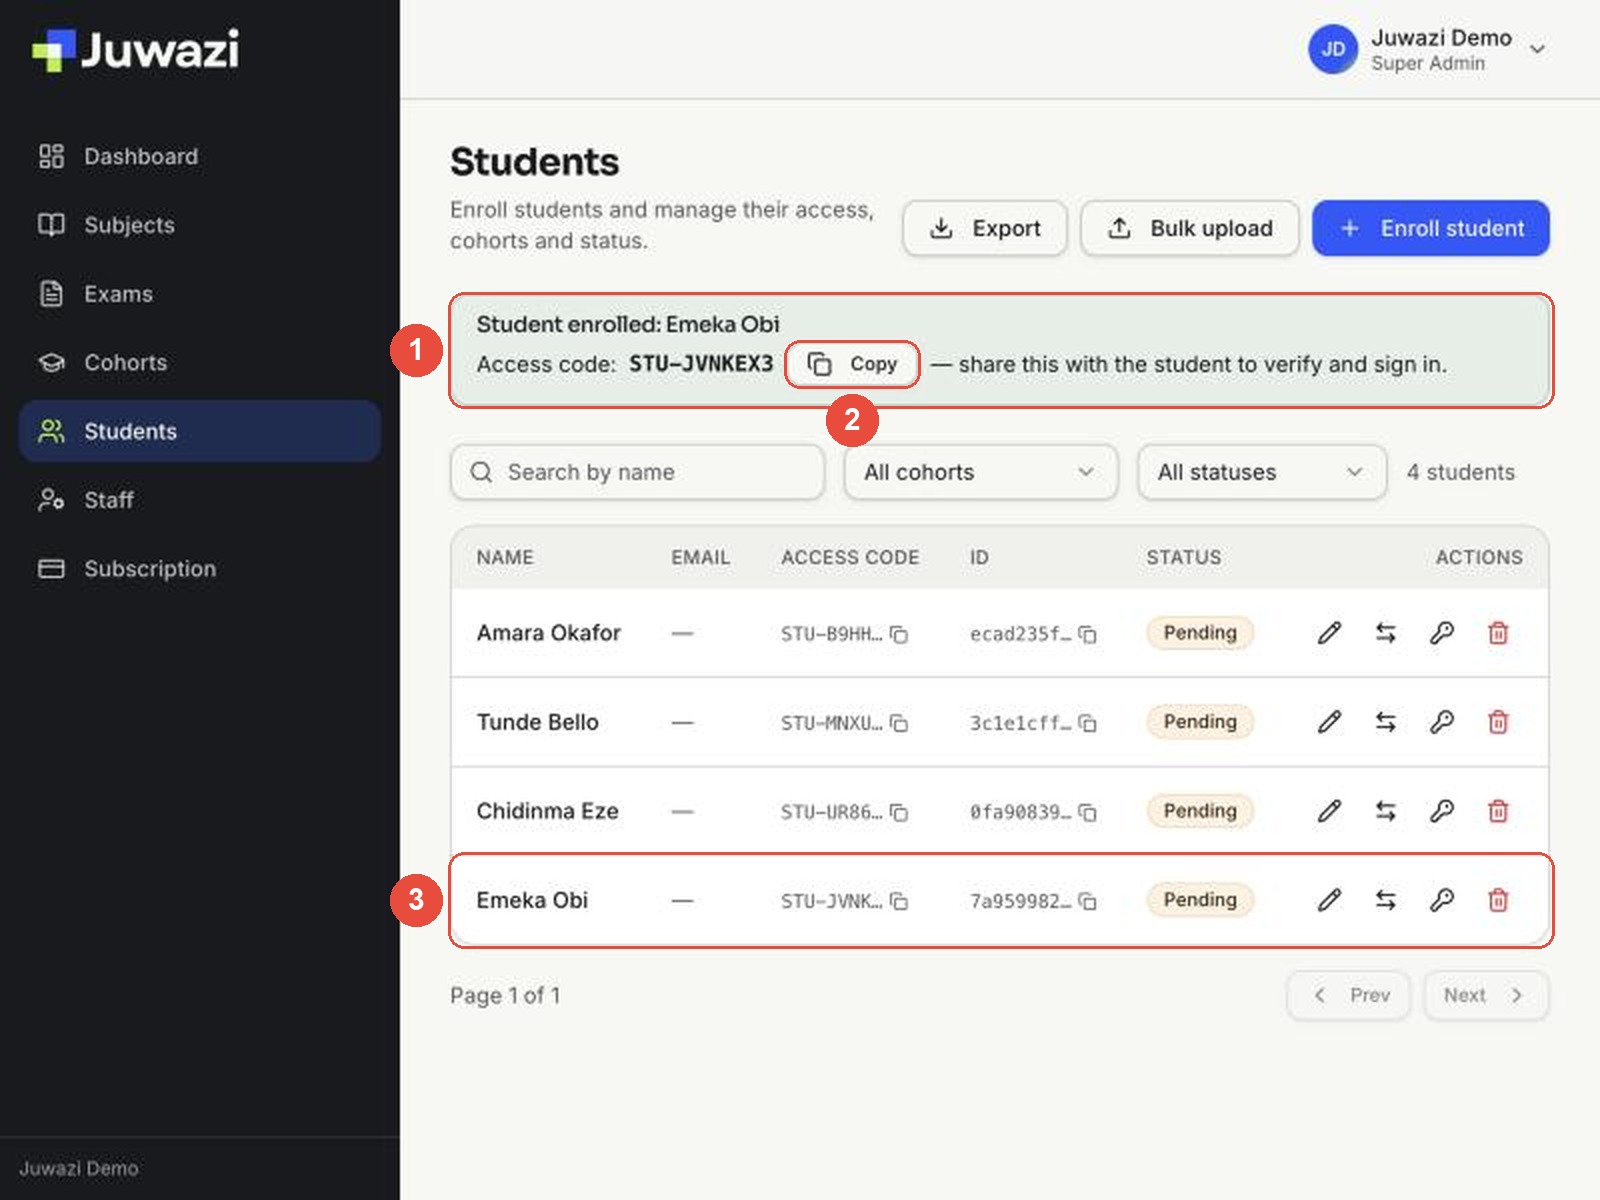
Share the access code#
Every student needs their own access code to sign in.
To copy a code:
- Right after enrolling, click Copy in the green banner, or
- At any time, click the copy icon next to the code in the Access code column of the Students page. The column shows the start of each code; the copy icon copies all of it.
Ways to share codes:
- Printed slips: print each student’s name and code on a slip and hand it out in class.
- Message: send it privately by SMS, WhatsApp or email.
- Through the class teacher for large groups.
Keep codes private. An access code is like a username. Share each one only with its student, and never post a list of codes where other students can see it.
What the student does next#
Give your students these instructions along with their code. Students go to app.juwazi.com, click Student sign in, and see the Student access page.
First time: Verify account#
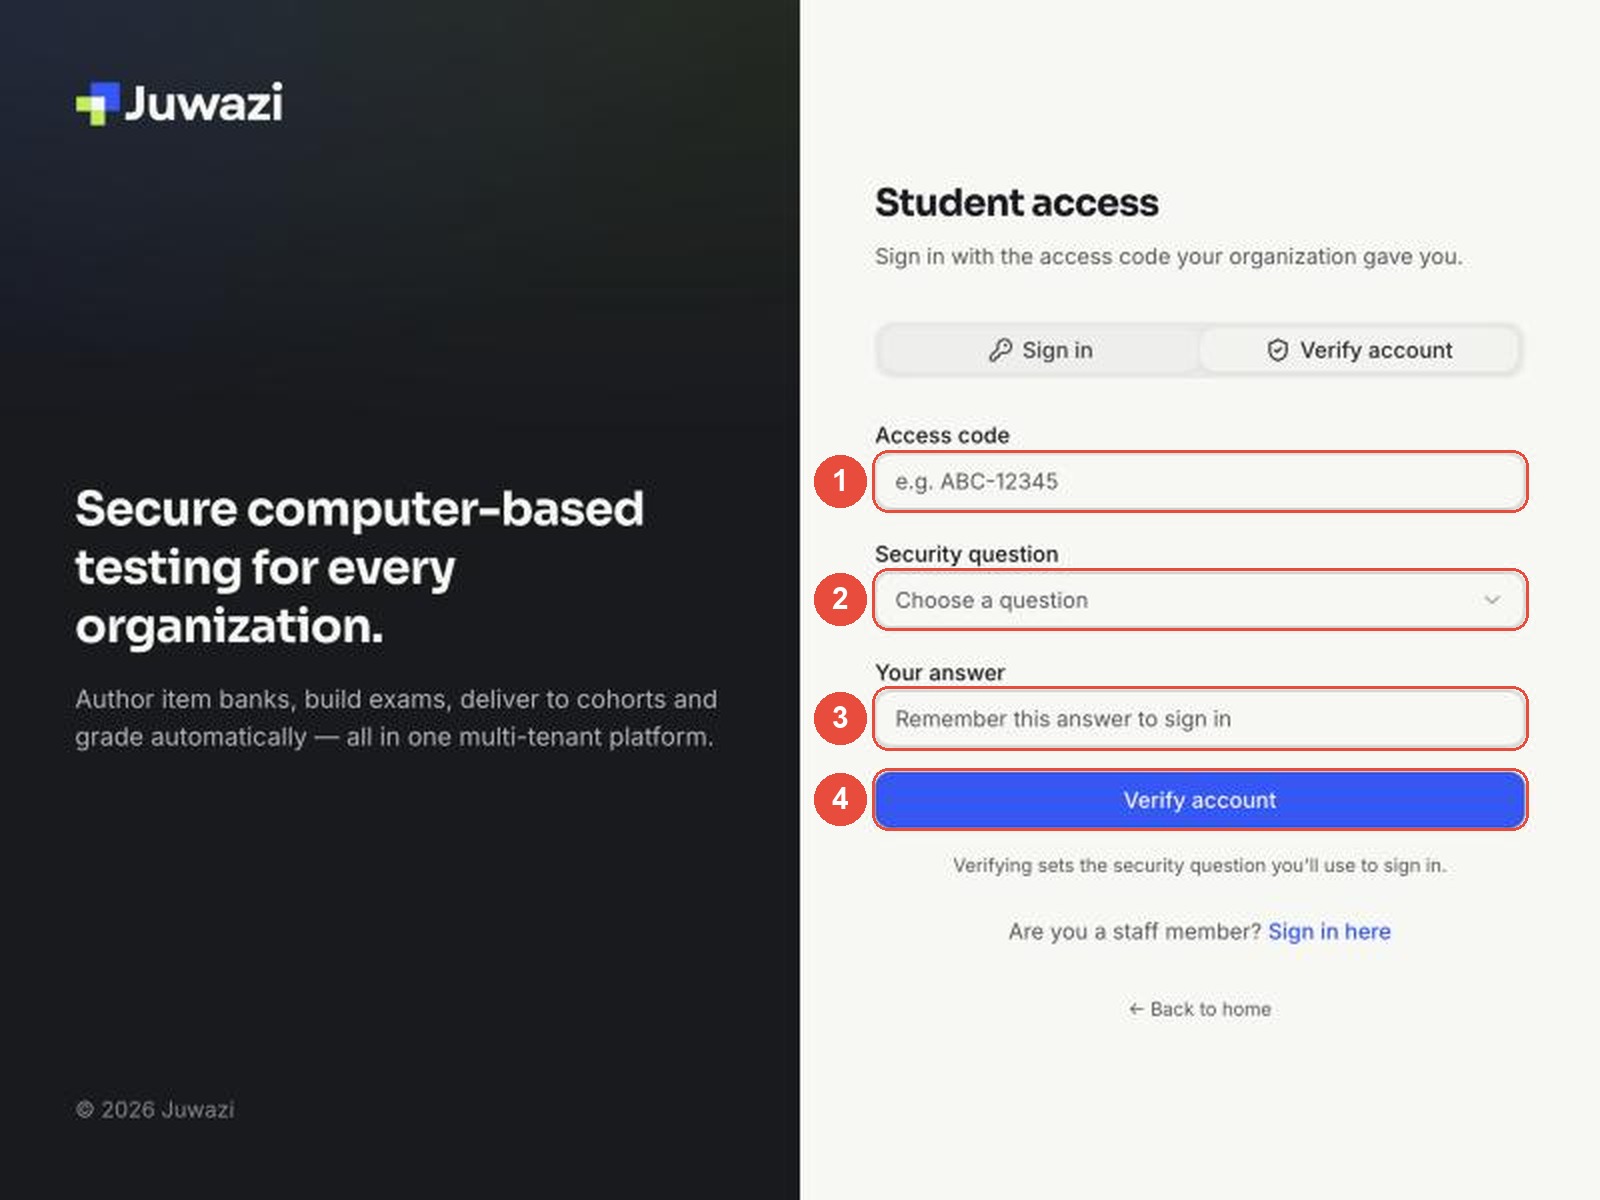
- Click the Verify account tab, then type the access code.
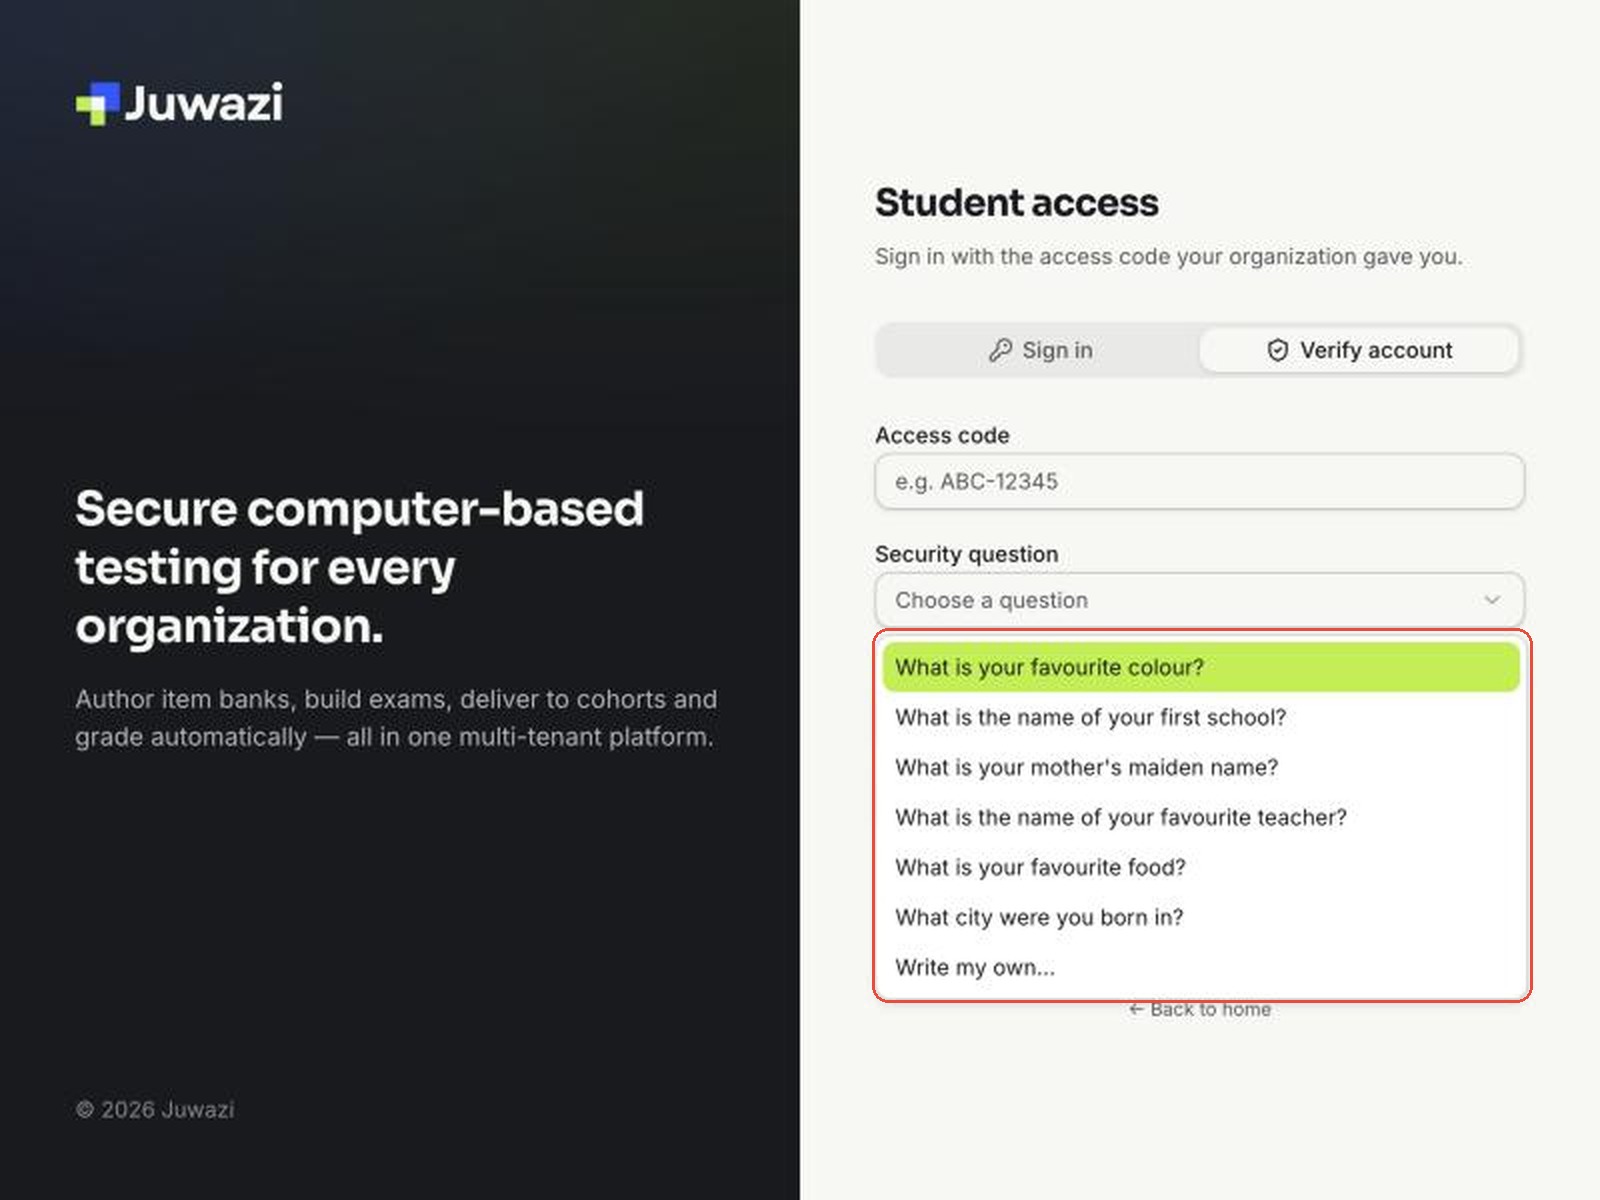
- Choose a security question.
- Type an answer they will remember.
- Click Verify account.
There are six ready-made questions, or the student can choose Write my own…:
Every time after: Sign in#
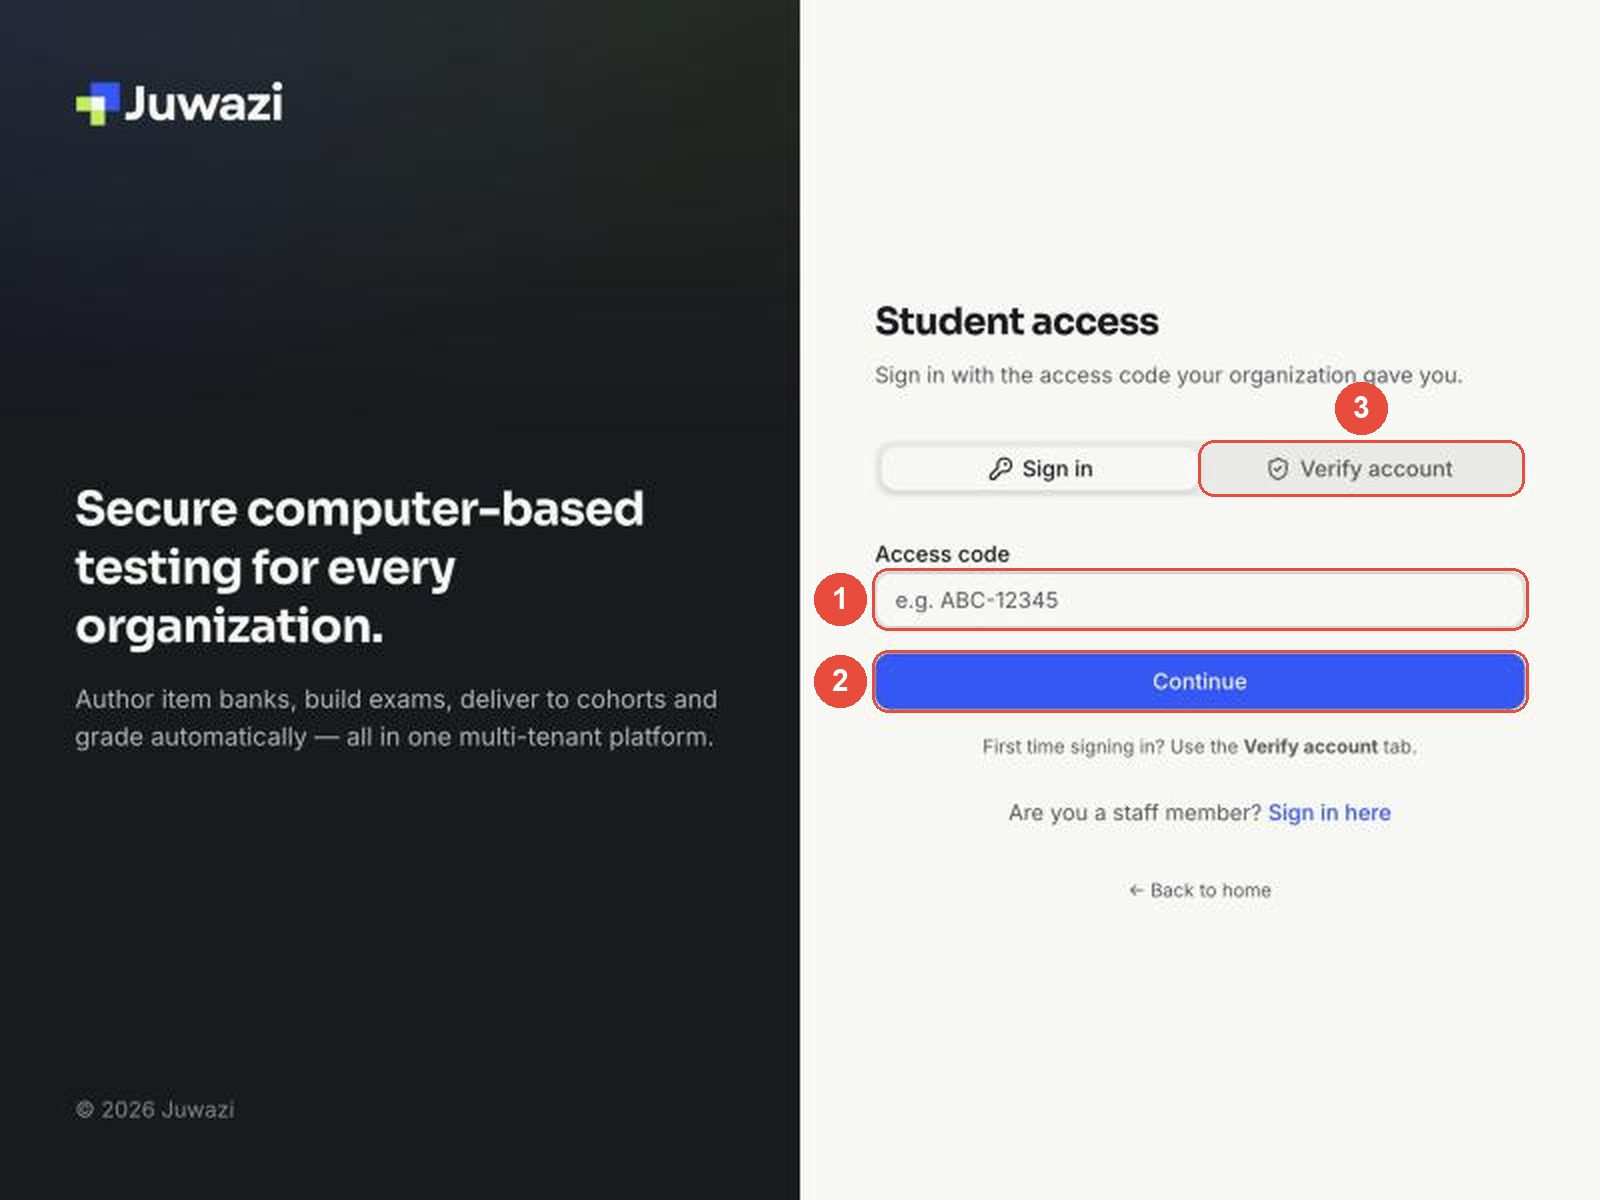
- On the Sign in tab, type the access code.
- Click Continue, then answer the security question.
- First time? Use the Verify account tab instead.
We’ll walk through the full student experience, from signing in to submitting an exam, in Guide 16.
The Students page#
The Students page lists everyone enrolled in your organization.
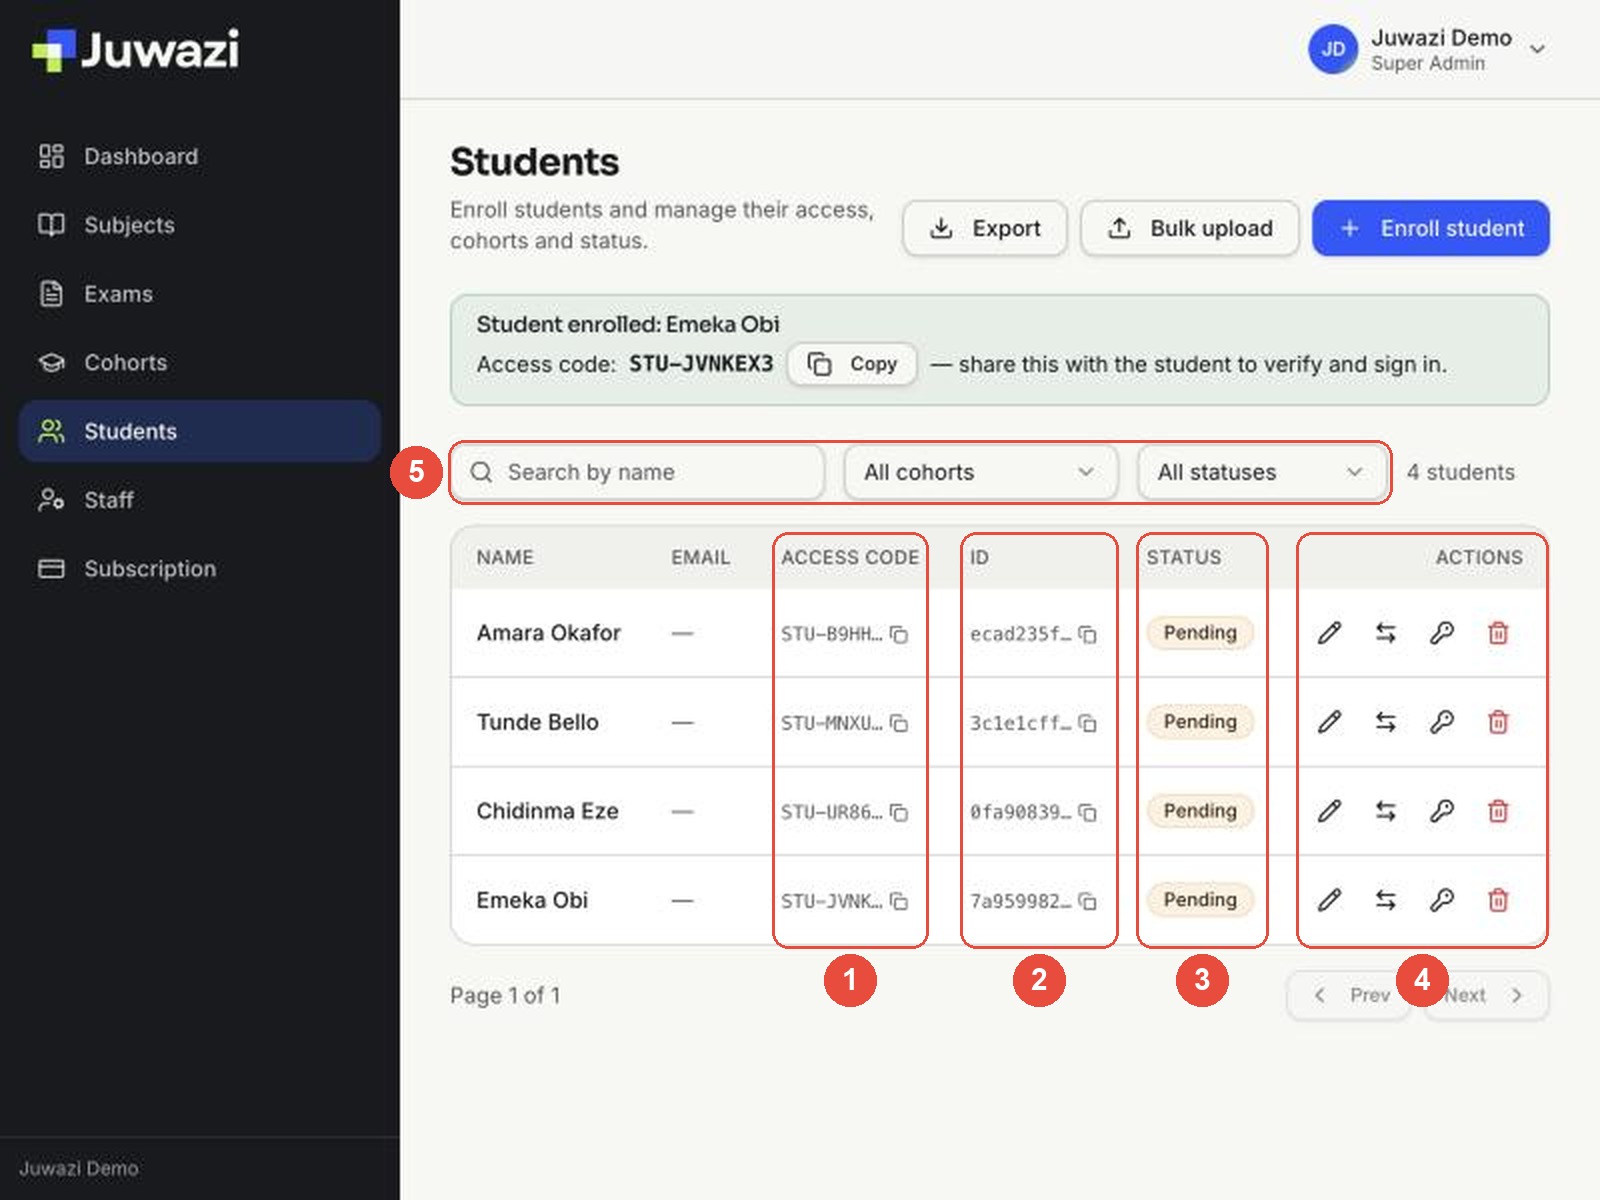
- Access code: the start of each code, with a copy icon.
- ID: Juwazi’s own internal reference for the student, with a copy icon. This is not the Student ID you typed when enrolling.
- Status: pending, active, archived or removed.
- Actions: Edit (pencil), Change cohort (arrows), Reset security answer (key) and Remove student (bin). Guide 21 covers each one.
- Search and filters: search by name, and filter by cohort or status. The number of matching students shows on the right.
The top of the page also has Export (download the list) and Bulk upload (enrol many students from Excel), both covered in Guide 9.
Common problems#
| Problem | Why | Fix |
|---|---|---|
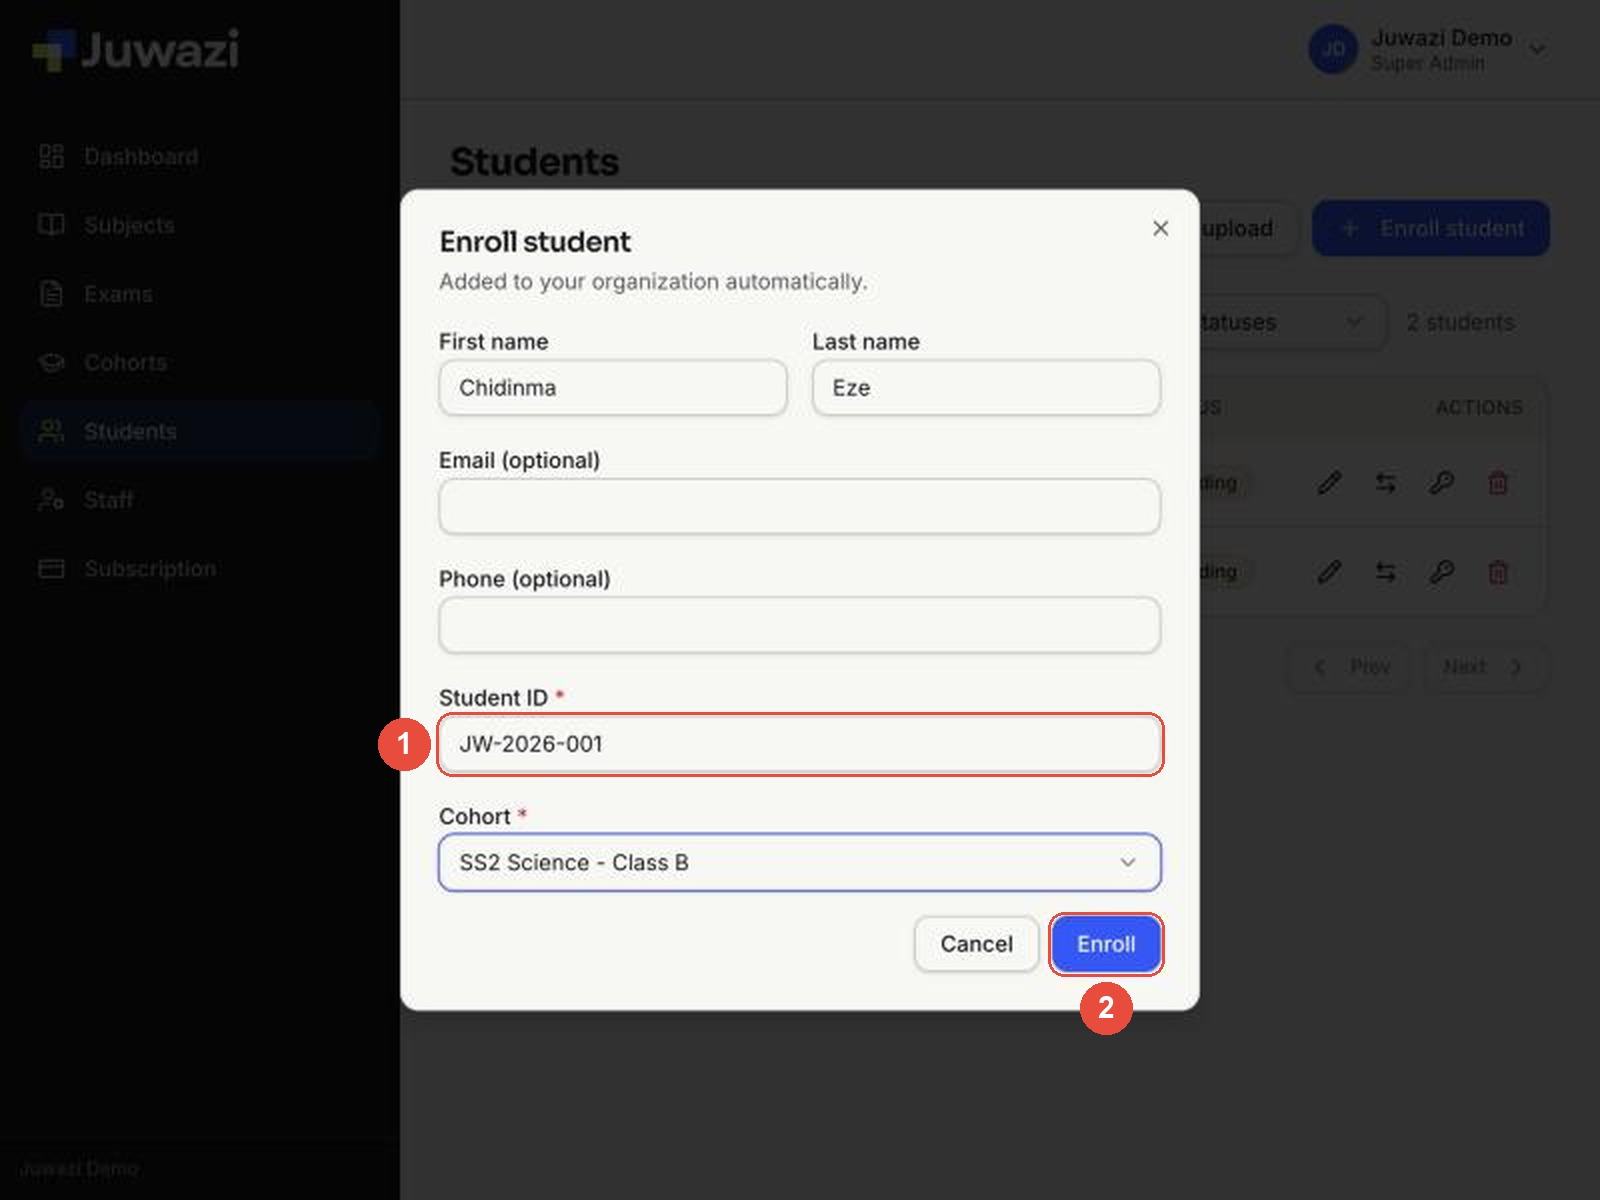
| You click Enroll and nothing happens | The Student ID is already used by another student. Juwazi doesn’t show an error message at the moment. | Check the ID against your records and use one that isn’t taken. |
| The Enroll button is greyed out | A required field is empty: Student ID or Cohort. | Fill in both (they’re marked with a red *). |
| No cohorts in the Cohort list | No cohorts exist yet. | Create one first (Guide 7). |
| The student says their code doesn’t work | A typo, or the student is using the Sign in tab before verifying. | Copy the code from the Students page and send it again; tell them to use Verify account the first time. |
| The student forgot their security answer | — | Click the key icon (Reset security answer) on their row (Guide 21). |
Here the Student ID JW-2026-001 already belongs to Amara Okafor, so clicking Enroll does nothing:
Tips and what’s next#
- Use your existing student numbers as the Student ID, so Juwazi results match your school records.
- Enrolling a whole class? Use Bulk upload instead (Guide 9).
- Track who has signed in: filter by status pending to see students who haven’t verified yet, and follow up before exam day.
- Allow time on exam day. Ask students to verify their accounts a few days before the first exam, not on the morning of it.
Next: Guide 9, Bulk-enrolling and exporting students.