

What you see as a teacher#
Your Super Admin or Administrator invites you (Super Admin Guide 10) and gives you one or more subjects and cohorts (classes). You get an email with a temporary password, then sign in at app.juwazi.com/login with your email and that password.
In this guide we’re Samuel Ojo, a Maths teacher assigned to Mathematics and SS2 Science – Class A.
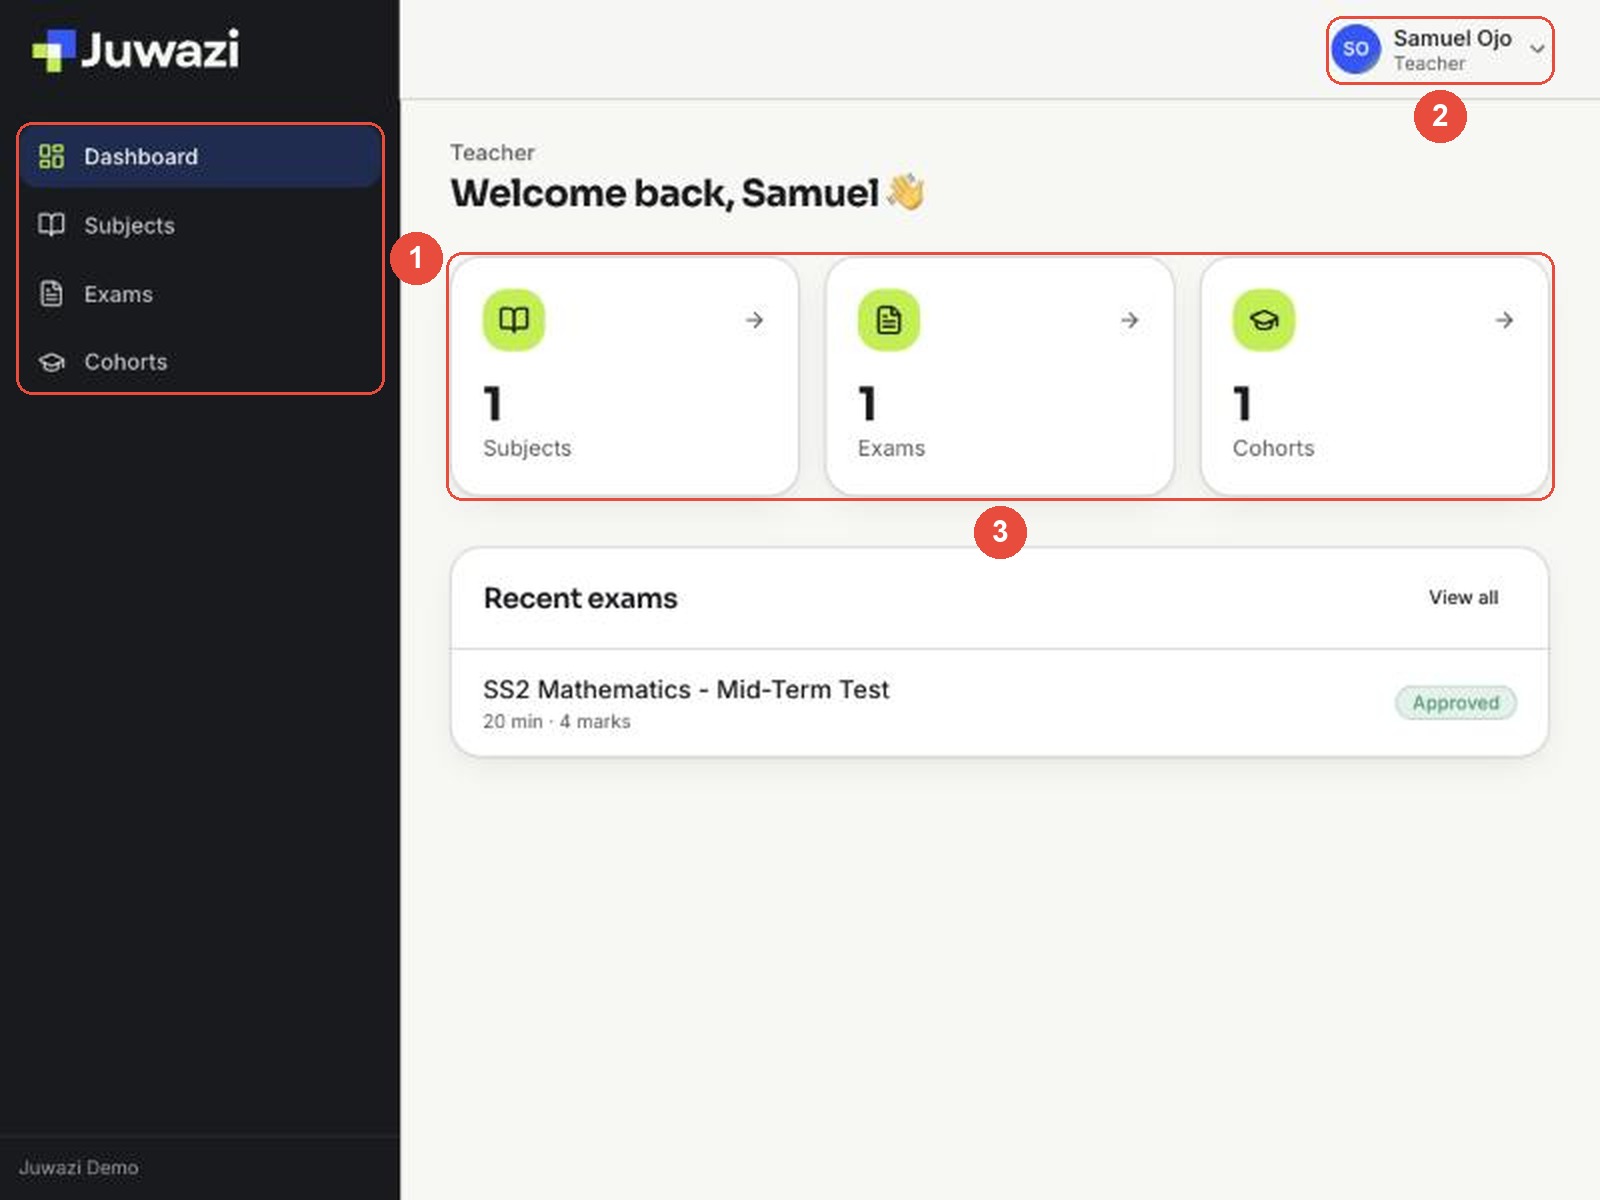
- A shorter menu: Dashboard, Subjects, Exams and Cohorts. Students, Staff and Subscription are for administrators only.
- Your name and the label Teacher at the top right.
- Your numbers: subjects, exams and cohorts. You only see what’s assigned to you, so Samuel sees 1 subject, 1 cohort and only Maths exams.
| Page | What you can do |
|---|---|
| Subjects | Write and manage questions in your subjects |
| Exams | Build exams, submit them for approval, assign them to classes, see results |
| Cohorts | See which students and teachers are in your classes |
If a subject or class is missing, ask your administrator to assign it to you.
Your classes#
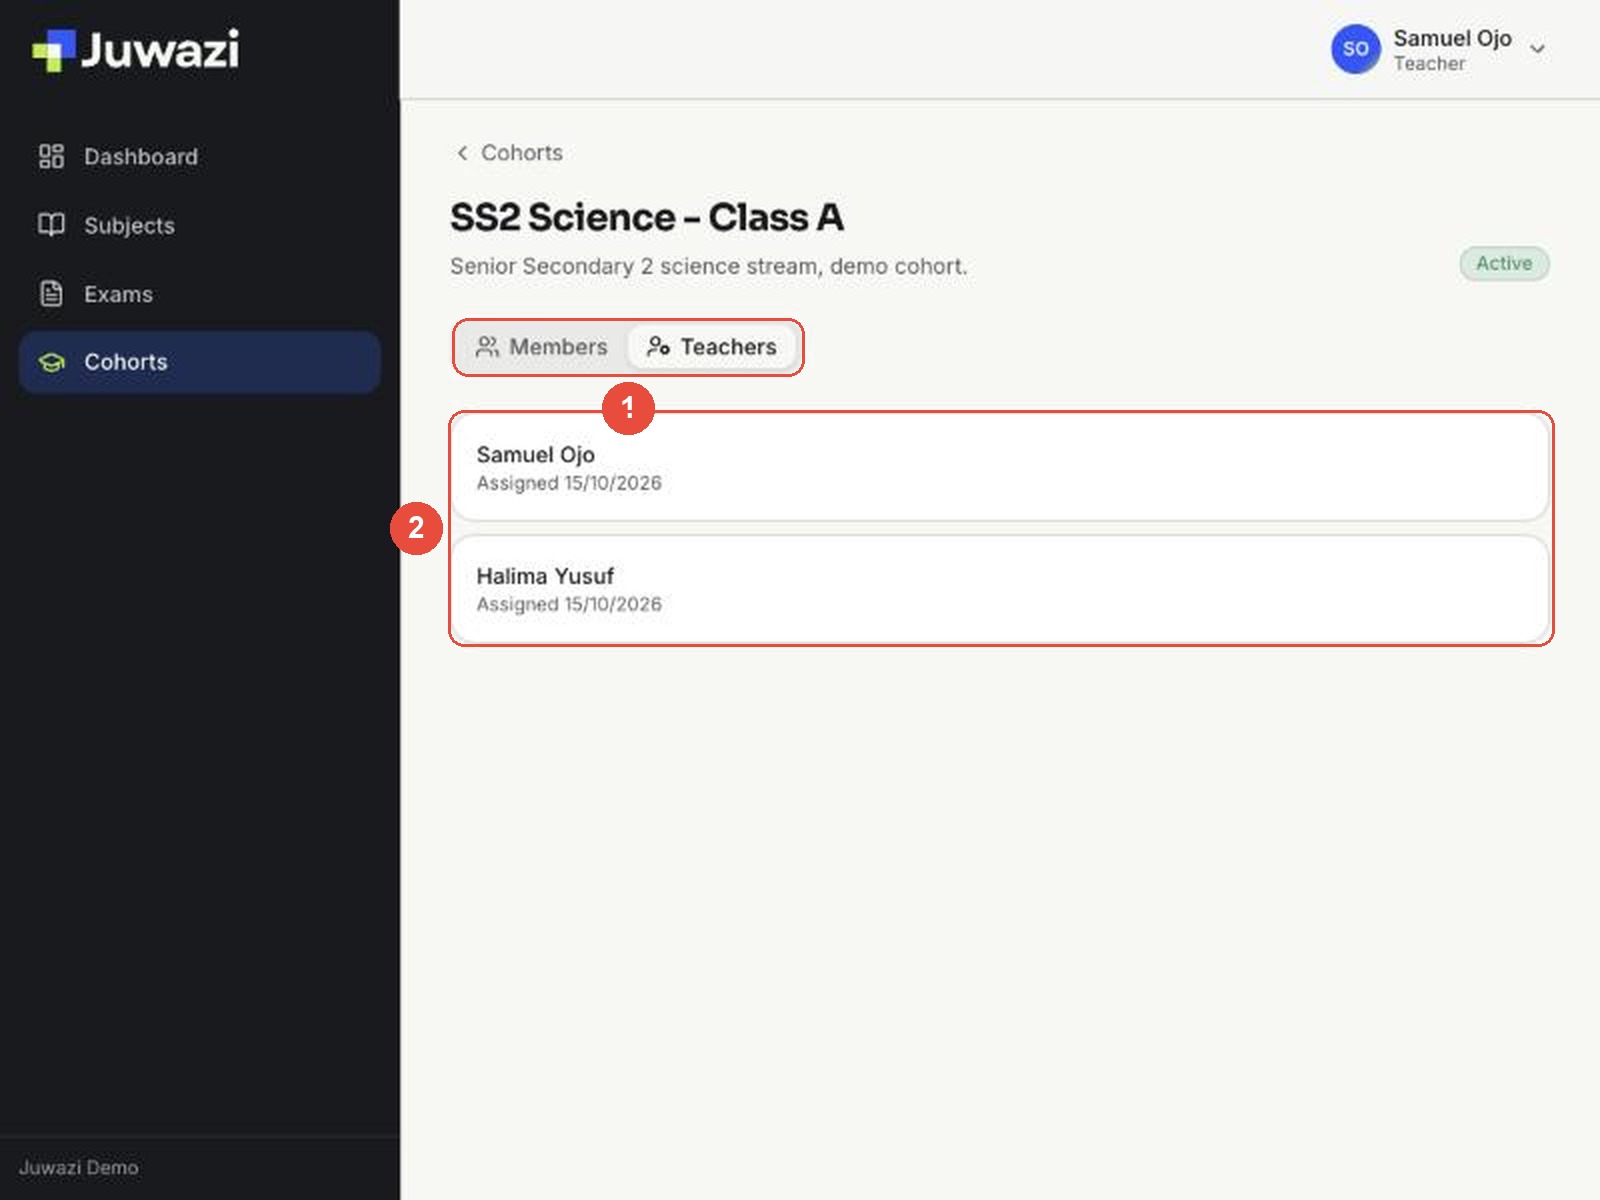
Click Cohorts to see the classes assigned to you, then click a class to open it. The class page is for viewing only. It has two tabs (1):
- Members – the students in the class, with a search box.
- Teachers (2) – the staff assigned to the class and the date they were assigned. Supervisors assigned to the class also appear here.
You can’t add or remove students, or change the class details. Ask an administrator if a student is missing or in the wrong class.
Managing questions in your subject#
Click Subjects and open your subject. This is your subject’s item bank, the pool of questions you build exams from. Inside your subject you have the same tools as an administrator:
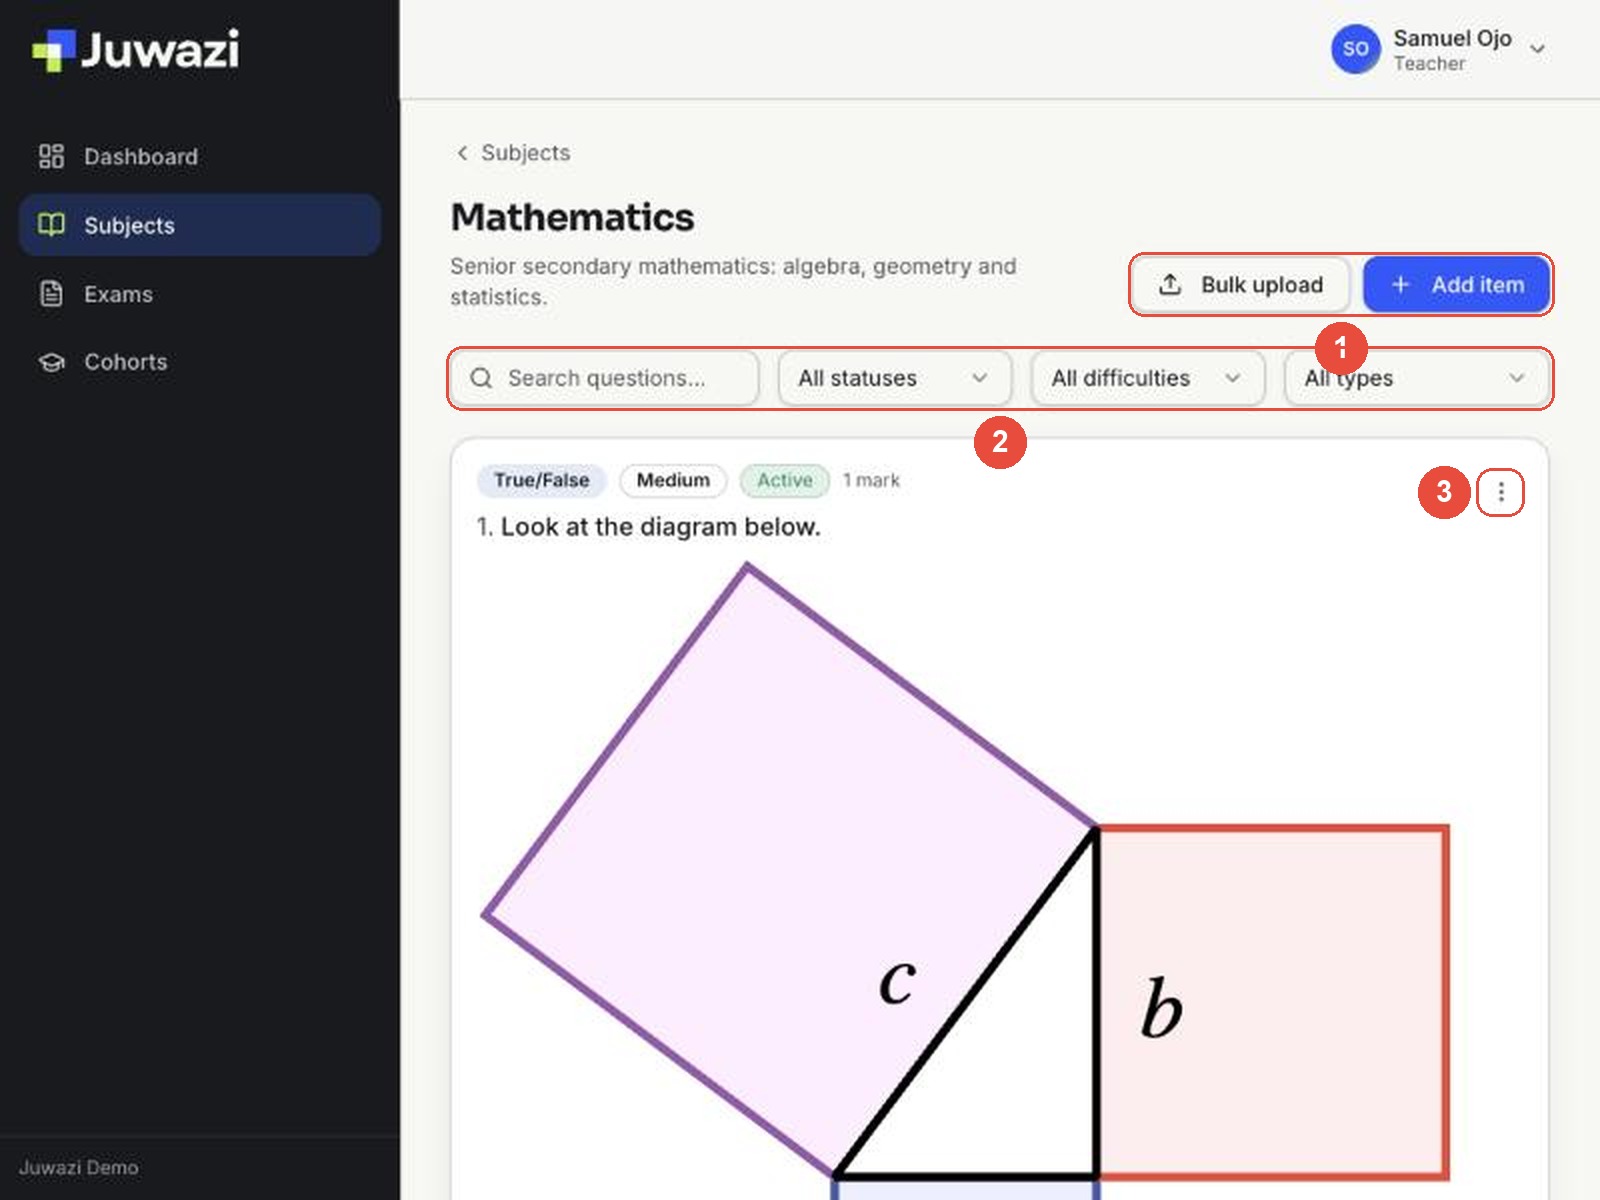
- Bulk upload (many questions from an Excel file) and Add item (one question at a time).
- Search and filters by status, difficulty and question type.
- The ⋮ menu on each question.
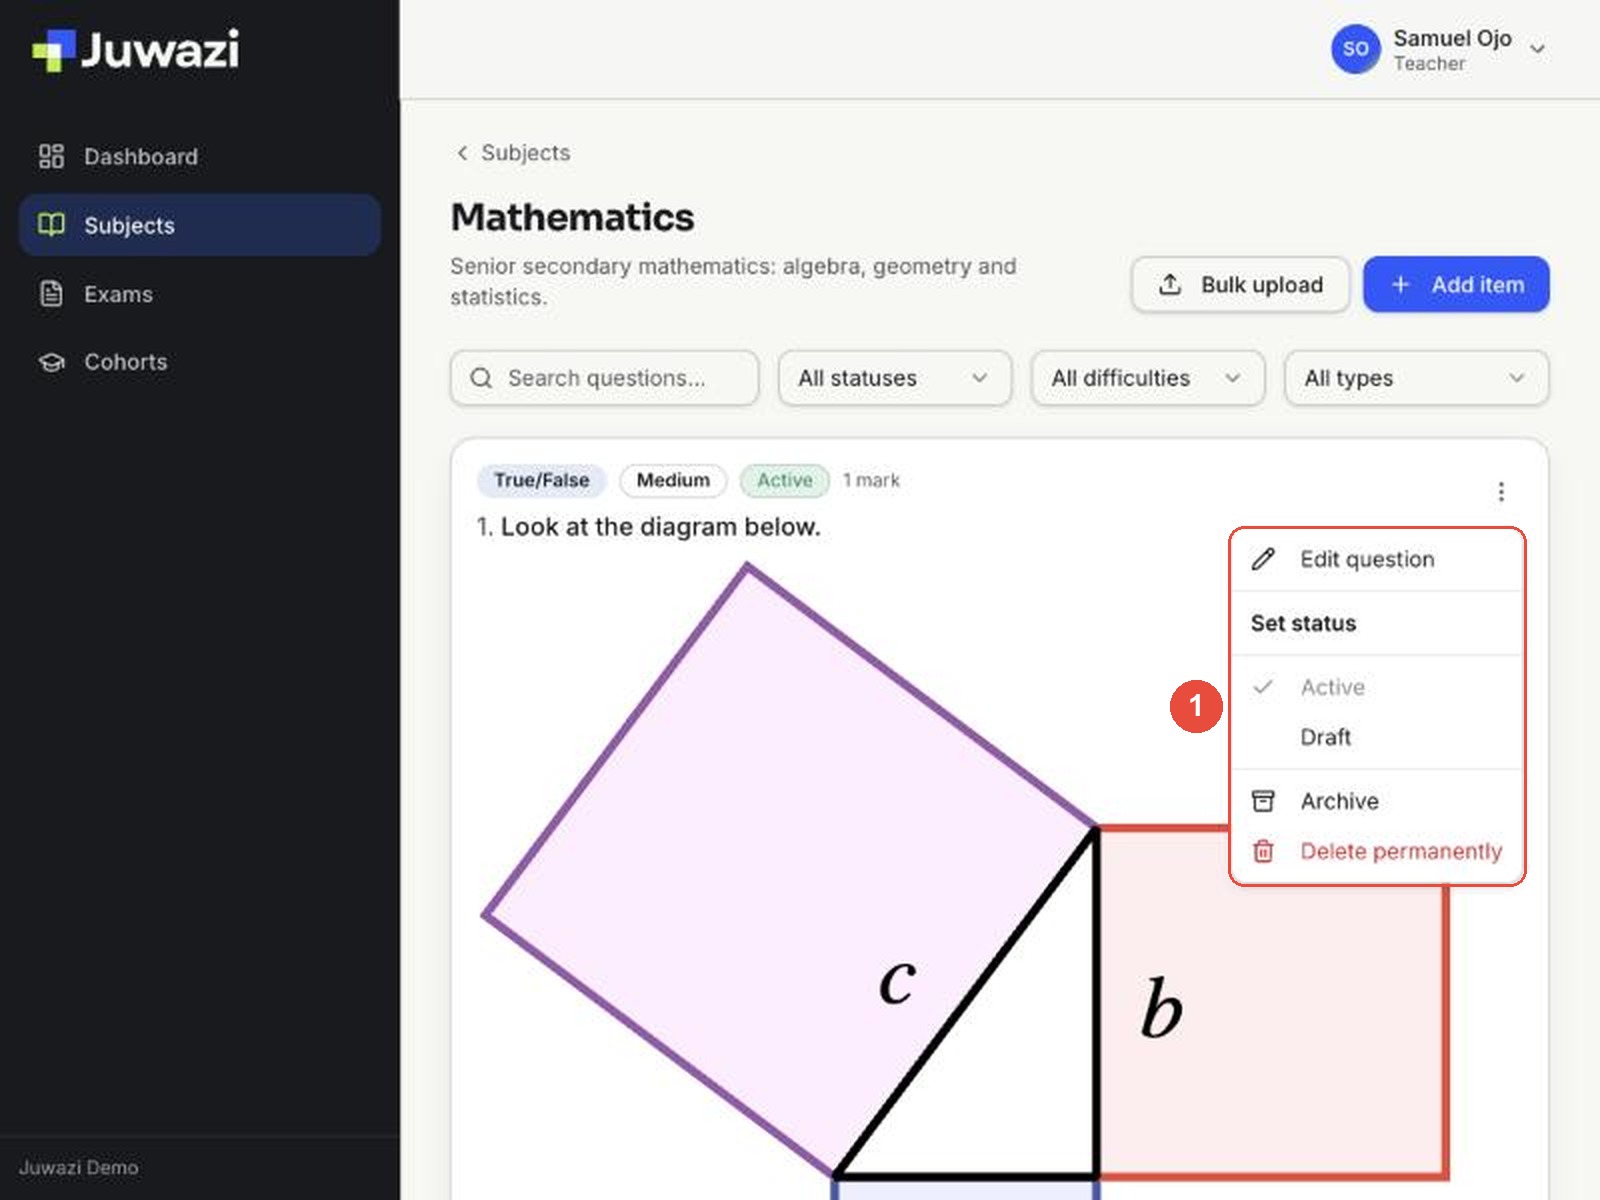
The ⋮ menu (1) lets you Edit question, set it to Active or Draft, Archive it or Delete permanently.
Keep finished questions Active. Use Draft for questions you’re still working on, so they don’t end up in an exam by mistake.
To learn how to write each question type, use maths formulas, tables and images, and bulk-upload from Excel, see Super Admin Guides 4, 5 and 6. The steps are exactly the same for teachers.
Archive, don’t delete. Delete permanently can’t be undone. If a question is wrong or out of date, Archive it instead.
Building an exam#
Our example is SS2 Mathematics – Algebra Class Test: one section, three questions and 20 minutes.
1. Create the exam#
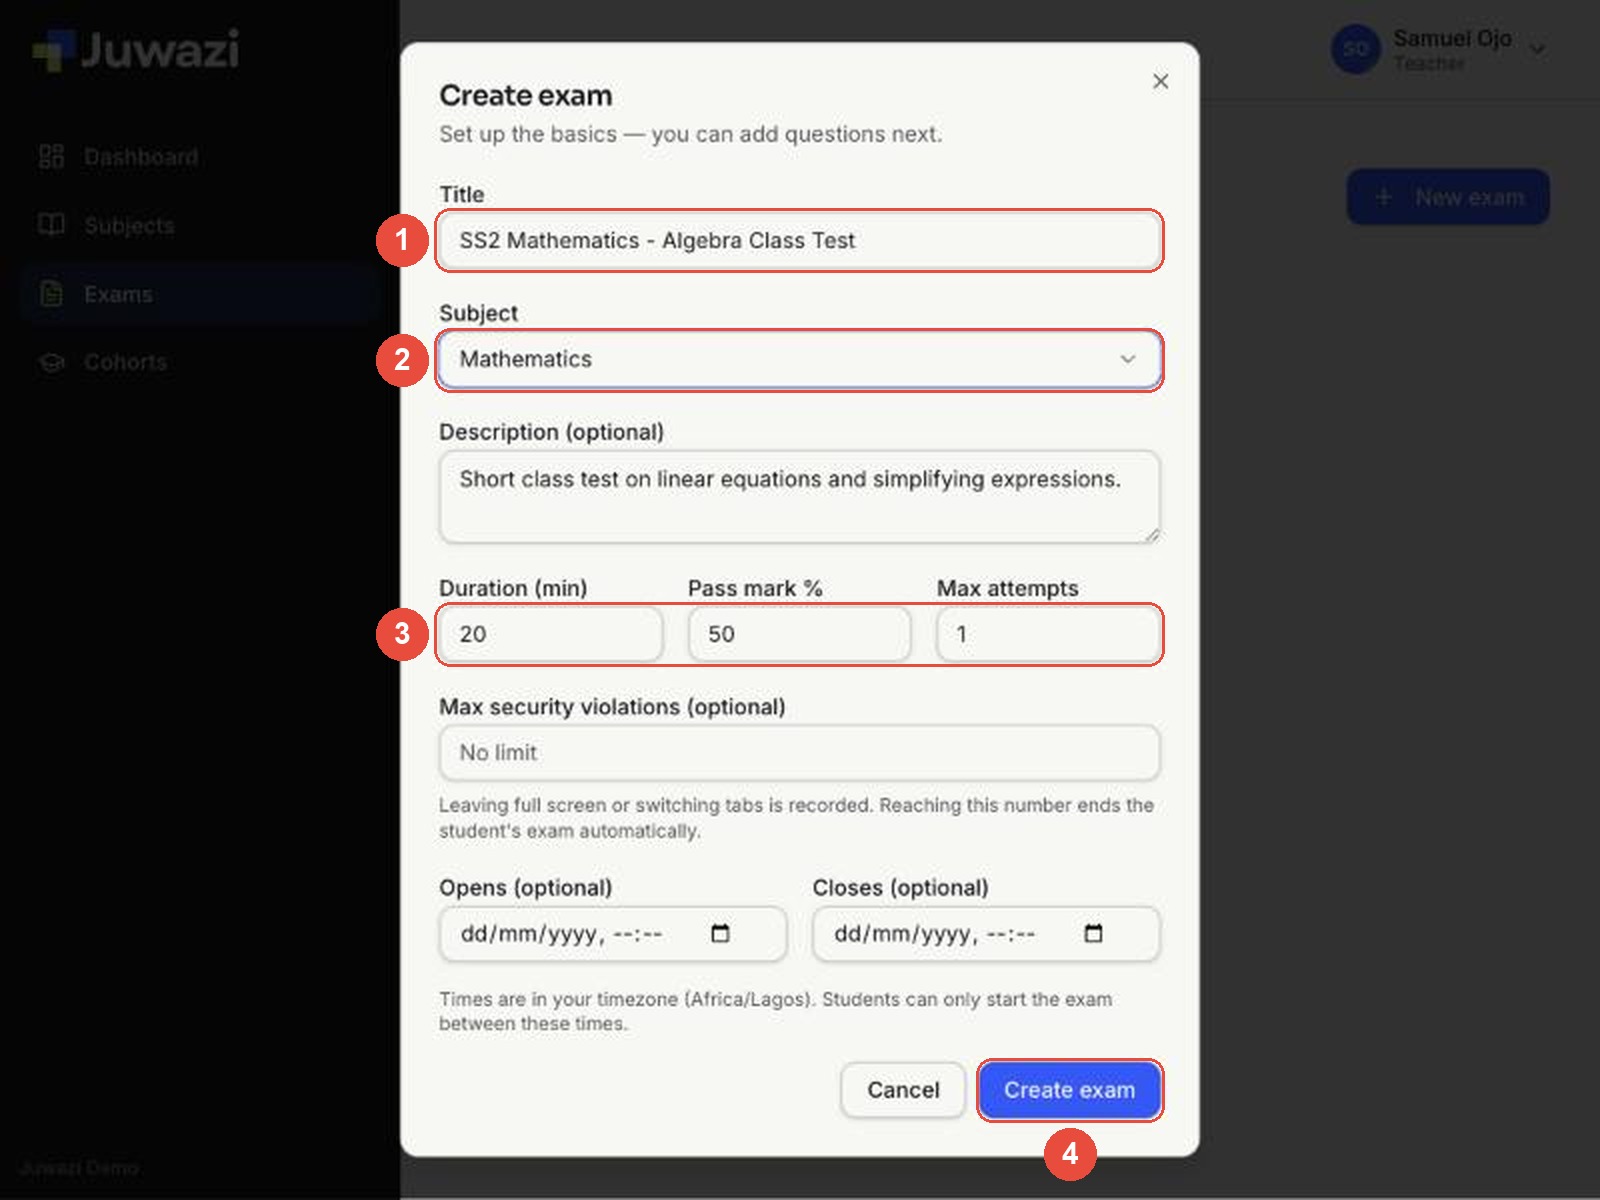
Go to Exams and click New exam. Fill in:
- Title – make it specific (subject, class and topic). The exam list shortens long titles, so put the distinctive part early, for example “Algebra Class Test – SS2 Maths”.
- Subject – only your subjects are listed. If you have just one, it’s picked for you.
- Duration, Pass mark % and Max attempts.
- Click Create exam.
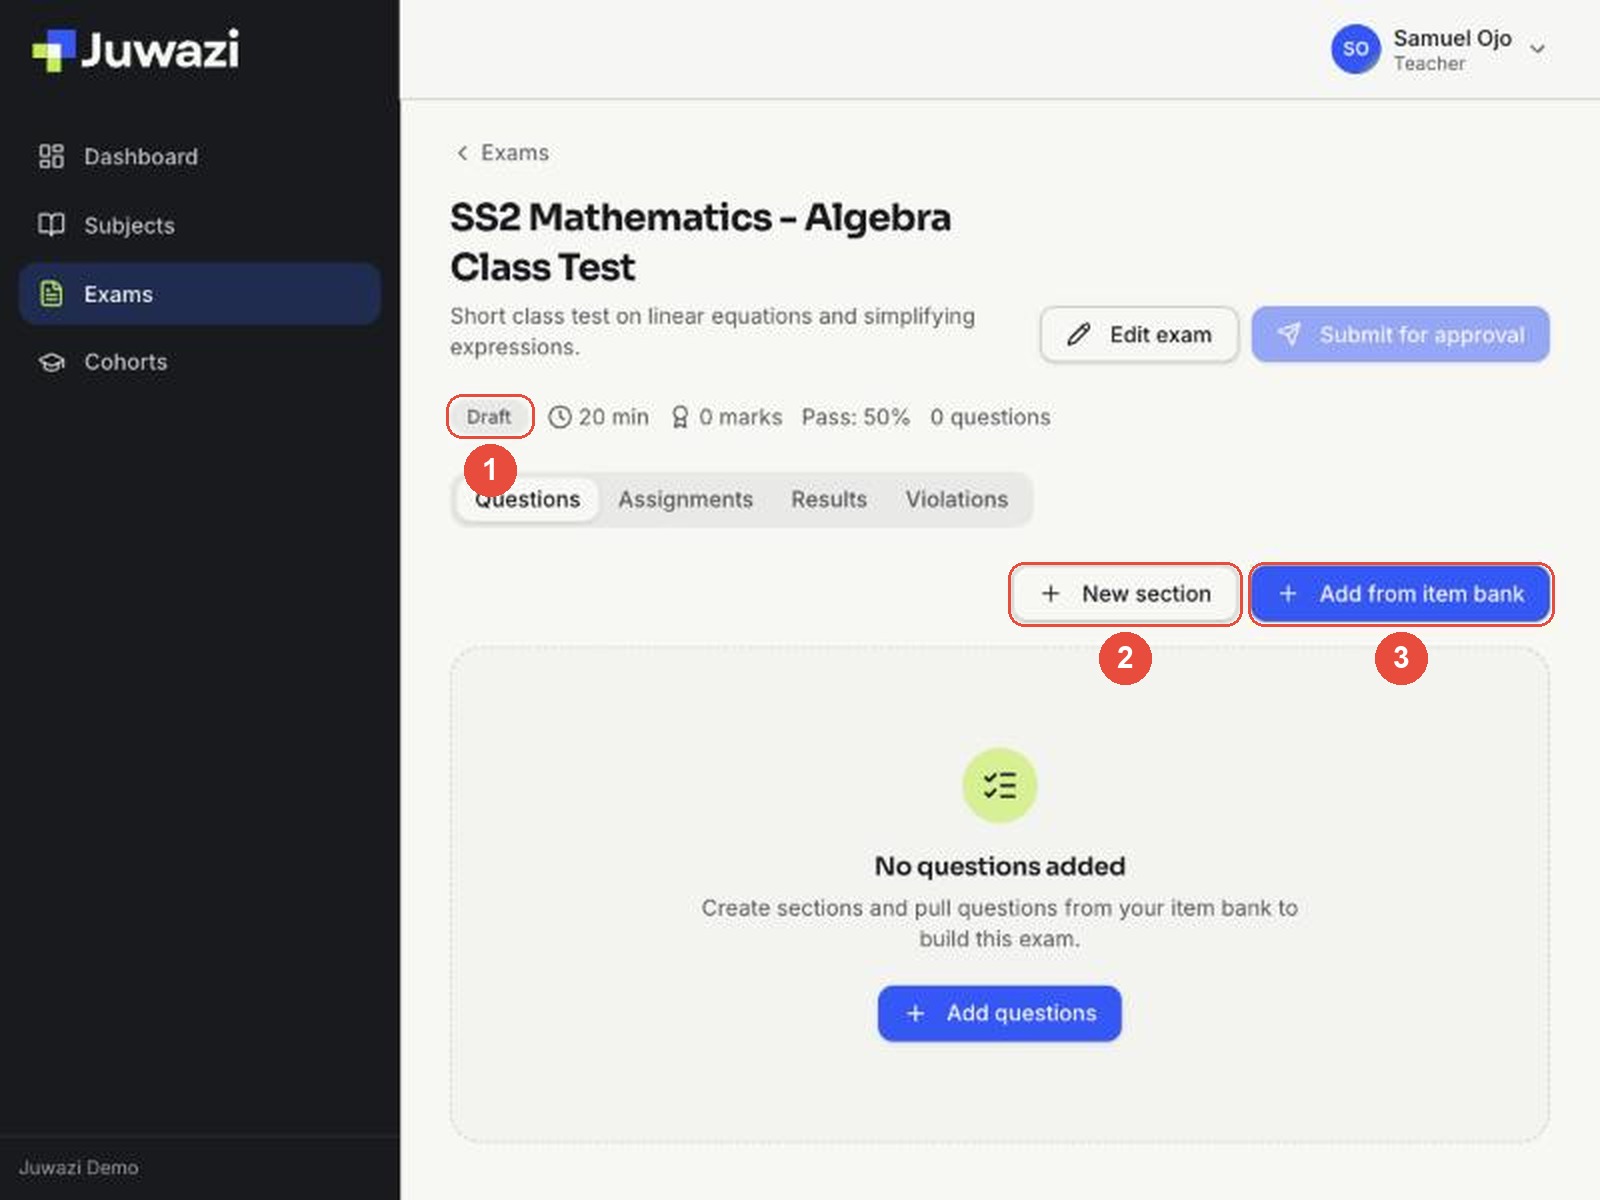
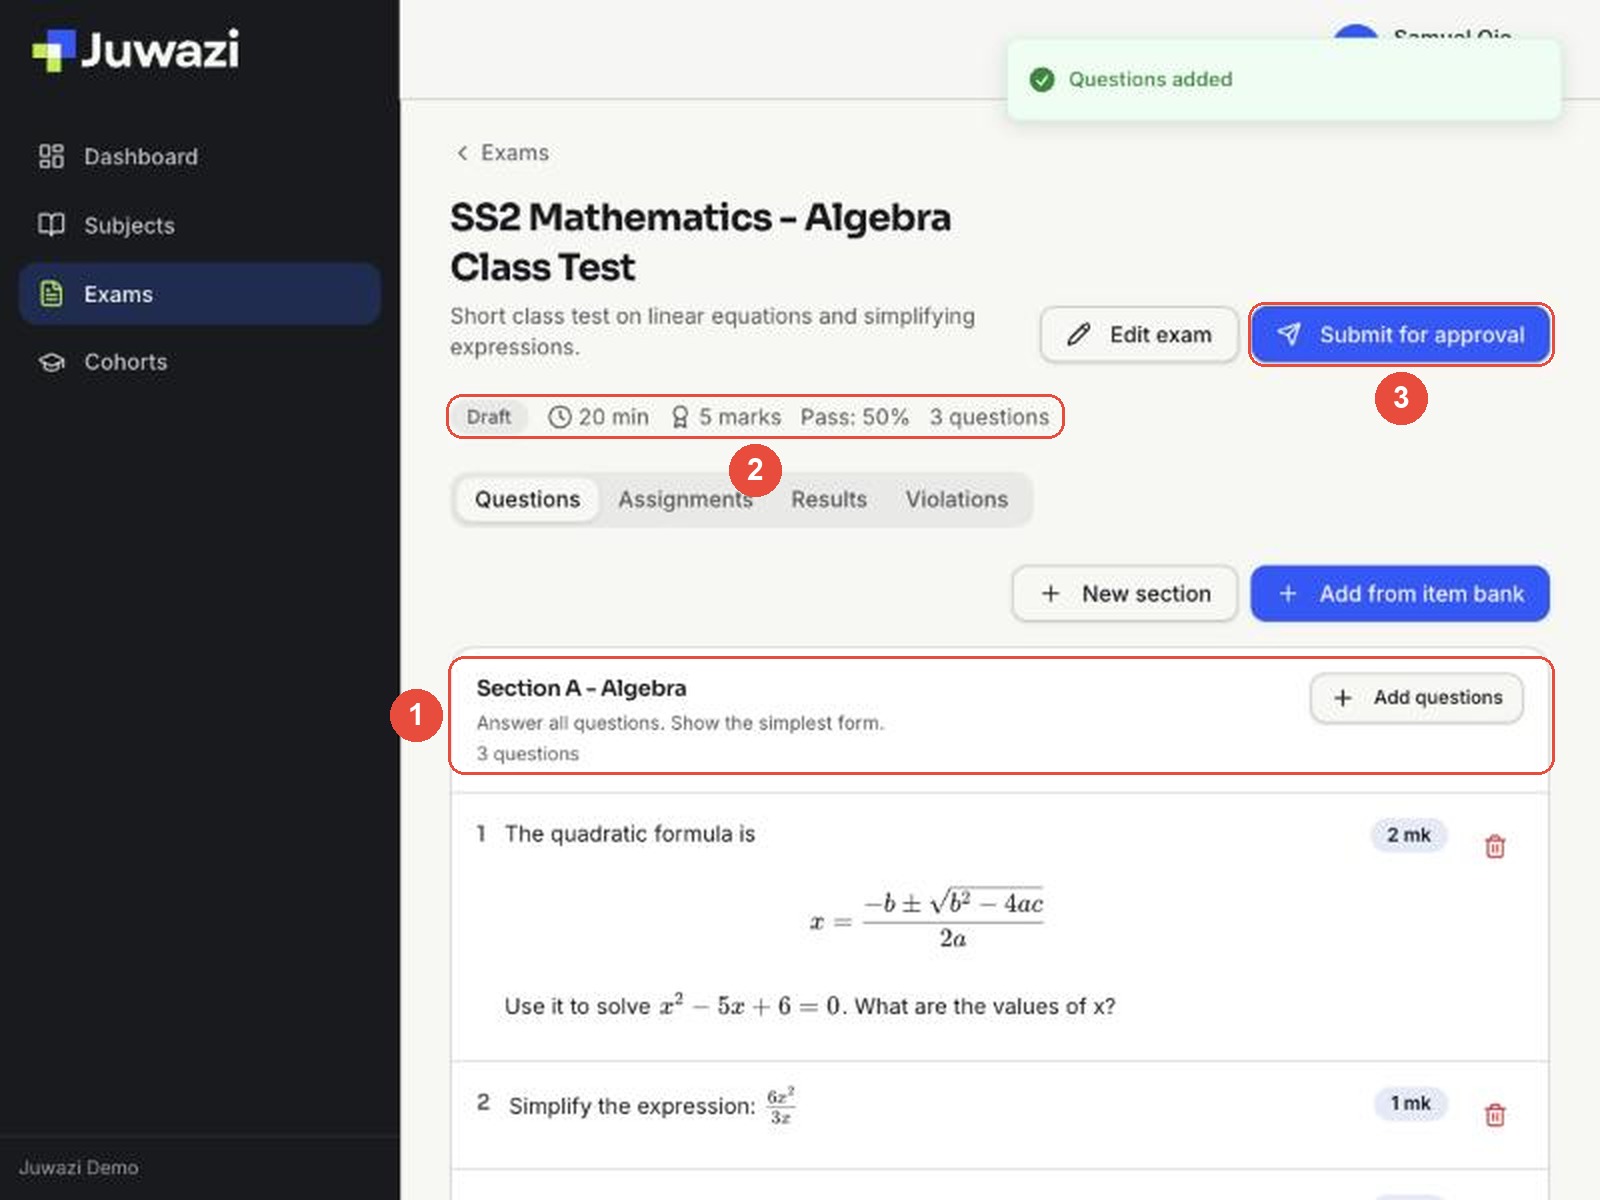
The new exam opens as a Draft (1). Use New section (2) to group questions, or Add from item bank (3) to start adding questions straight away.
2. Add a section (optional)#
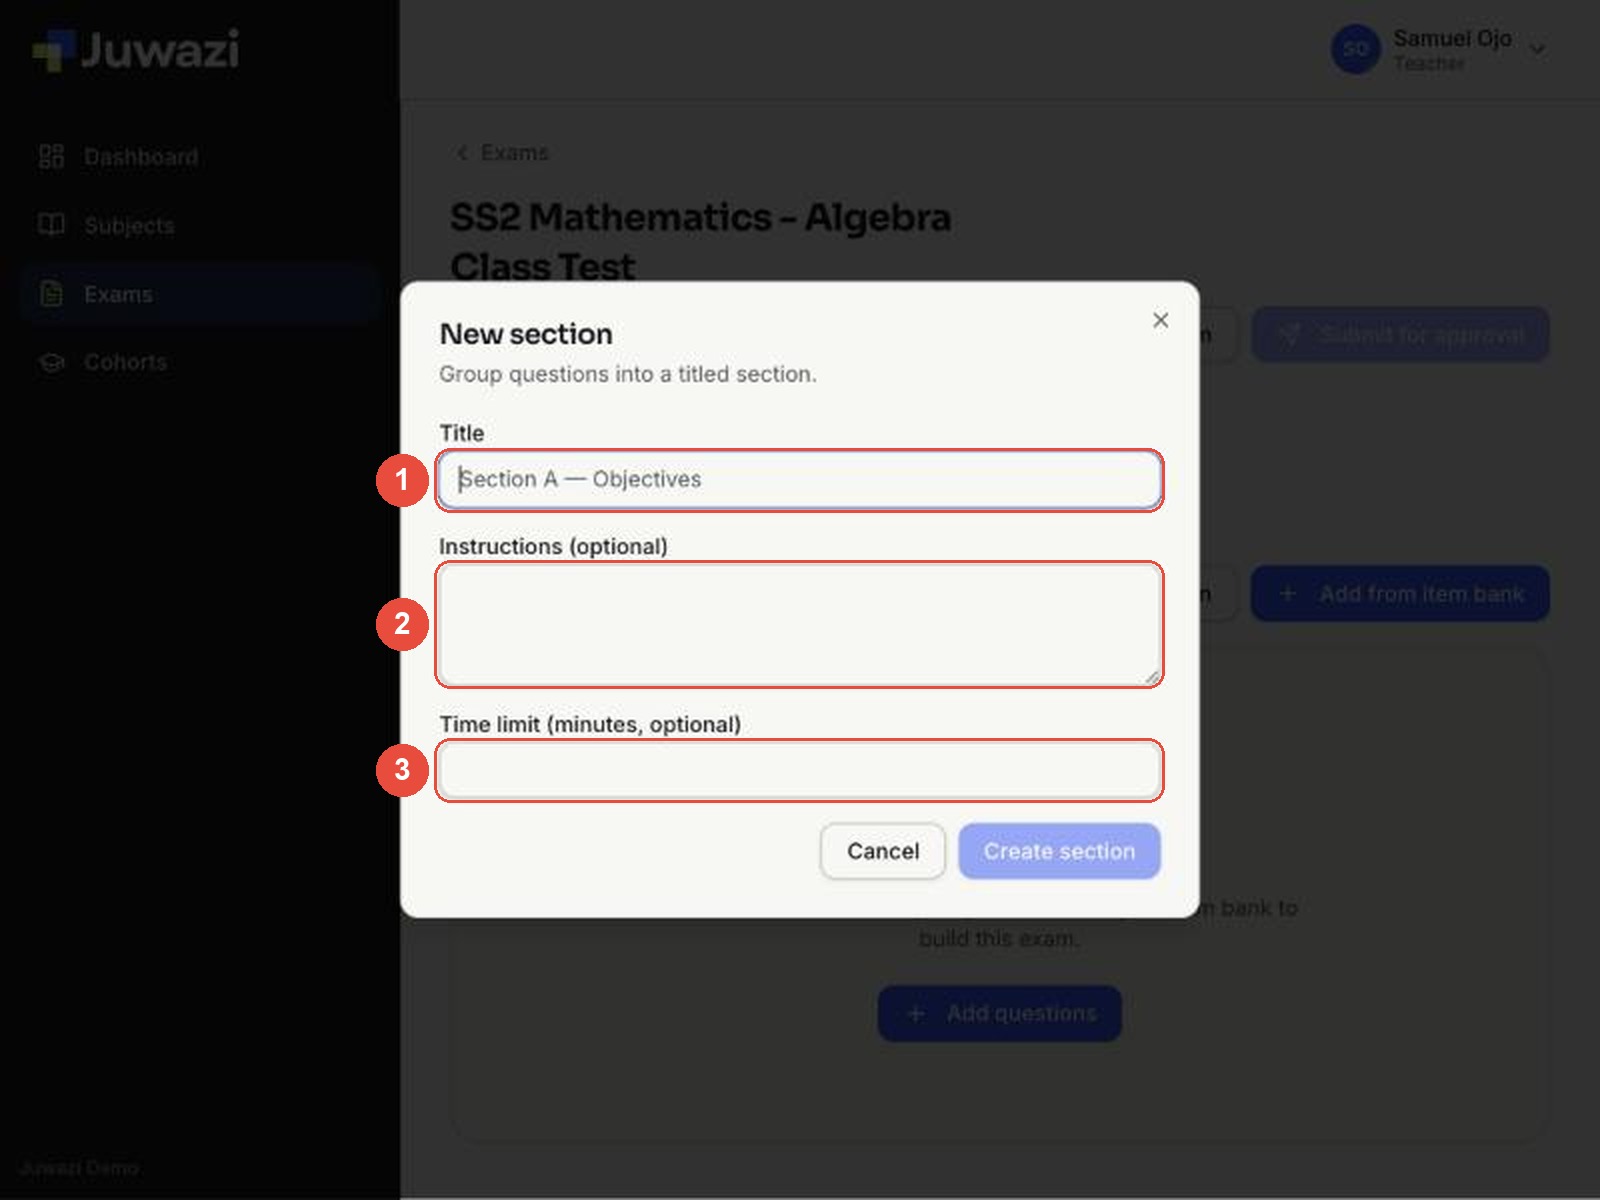
Sections let you split an exam into parts, such as Objectives and Theory. Click New section and fill in:
- Title, for example “Section A – Algebra”.
- Instructions (optional) – shown to students at the start of the section.
- Time limit (optional) – a separate time limit for this section.
3. Add questions from your item bank#
Click Add questions on the section. In the window:
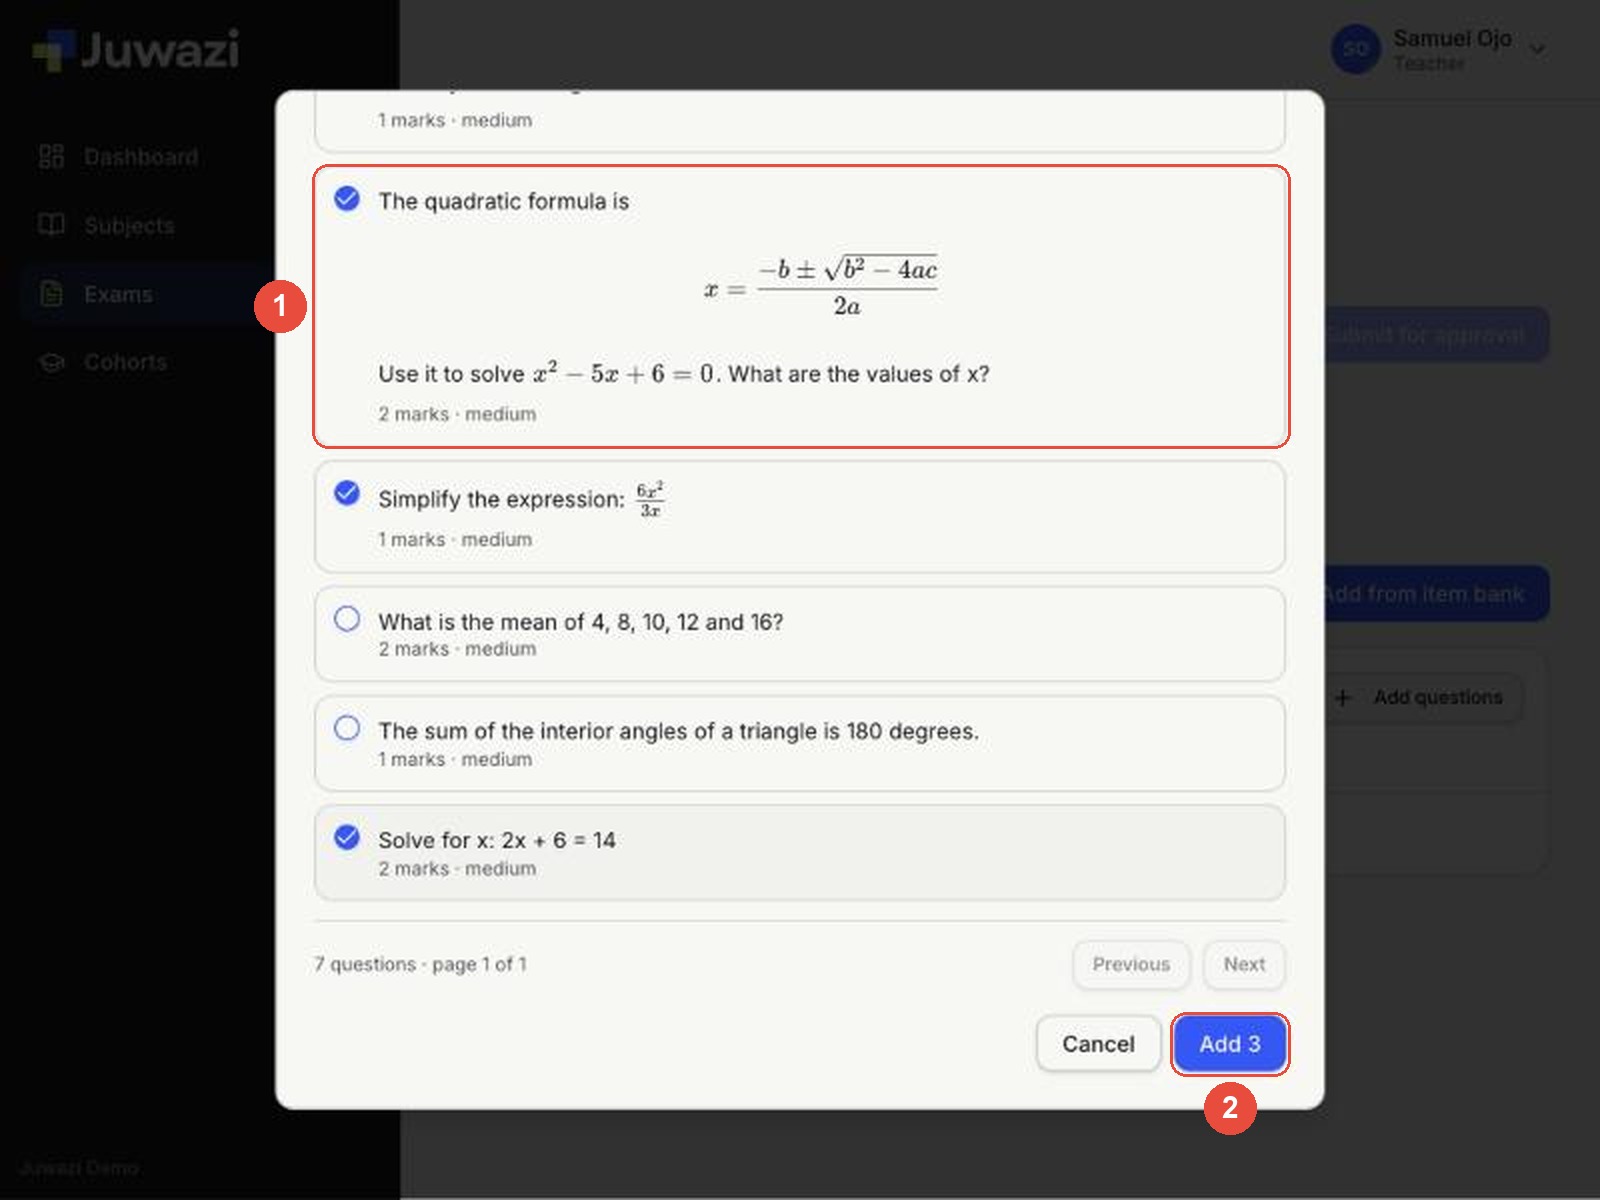
- Choose the Section, then tick the questions you want. Search and filters help in a large bank, and your ticks are kept while you search.
- Click Add 3. The button counts how many you’ve picked.
The section now lists its questions (1), and the summary line (2) updates: 5 marks, 3 questions. Use the red bin next to a question to remove it from the exam. It stays in your item bank.
4. Check the delivery settings#
Click Edit exam to set:
- Start and end date & time – the window in which students can start the exam (optional).
- Duration, Pass mark, Max attempts and Max security violations.
- Shuffle questions, Shuffle options, Show result immediately and Allow review after submit.
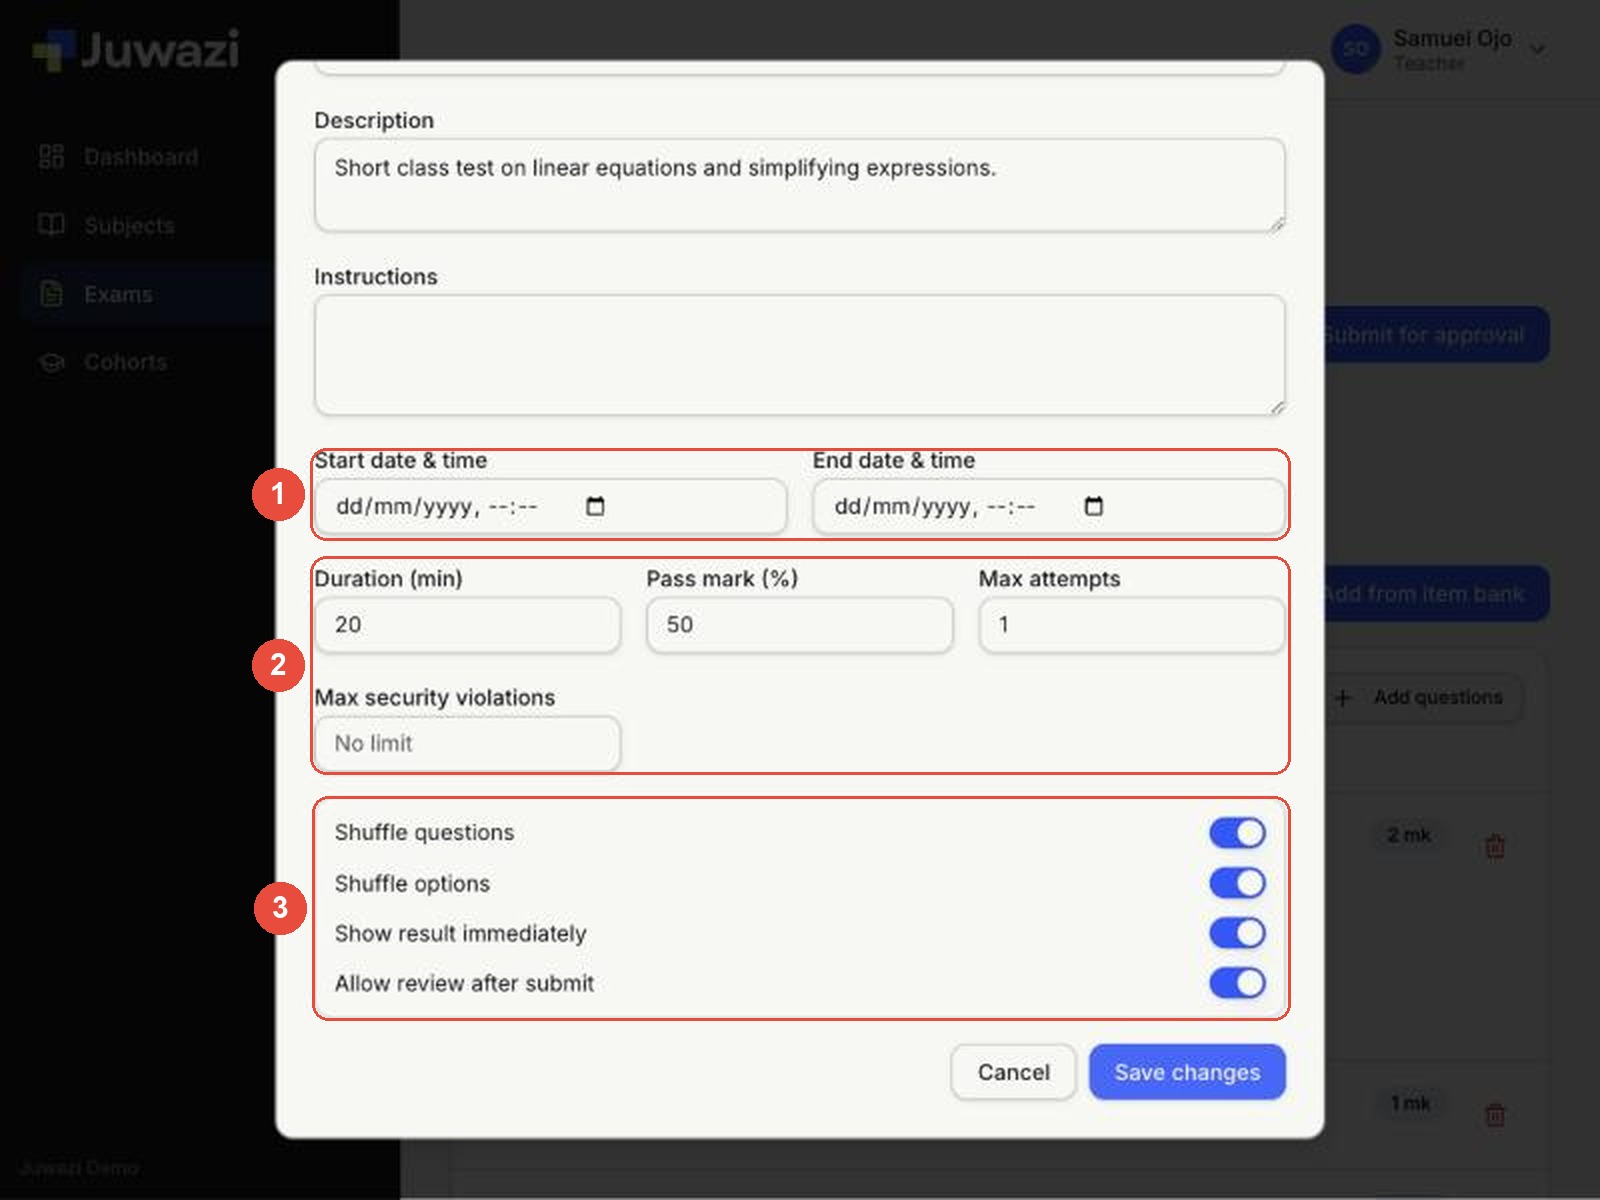
We turned on both shuffle options, so each student sees the questions and answer options in a different order. Click Save changes.
Submitting for approval#
Teachers can’t publish exams on their own. An administrator reviews every exam first.
Before you submit, check everything. Once submitted, the exam is locked. You can’t edit it or take it back.
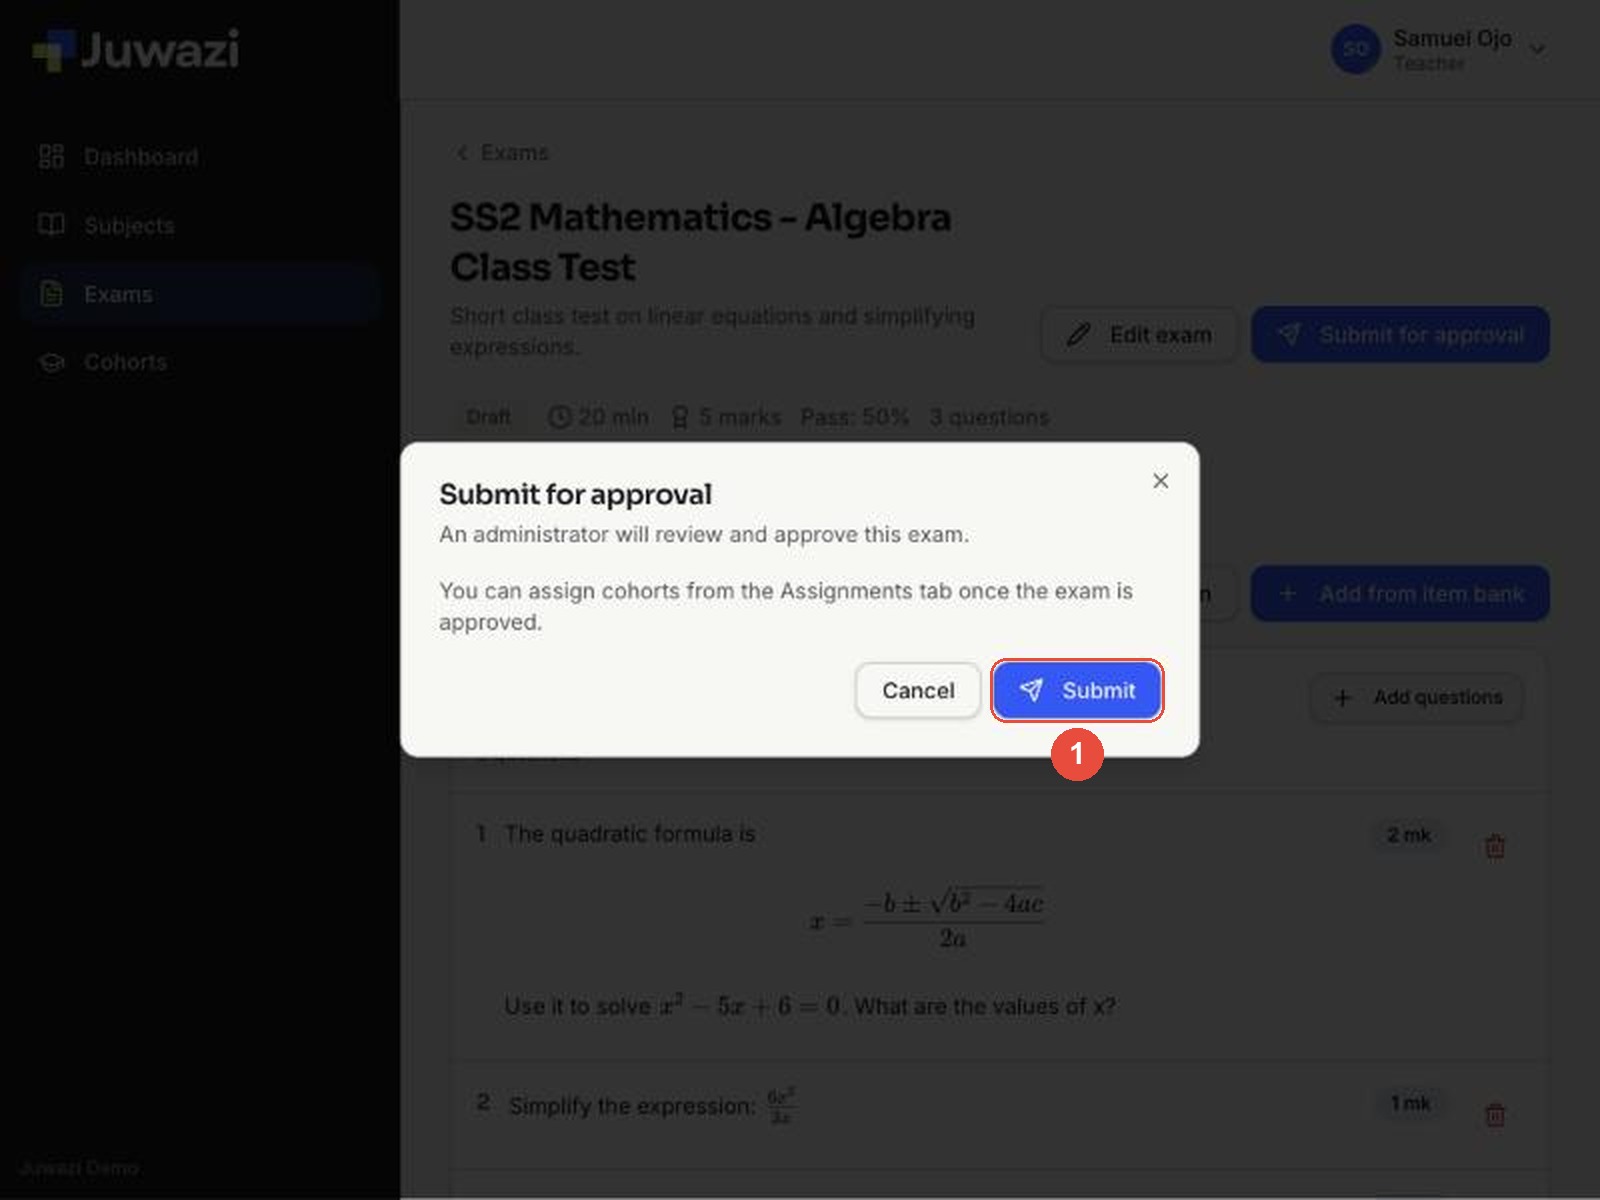
- Click Submit for approval.
- The window explains: “An administrator will review and approve this exam. You can assign cohorts from the Assignments tab once the exam is approved.” Click Submit (1).
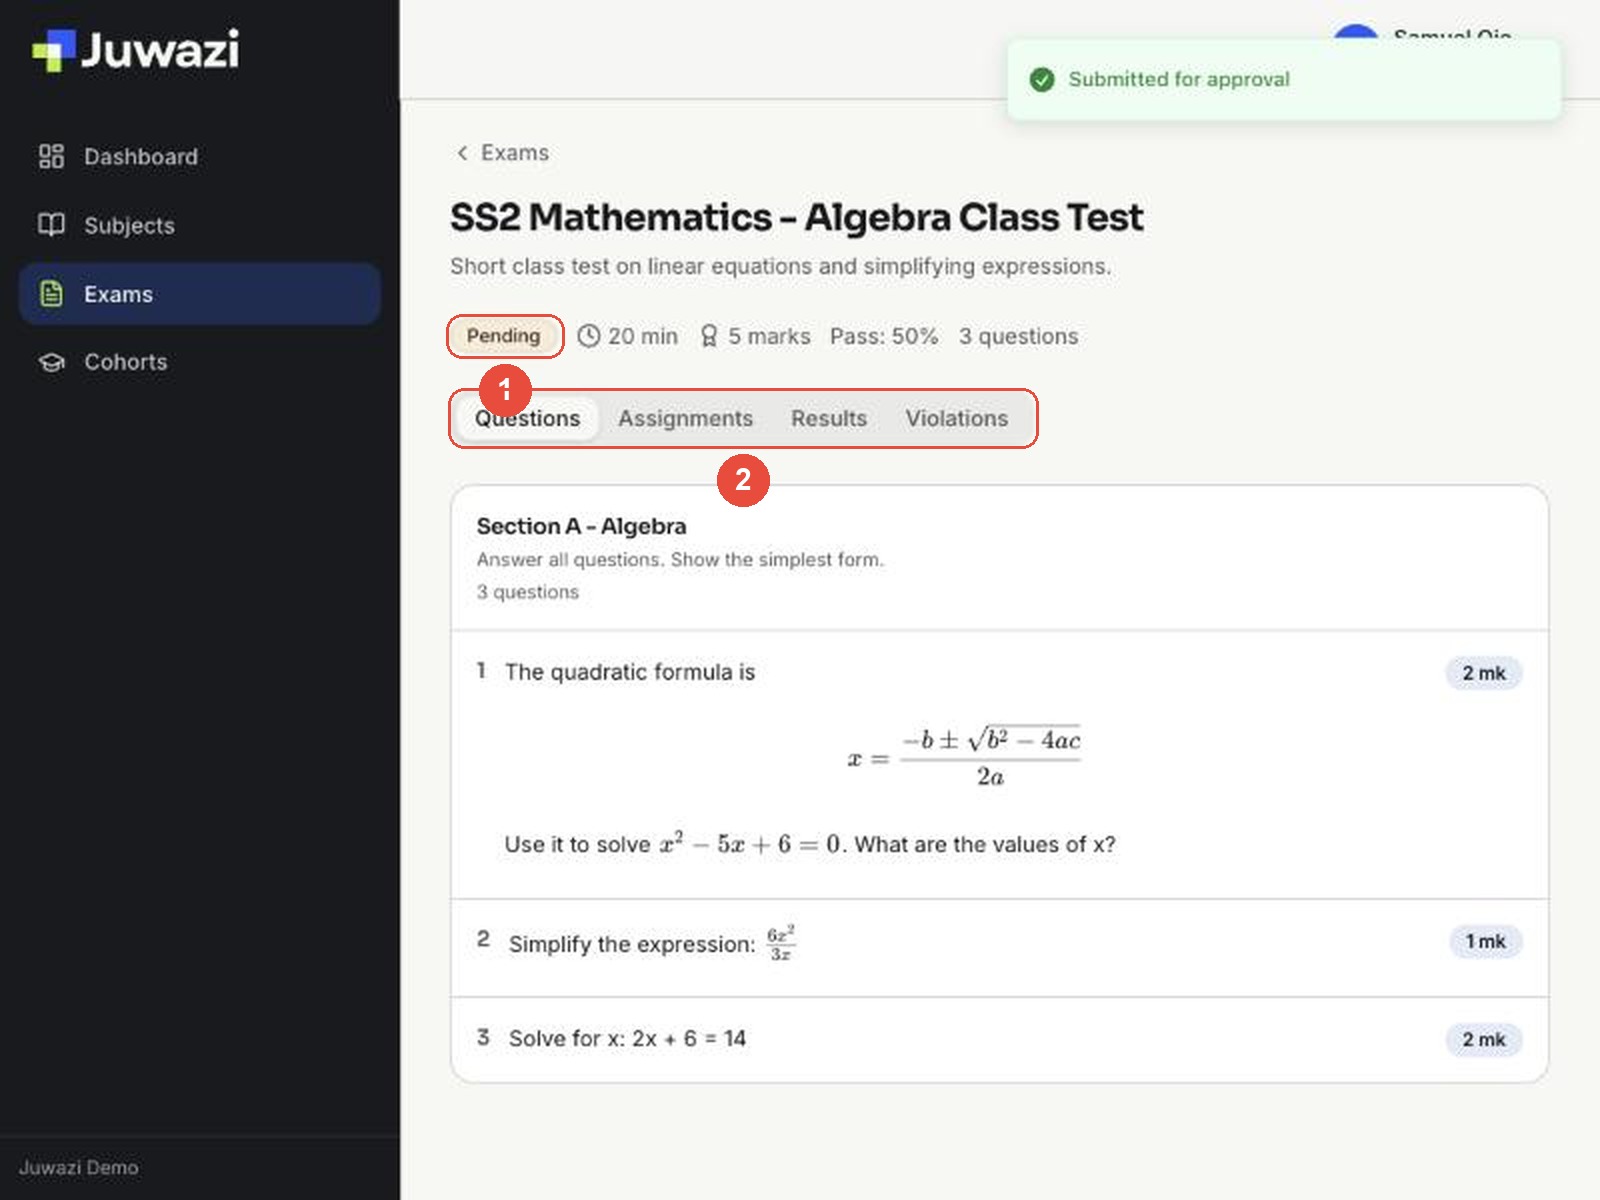
The exam status changes to Pending (1). The Edit exam button disappears, and the tabs (2) stay available so you can look at the exam.
What happens next#
| Status | Meaning | What you can do |
|---|---|---|
| Draft | You’re still building it | Edit, add questions, submit |
| Pending | Waiting for an administrator | Wait, or ask them to review it |
| Approved | Ready for students | Assign it to your class, then watch results |
Use the Drafts, Submitted and Approved filters on the Exams page to see your exams at each stage. Juwazi may not tell the administrator that you’ve submitted, so let them know.
Assigning cohorts and viewing results#
Once your exam is Approved, you can give it to your class yourself. Our example is the approved SS2 Mathematics – Mid-Term Test.
Assign the exam to a class#
- Open the exam and click the Assignments tab.
- Click Assign cohort (1) and choose your class. Every student in that class gets the exam.
- Assigned students are listed with an Assigned badge (2).
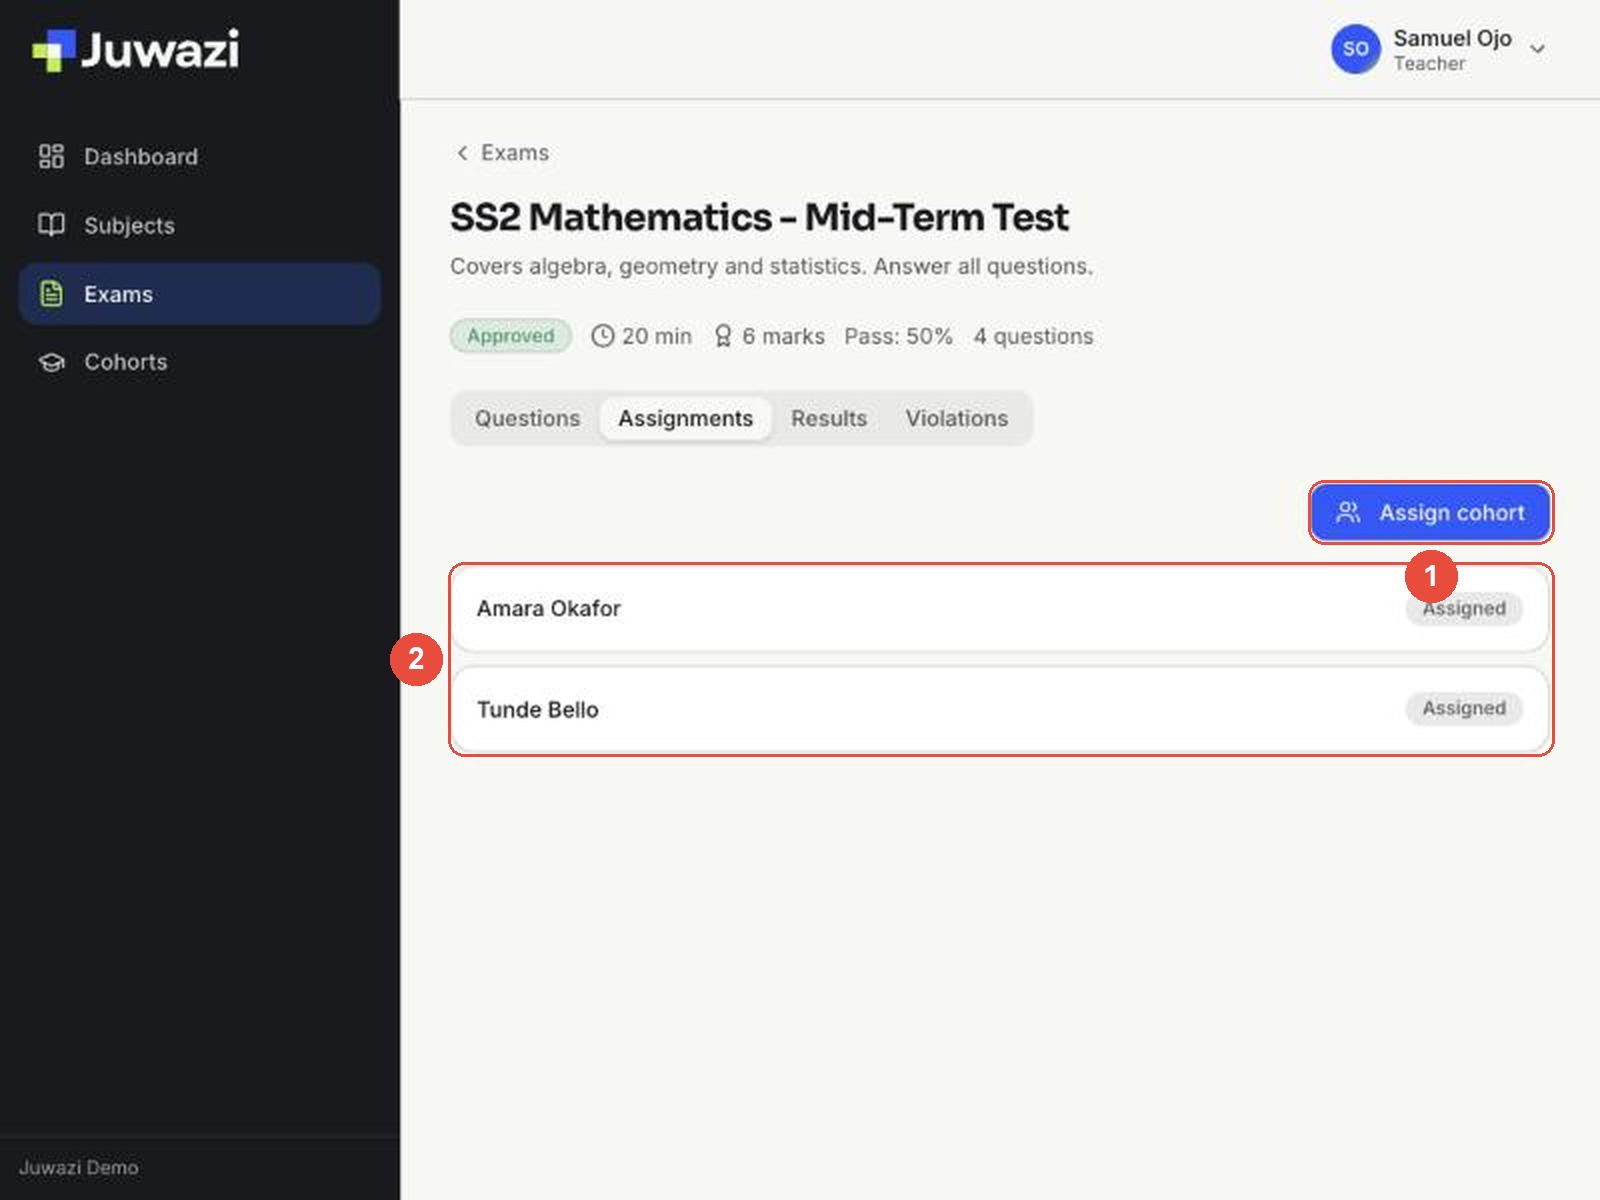
Students can start the exam once it’s assigned and within any start and end times you set. They sign in at the student sign-in page with their access code.
Watch results#
- Click the Results tab and choose a class in Cohort (1). You’ll see each student’s attempt status, score and pass/fail result.
- Click Export to Excel (2) to download the results for your records or report cards.
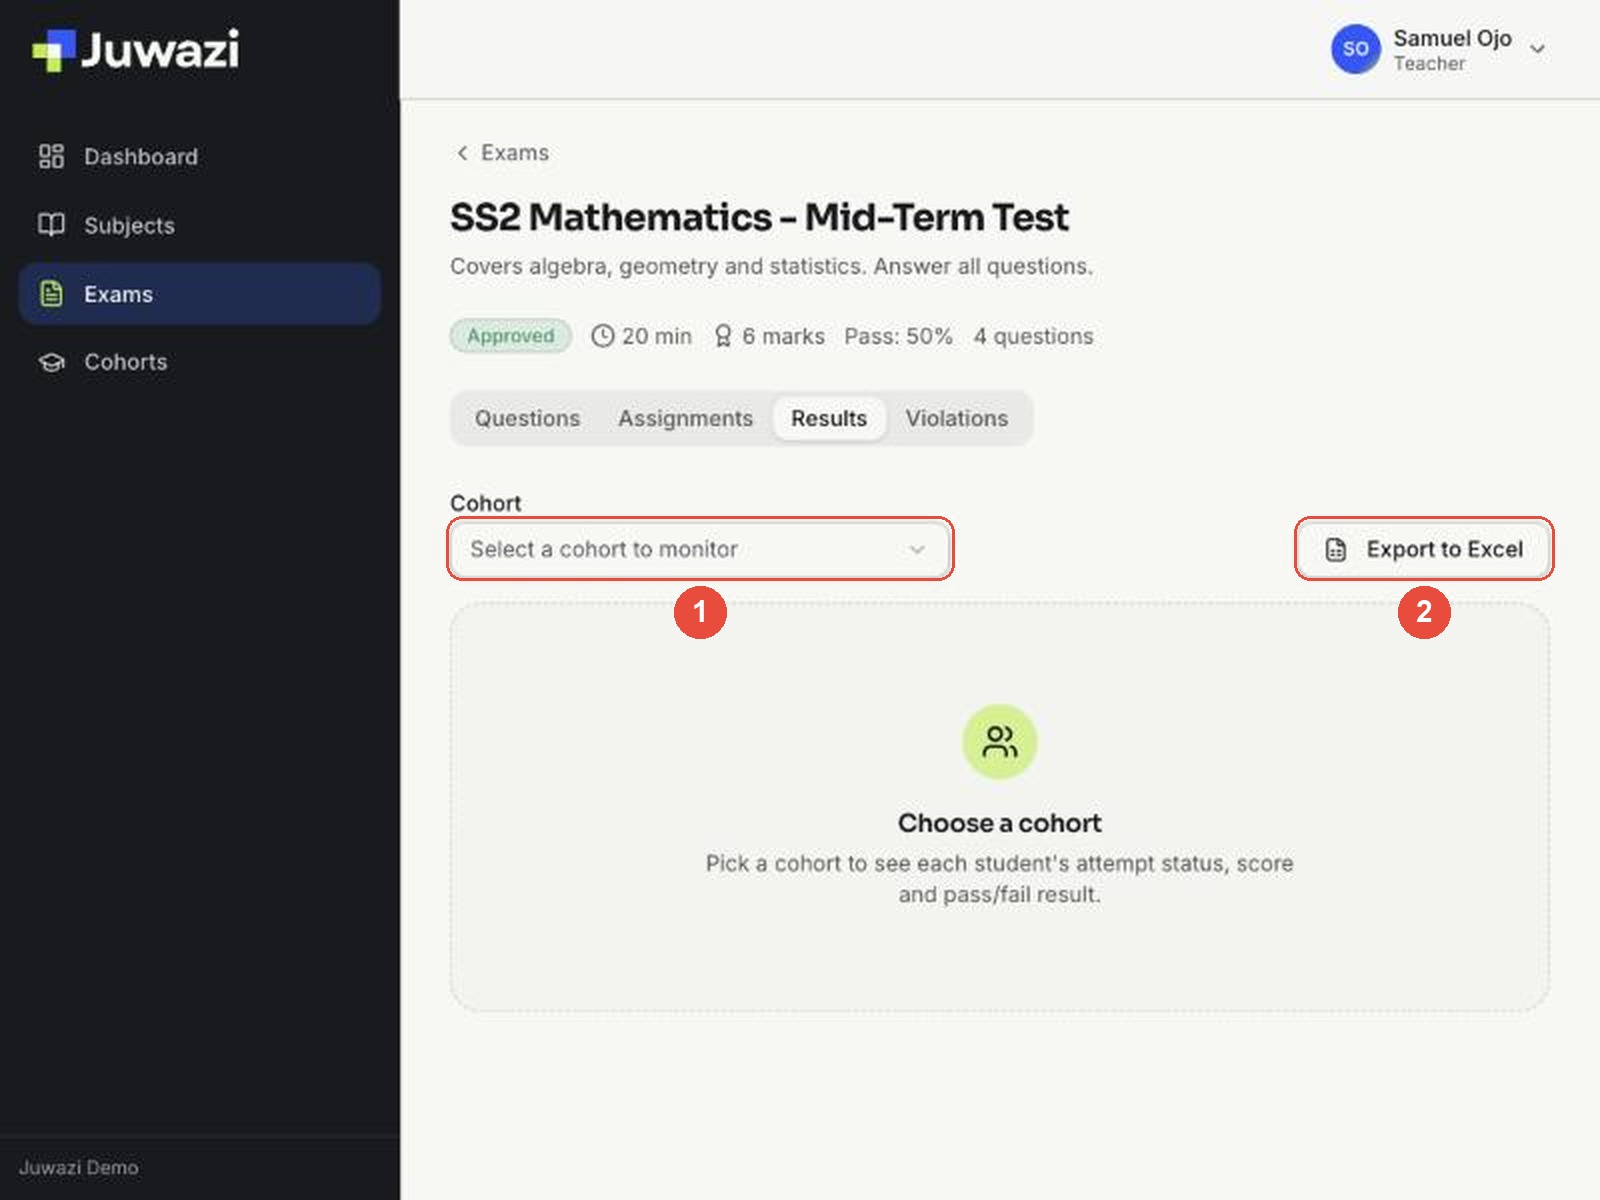
The Violations tab lists security events during the exam, such as a student leaving full screen or switching tabs.
Results with real student attempts will be added once a student has sat the demo exam.
What teachers can’t do, and tips#
| You can’t… | Ask your administrator to… |
|---|---|
| Create subjects or classes | Create them and assign them to you |
| Enrol, move or remove students, or see access codes | Use the Students page (Super Admin Guides 8 and 9) |
| Approve your own exams | Review and approve them |
| Edit or withdraw an exam once it’s submitted | Send it back to Draft with Override status |
| Delete a draft exam | Delete it for you |
| See the Activity log of an exam | Check it for you |
Tips
- Build in the item bank first. Write and check questions in your subject, then pull them into exams. You can reuse them next term.
- Name exams so they’re easy to tell apart. The exam list cuts off long titles, so “SS2 Mathematics – …” exams all look the same.
- Check everything before you submit. Submitting locks the exam.
- Max security violations may not be saved. In our tests the field was empty again after saving. Don’t rely on it until it’s fixed.
- Tell your administrator when you submit, and agree who assigns approved exams to classes.
- Export results after each exam for your own records.
Next: the Supervisor guide.